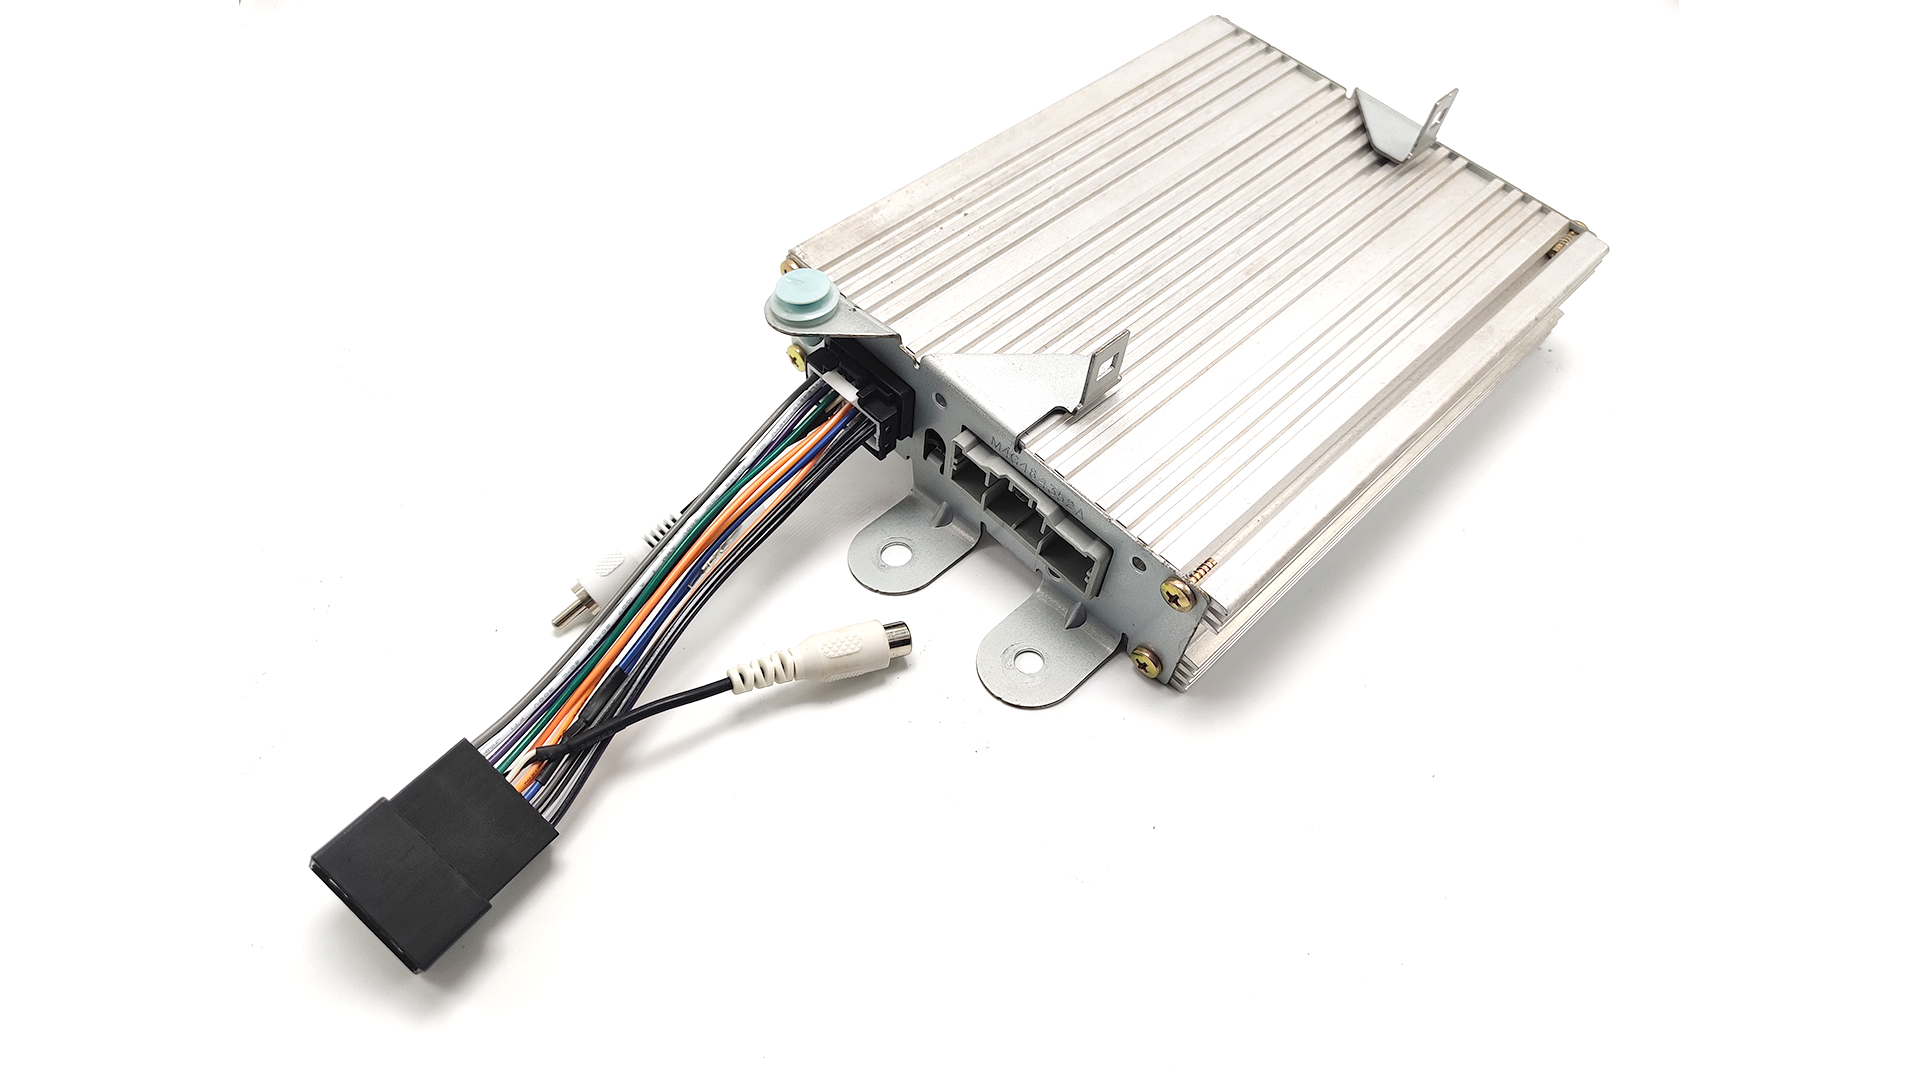
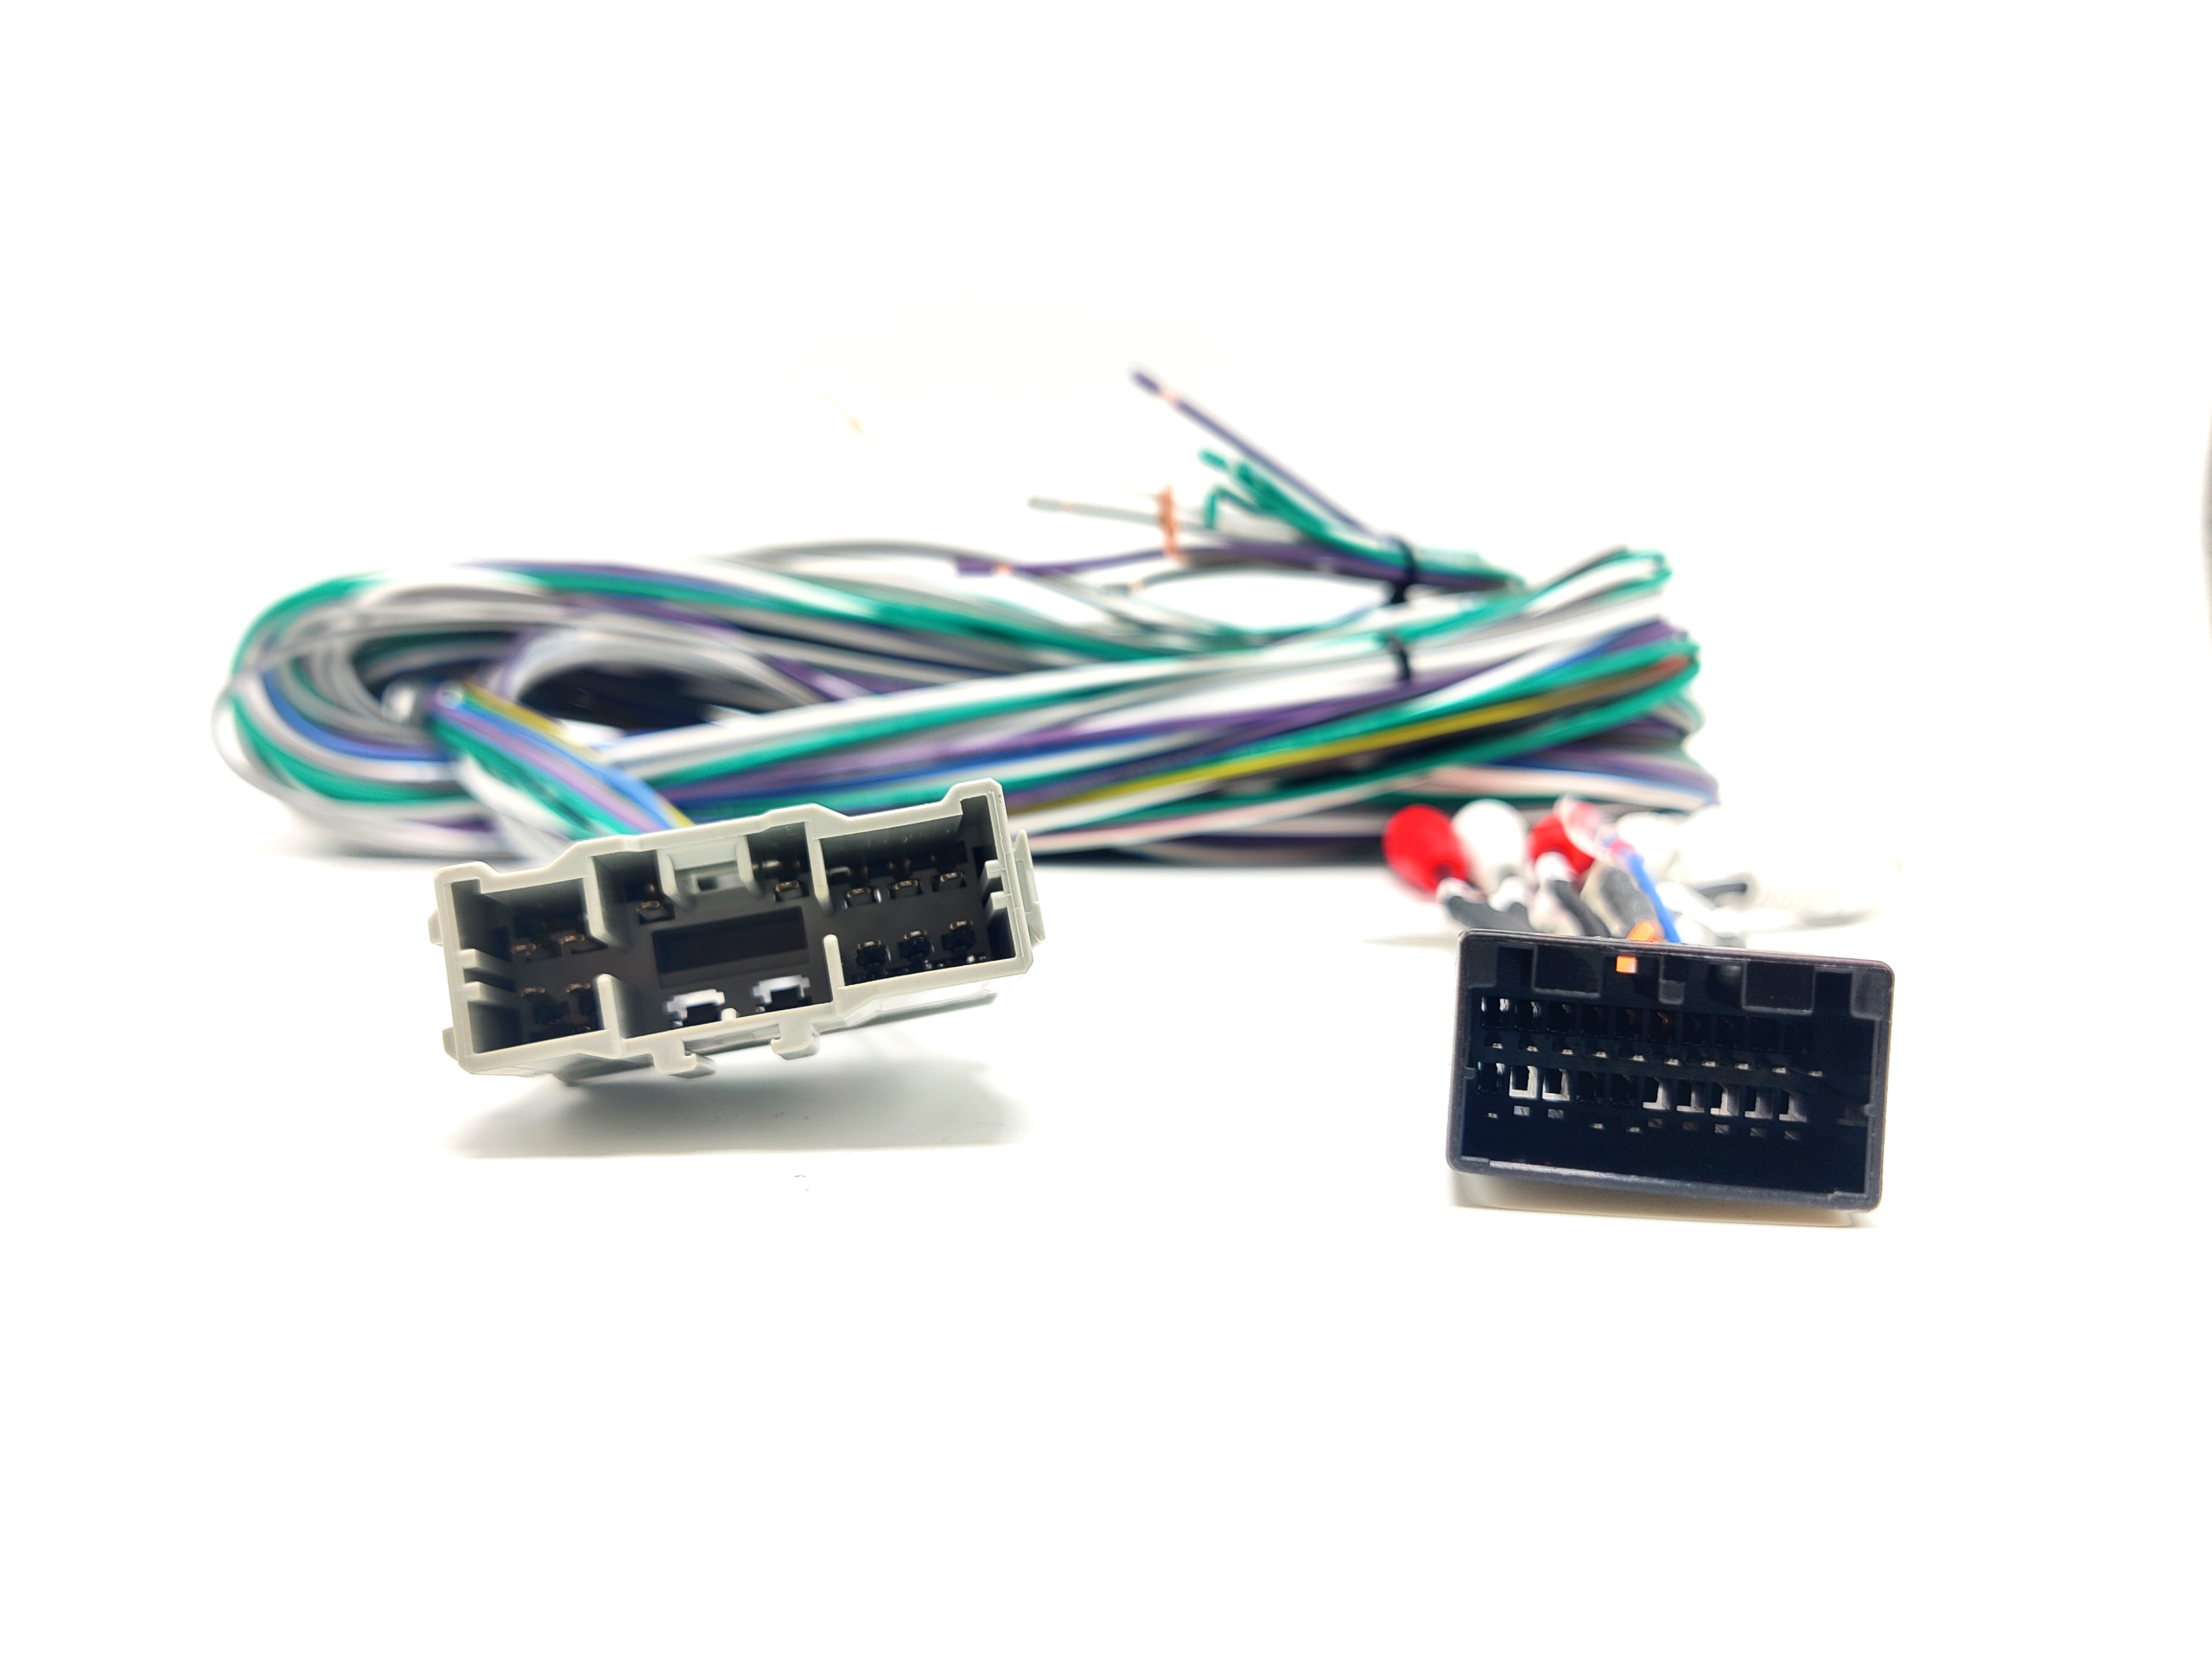
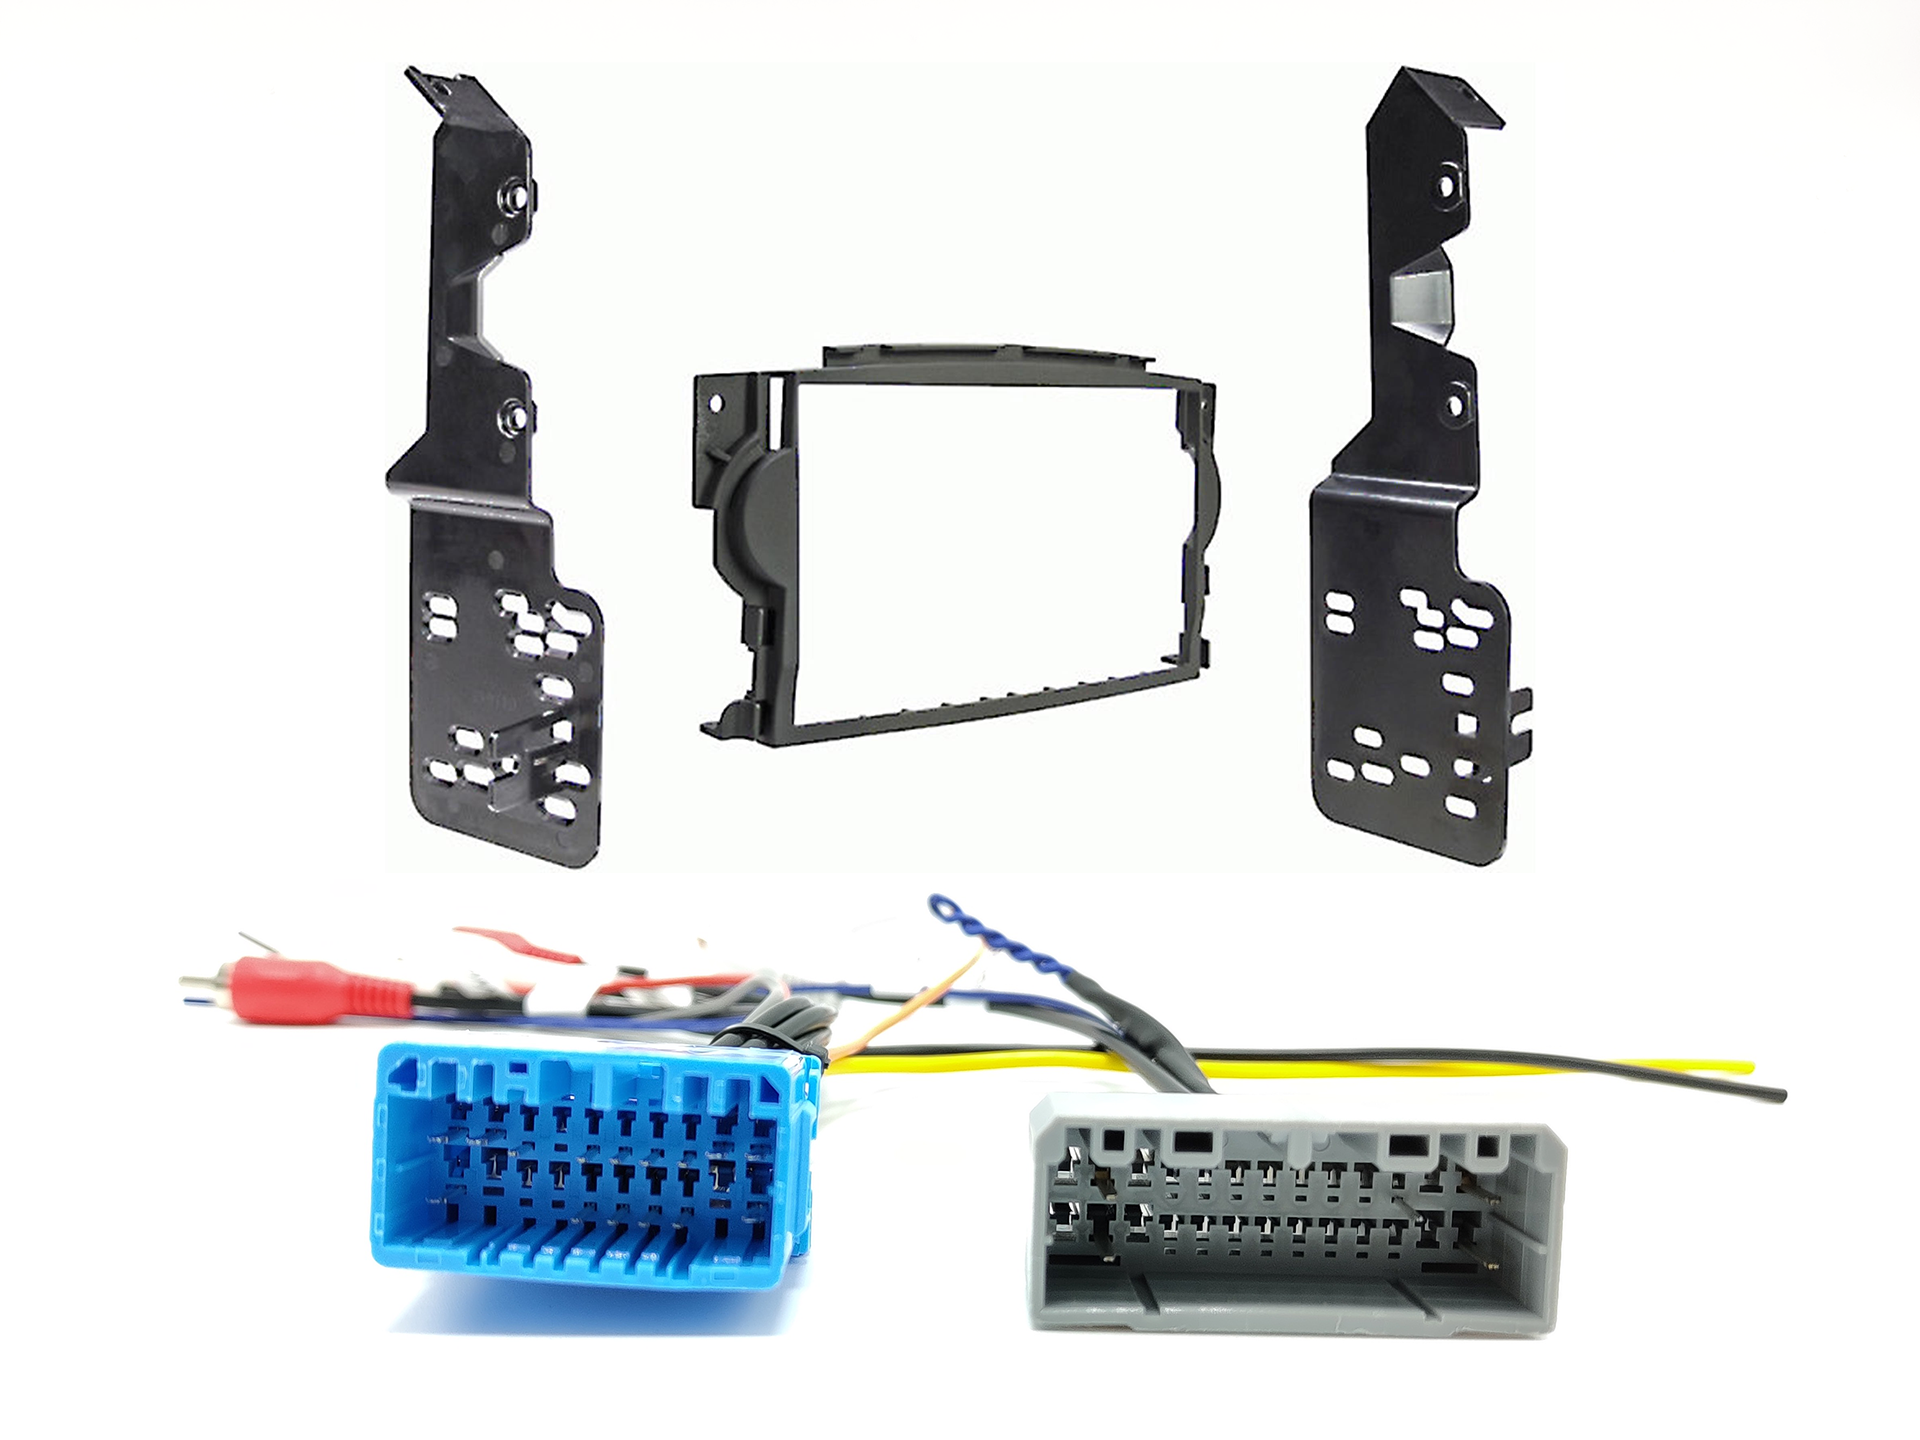
2004 2005 2006 2007 2008 Acura TL Aftermarket Subwoofer Integration T-Harness

Do you want to add aftermarket subwoofers to your Acura TL? If you have a TL from 2004 to 2008 that uses the factory amplifier (they all do unless you removed it) then you can use this t harness to get a low level sub signal from the factory radio and the amp turn on as well from one location without removing the radio.

This harness connects to the factory amplifier plug and gives you an RCA out and a remote lead (12v power) for your aftermarket amplifier. It makes adding a dedicated subwoofer amp easy and you can use it with the factory radio or an aftermarket radio if you use one of our DIY or plug and play harness to install your radio.

This is a low level signal with 1V of output at max volume if you are using the factory radio so you will need to turn the gain up on your amp or use a line driver to increase the signal.

If you are using an aftermarket radio installed with our accessories then this allows you to add a sub amp without removing the radio and getting full output from the radio.

Here is video demonstration start the video at 30:00. https://youtu.be/3RuAGS7Tz5g?t=1829

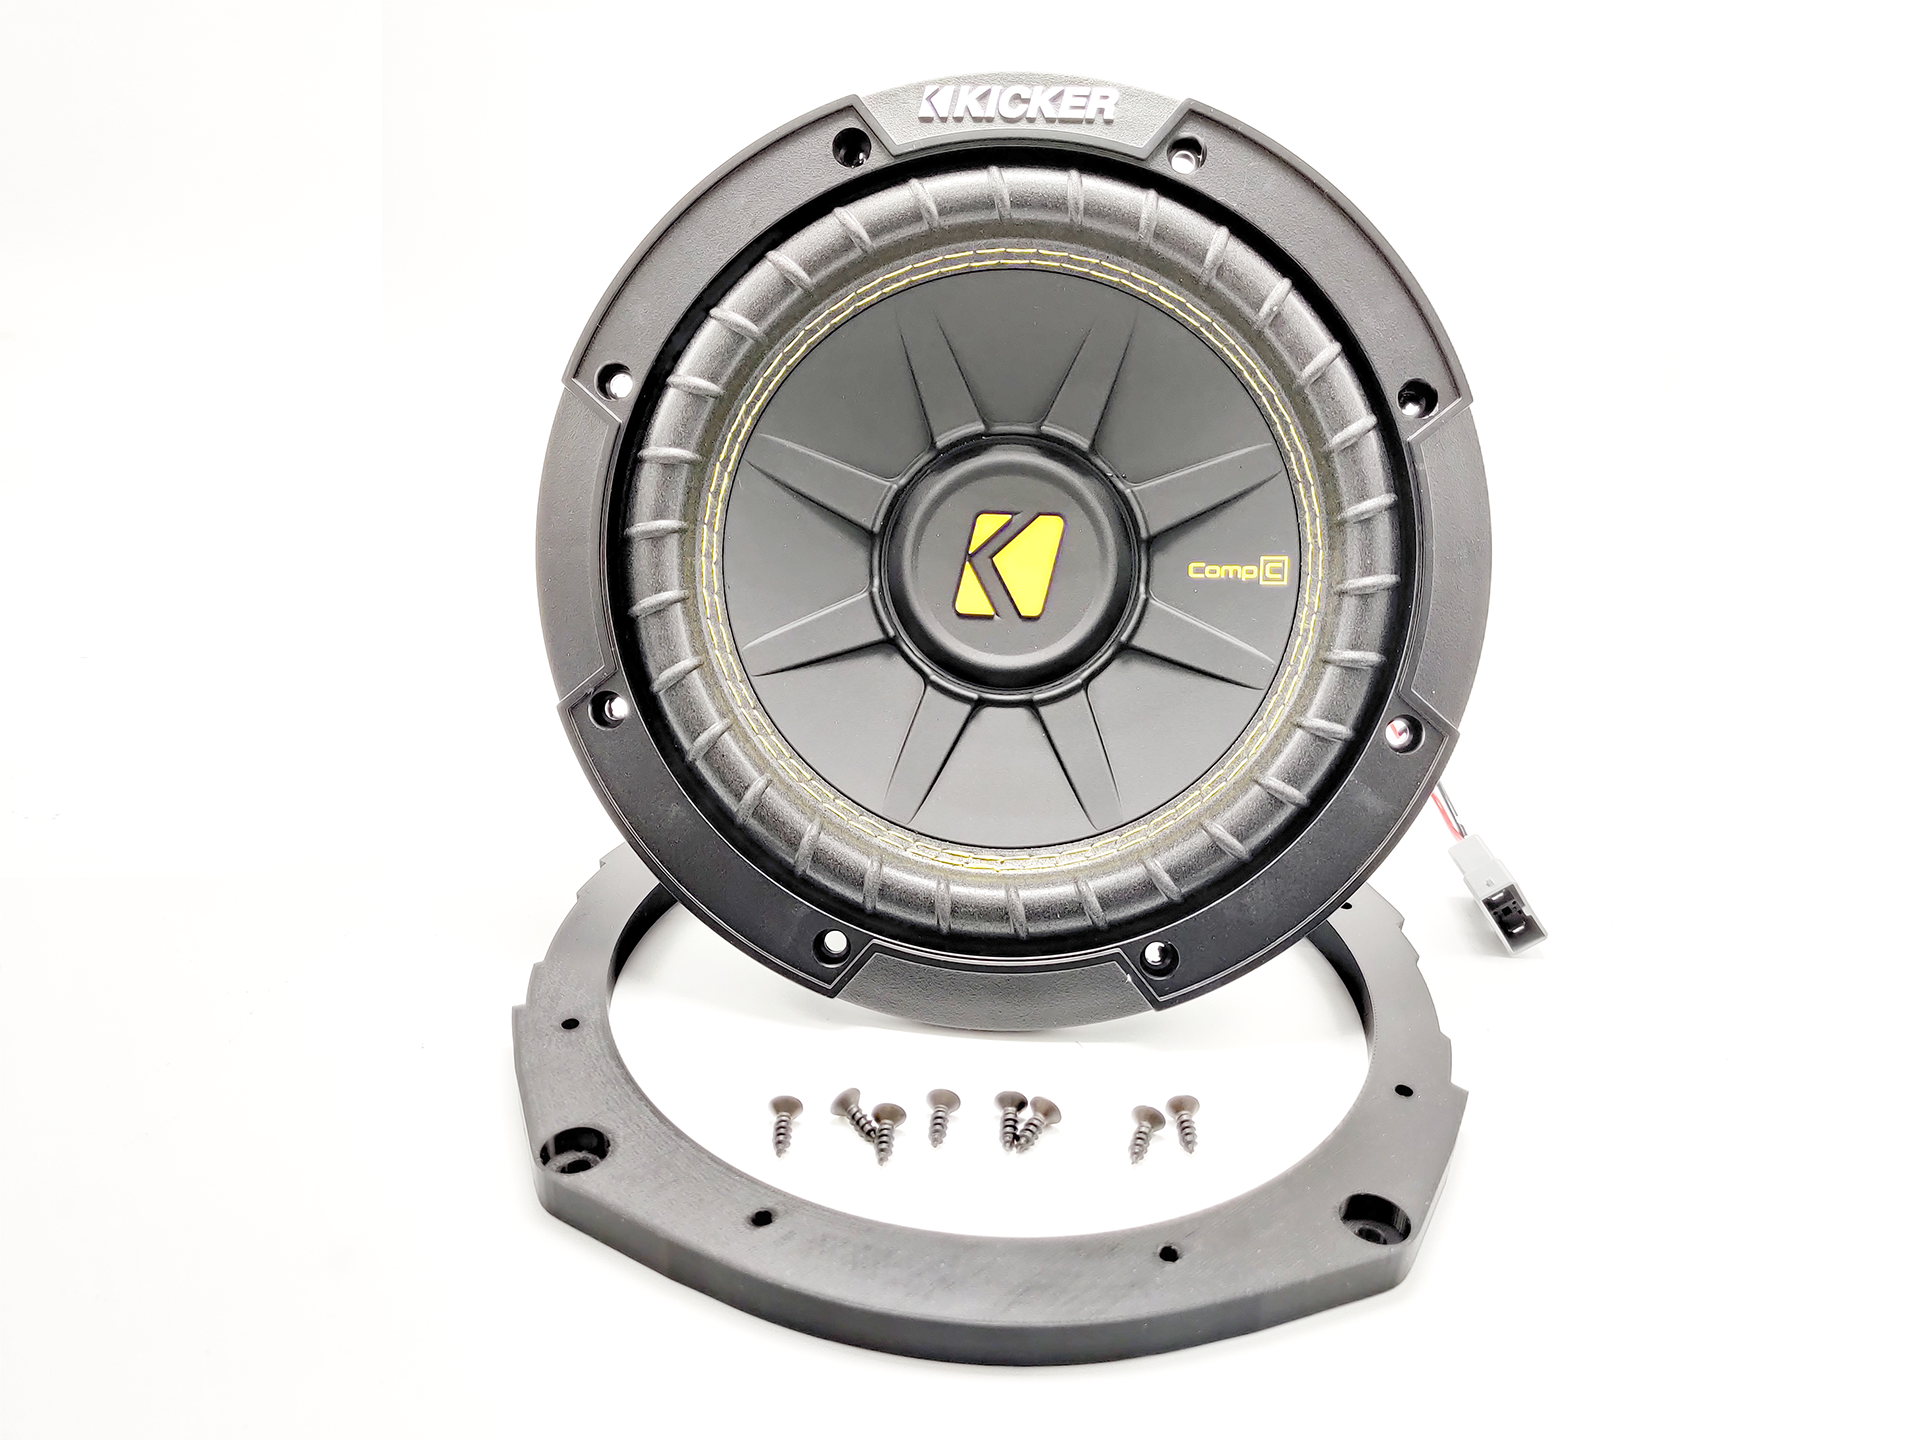
2004 05 06 07 08 Acura TL 8″ Factory Subwoofer Upgrade Replacement Package

This subwoofer package includes the Kicker 8 inch subwoofer, the subwoofer mounting bracket, and the subwoofer wiring to make installation plug and play. This subwoofer can work with the factory amplifier or our plug and play amplifier. This subwoofer package works with Acura TL’s from years 2004 to 2005, 2006 to 2007, and 2008. This subwoofer package will work for an Acura TL Base and an Acura TL Type S . Our subwoofer packages ship next day and arrive within 3-5 business days to most US states. Your subwoofer is covered with a one year warranty.

While this subwoofer upgrade package won’t rattle the windshield in your car it does provide better bass response than the factory subwoofer. If your factory subwoofer is blown the difference in bass output will be extreme. If you are looking to get the most out of this subwoofer upgrade we also recommend upgrading the amplifier that powers this subwoofer. You can save your self some money by installing this subwoofer yourself following the video guide below. If you want to have this subwoofer installed professionally it is about 2 hours of installation time.

When replacing your factory subwoofer there are three main specifications your new must subwoofer must meet. One is that it must be a free air subwoofer as the factory subwoofer is not fully enclosed. The second is that it must be 8 inches and not exceed 6 inches in depth so that it may fit in the factory location. The last specification is that its final impedance must be two ohms to not cause any issues with the factory amplifier. This Kicker subwoofer meets all of those specifications and fits into the factory location with the use of our adapter bracket. The kicker subwoofer also has a flat surround which stops it from rubbing against the rear deck.

In order to achieve the best bass output we recommend applying sound treatment to the rear deck and the rear deck cover. This sound treatment is to minimize rattle and increase acoustical output to your ears. The sound treatment is an additional purchase. We offer some options you can check them out here.

Installation

To install the subwoofer upgrade you will need to remove the rear seats, the C-Pillars, and the rear deck cover. The tools you will need include a ratchet, ratchet extensions, a 10mm socket, a panel removal tool, a clip removal tool and a towel or blanket to protect parts of your interior. If you are completing the install your self and its the first time removing the rear seats, we suggest setting aside 2-4 hours to complete the installation. If you are looking for written instructions you can find them here. The video guide is below.

If you have questions regarding installation or the product please call us at 877-542-2872.

If you are looking to install a different subwoofer but need the adapter bracket you can find it here.

Frequently Asked Questions

  1. Is this subwoofer louder than the factory subwoofer?
    A: Yes this subwoofer is slightly louder than the factory because it is more efficient.
  2. Does this subwoofer handle more power than the factory subwoofer?
    A: Yes this subwoofer is rated for 200W RMS
  3. How much power does the factory amplifier output to the subwoofer?
    A: About 50-60 Watts
  4. If I install this subwoofer will it shake my car?
    A: This subwoofer has the potential to shake your car but it will need another amplifier to power it to its full potential.
  5. I installed this subwoofer but its not much louder than the old one, what did I do wrong?
    A: Upgrading the subwoofer only doesn’t give your vehicle more bass, you also need to upgrade the amplifier powering the subwoofer.
  6. How does my warranty work?
    A: As long as there is no physical damage to your subwoofer and you are within your warranty period you can exchange your subwoofer for a new one.
Posted on 2 Comments

3G Acura TL Climate Control Display Lights

If your climate control bulbs aren’t lighting up this article should help you determine the cause. First a disclaimer everyone’s situation is different the reason your bulbs may not be working may not be the same reason as someone else, if you proceed to troubleshoot and cause damage to your vehicle you are solely responsible.

My situation is:

Only a few lights don’t work:

This is most likely due to bad bulbs please check your Acura parts source for the correct part number for your vehicle Type S bulbs are different. Here are the common part numbers

39055-SEP-A31
39055-SEP-A22
39054-SEP-A01


None of my lights work:

The first step here is to check your fuses and make sure none are blown the TLs electrical system is pretty tied together and if one fuse goes out it sometimes takes out another, also the illumination fuse is under the hood and in the kick panel so both must be good for the lighting to work correctly.

All of my my fuses are good but no lights work:

This is the worst one. According to https://acurazine.com/forums/3g-tl-problems-fixes-114/light-bulbs-around-navigation-screen-out-851060/ and other posts/forums this leads to the electronics within the climate control display going bad. This happens when you put a bulb in the wrong orientation or put the wrong bulb in a location. This means that the electronics inside the board must be repaired and we currently don’t know anyone who does this repair. This almost always leads to just having to replace the climate control display. If you have navigation yes this means the entire navigation screen. Before condemning the climate control you can try replacing the bulbs to see if maybe they all just went out at once, this can happen but it is very rare.

Climate control displays are not interchangeable between all TLs only from models 04-06 and then 07-08 so a 2008 display will not work in a 2004 and vice versa.

Can I replace the bulbs with LED lights?

Yes you can we don’t really know too much about this topic but you would need nano wedge bulbs that are 14v and 8v and the color you want them to be.

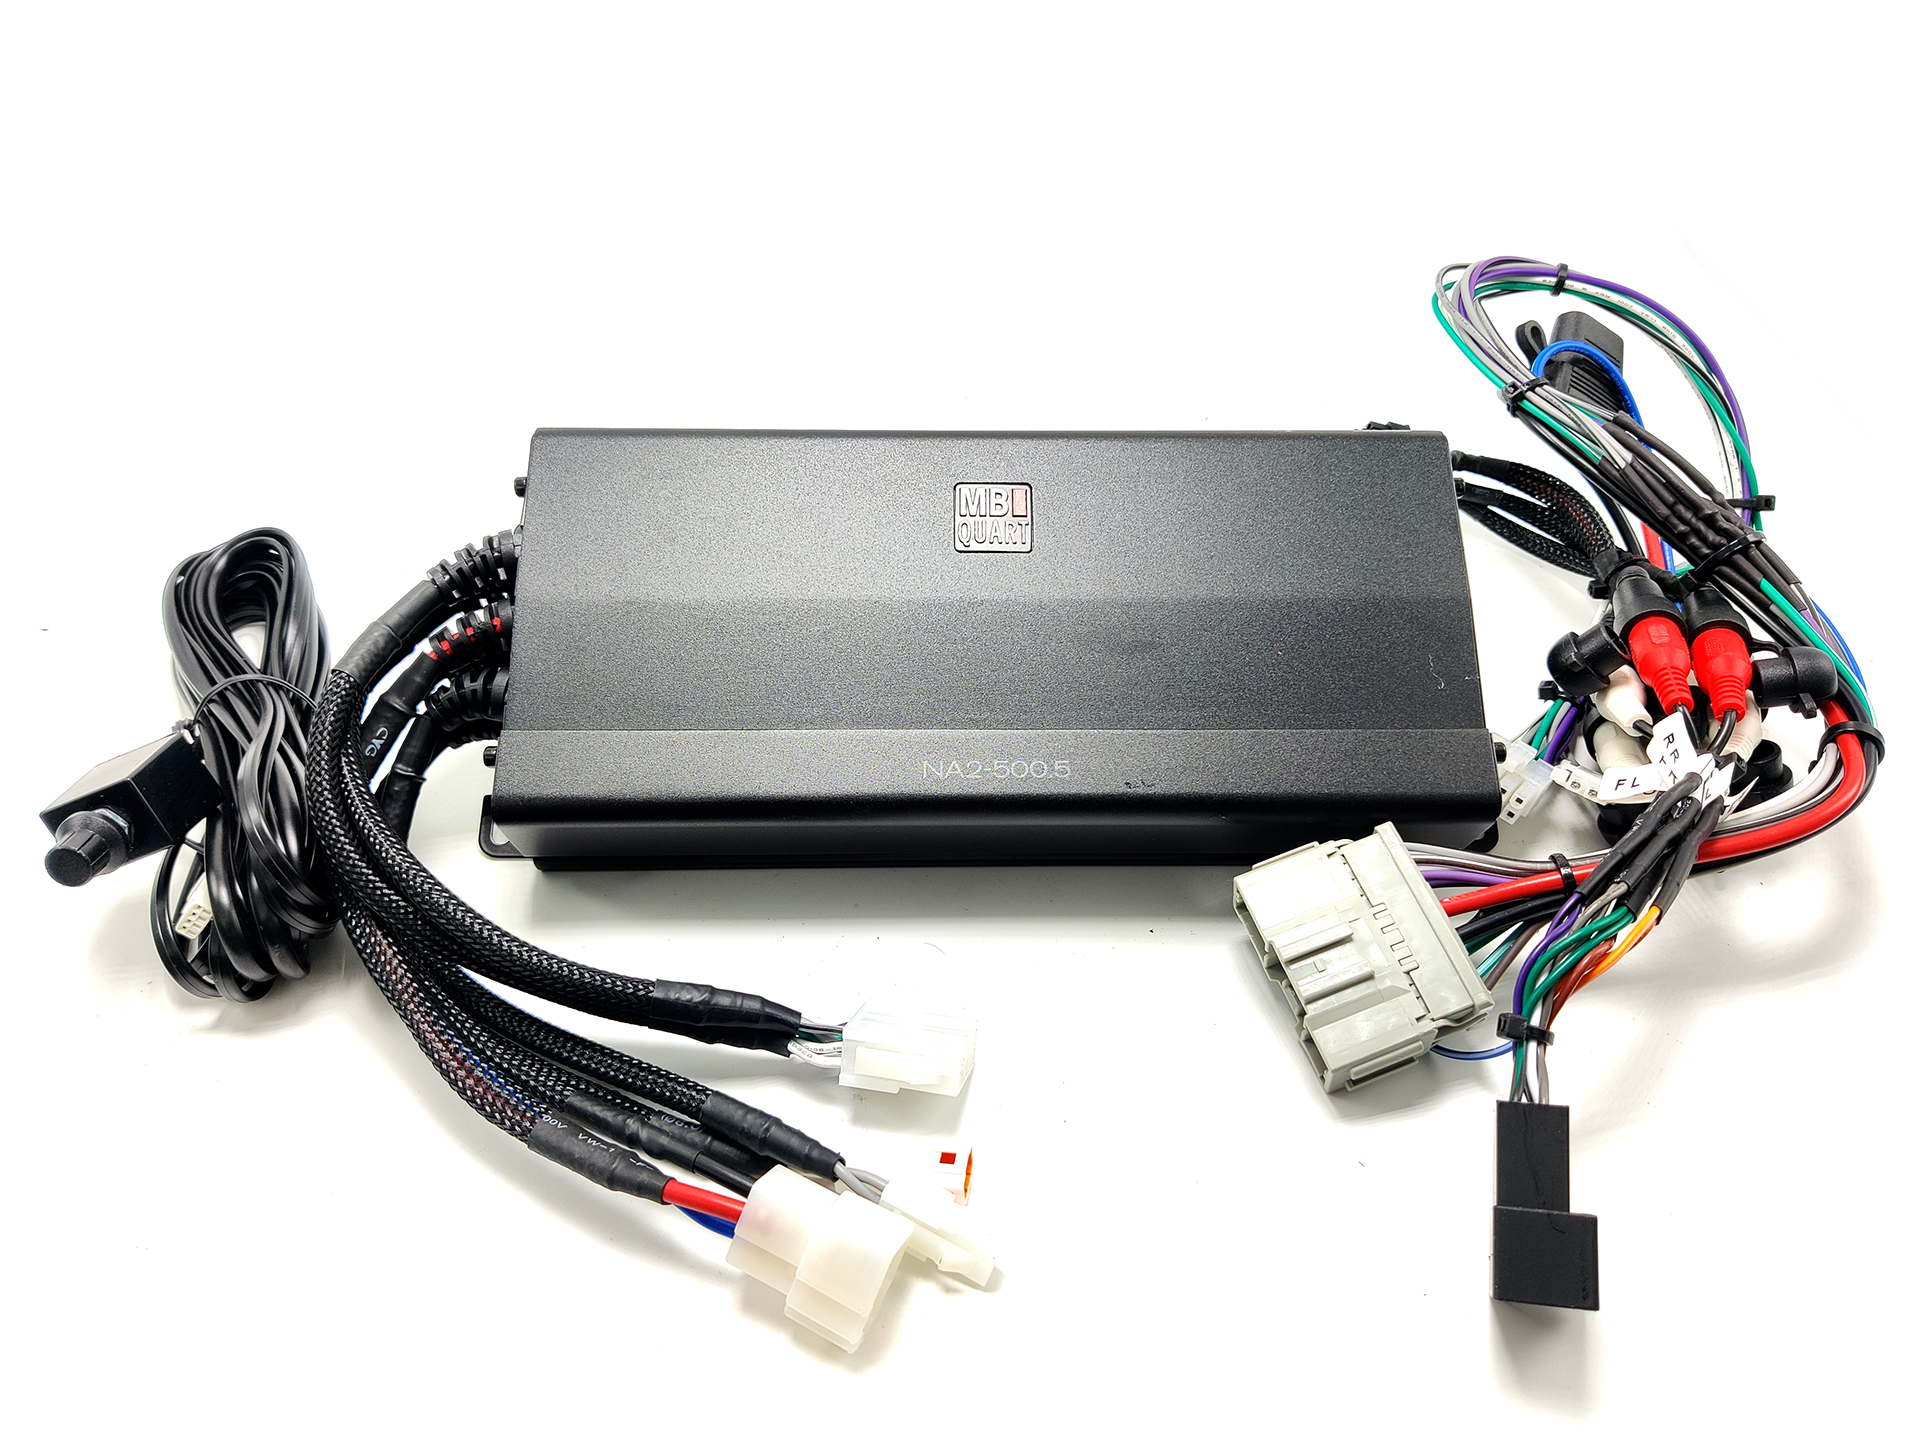
2004 2005 2006 2007 2008 Acura TL 5 Channel PNP Amplifier

The third-generation Acura TL, spanning the years 2004–2005, 2006–2007, and 2008, comes equipped with a factory amplifier located in the passenger kick panel. The factory audio system in the Acura TL consists of 8 individual drivers, including the front speakers, the dashboard tweeters, the rear deck speakers, the subwoofer, and lastly, the center channel speaker. When the factory amplifier is working with no issues, the factory audio system sounds rich and full. When your amplifier begins to fail or has failed, the system sounds tinny, and the volume output is very low. If you want to upgrade your sound system or if your factory amplifier has failed, this is a great option to consider. Our plug-and-play amplifier works with the factory radio or with an aftermarket radio if installed with our accessories. The plug-and-play amplifier will work with your factory speakers or aftermarket speakers. This is a five-channel amplifier that will retain all your speakers except for the center dashboard speaker.

This upgrade is plug-and-play so it doesn’t require any new power or ground lines. When installing the amplifier, you don’t have to run any wires to the speakers or to the battery.

These are the amplifier power ratings.

  • NEW AMPLIFIER With 2 OHM Speakers: 80 Watts to each speaker + 200 Watts to the subwoofer
  • NEW AMPLIFIER With 4 OHM Speakers = 40 Watts to each speaker + 100 Watts to the subwoofer
  • FACTORY AMPLIFIER With Factory Speakers: 20 Watts to each speaker + 40 Watts to the subwoofer

Impedance is rated in ohms. Impedance changes in a speaker as it begins to play music, but for the best results, you want speakers that have a resting impedance of 2 ohms. The amplifier will automatically send as much power as it can to each speaker, depending on the impedance of that speaker. There is no switch or setting on the amplifier for changing impedances; it is handled automatically by the electronics inside the amplifier. To take full advantage of this amplifier, we recommend installing 2 ohm speakers for the doors, deck, and subwoofer. We sell 2 ohm JBL, Infinity, and Audison speakers, but there are other brands that also sell 2 ohm speakers. If you also plan to upgrade the subwoofer, the kicker subwoofer we offer is the best choice. There are other subwoofers, but you want one that has a 2 ohm final impedance.

The factory amplifier powers each speaker with roughly 15–40 watts, depending on the speaker; this results in a total power output of 140 watts. This amplifier has a total power output of 500 watts. The factory speakers are all 2 ohms in final impedance, so if your factory speakers are all in good condition, the amp will make them sound great. If some of your speakers are blown and you didn’t notice it before, this amplifier will make you notice it now.

When installing the amplifier, we highly recommend replacing the factory subwoofer at the same time. The factory subwoofer works with this amplifier, but you will have to be careful at higher volumes with heavy bass songs. The extra power can possibly damage your factory subwoofer. As for the factory door speakers, we have found they can handle the extra power as long as the high-pass filter is turned on. The amplifier is shipped pre-configured, so you don’t have to turn any knobs or flip any switches. We ship the amplifier configured based on the selections you make on this page. When shipped, the amplifier will have the proper level set along with the correct high-pass and low-pass filters selected for your application.

This amplifier is packaged with a plug-and-play harness and the accessories you need to install it. The amplifier also comes with a bass knob, so you can control the bass level on the fly. To install this amplifier, you will need to remove the passenger kick panel cover and unbolt the factory amplifier. Then you can proceed to unplug it and connect our plug-and-play amp in its place. The amplifier shares the same connectors as the factory amplifier, so no wiring is necessary. If you plan to install the bass knob that comes with the amplifier, you will have to snake the wire for the bass knob to your chosen location. To mount the amplifier, you can use the supplied screws or self-tapping screws to secure it in the factory amplifier’s location. The new amplifier will fit in the factory location; you will just need to maneuver the wiring harness into the area next to the glove box and then mount the amplifier.

While this amplifier is louder than the factory amplifier, it does not shake the doors off your car or make your window flex from the bass output. This amplifier is a great choice for someone who has a failing amplifier or wants just a little bit more bass from the subwoofer and the door speakers. If you are looking to make your car show stopping loud, you will want to check out our other high-power plug-and-play amplifier. This upgrade will make your car noticeably louder, and you will feel the bass, but you must have realistic expectations.

Please read this disclaimer. The loudness of sound can be subjective from person to person, along with the quality of sound. Almost all of our customers who have bought this amplifier have loved it, but there have been a select few who claimed it was not louder than the factory or that it did not sound better than the factory. We do not accept returns because you don’t like how it sounds or because the amplifier is not as loud as you expected. If you want loud and clear sound, check out some of our higher-end amplifier options.

If, after reading this description, you feel that this package does not have enough power, you can use our amplifier bypass kit to easily install your own amplifier. Please keep in mind that if you are going to power each speaker with more than 125 watts RMS, then we recommend running new speaker wires and suggest you do not use our amplifier bypass.

If you have questions regarding shipping or product availability, please check out our FAQ section.

FAQ

  1. Can I use the factory radio and factory speakers with this amplifier?
    Yes, you can use this amplifier with the factory radio and factory speakers.
  2. Can I use an aftermarket radio with this amplifier?
    Yes, but you must have installed that radio using our accessories.
  3. Can I use aftermarket speakers with this amplifier?
    Yes, we recommend using speakers from JBL or Infinity.
  4. Does the Tesla-style radio work with this amplifier?
    Yes, but you will not have fader and balance controls.
  5. Can I run this amplifier and another amplifier for subwoofers?
    Yes, you can either tap the lines of this amplifier (brown) or run an LOC of the rear subwoofer.
  6. Can I use the subwoofer output of this amplifier to run a 10″ or 12″ subwoofer in a box?
    Yes, if you don’t want to upgrade the 8-inch subwoofer, you can instead use it to power a subwoofer in a box.
  7. Is this amplifier louder than the factory amplifier?
    Yes, this amplifier is louder than the factory amplifier.
  8. If my factory amplifier has low audio, is it the amplifier or the factory radio?
    If you are having audio volume issues, it’s almost always the amplifier.
  9. How do I know if my speakers are blown?
    If you turn your radio up and set the bass to +3, your speakers should not make any weird noises. If they do, they might be blown.
  10. How do I mount this amplifier?
    The amplifier comes with four mounting screws, so you can secure it to the factory amplifier location.
  11. What speakers should I upgrade if I get this amplifier?
    We recommend getting two ohm final impedance speakers.

2004 05 06 07 08 Acura TL Amplifier Bypass Harness

If you are tired of the factory amplifier this harness will help you bypass all the tricky wiring and go straight to the speakers from one central location. This harness is over 17 inches long it can easily reach from the factory amp location to the trunk or behind the radio. This makes it easy to install your aftermarket amp wherever you decide You just have to run RCAs and the power cables from your aftermarket radio. Also included in this package is the harness that will allow you connect to the output side of the factory radio allowing you to use this harness combination with the factory radio to add an amplifier or with an aftermarket radio.

All the wiring you need to add your system is in one location and the RCA outputs are labeled with FL, FR, RR, RL, CENTER, and SUB. The harness with all the outputs also provides and amp turn on wire that is blue with a quick connect on the end to attach your amplifier remote wire.

The colors on the speaker wire harness are as follows:

Gray – Passenger Front positive speaker and tweeter
Gray w/black stripe – Passenger Front negative for speaker and tweeter
White – Drivers Front positive speaker and tweeter
White w/ black stripe – Drivers Front negative speaker and tweeter
Purple – Passenger Rear positive speaker
Purple w/ black stripe – Passenger Rear negative speaker
Green – Drivers Rear positive speaker
Green w/ black stripe – Drivers Rear negative speaker
Green w/ white stripe – subwoofer positive
Gray w/ yellow stripe – subwoofer negative
White w/ red stripe – center speaker negative
Gray w/ blue stripe – center speaker positive

There are several five channel amps that will work with the factory system remember all of the factory speakers are 2 ohms and most are rated for just 20 watts so unless you replace all the speakers choose the amp carefully as not to blow them. If you plan to power your factory speakers with the aftermarket radios built in amplifier make sure the aftermarket radio can handle 2ohm impedances otherwise you may damage your new aftermarket radio.

2007 2008 Acura TL Aftermarket Radio Installation DIY Harness Combo

If you are upgrading to an aftermarket radio in your 2007 or 2008 Acura TL this combination of harnesses simplifies the installation. There is no need to cut or splice any of the factory wiring. Instead to install your aftermarket radio simply color match the colors on this harness to the wires on your aftermarket radio harness. This harness combo allows you to retain your factory amplifier, subwoofer, backup camera and navigation. The radio you choose must have 5/6 RCA ports on the back labeled FL, FR, RR, RL,SUB if your radio does not have these outputs you will need a line out converter. You can find printable instructions here.

Our harness combo utilizes RCA connections to send a low level (0v-4v) audio signal from the back of your new aftermarket radio to the factory amplifier in your Acura TL. Our harness combo integrates with the factory amplifier to keep all of your speakers working except the center channel. If you wish to keep the factory steering wheel controls with your new aftermarket radio you may also need the AXSWC steering wheel control interface. If you do plan to retain your steering wheel controls, you will only be able to keep volume up, volume down, next, previous and mode. You will not be able to keep the call control buttons or navigation control buttons When you replace the radio you will lose the factory hands free functionality, the factory aux input and the factory XM radio along with your factory navigation’s audio prompts.

Please verify your factory amplifier is working and you aren’t having any volume issues before replacing the factory radio. If you are having volume issues please check out our plug and play amplifier. If you wish to bypass the factory amplifier in your Acura and power your speakers directly from your aftermarket radio check out the amplifier bypass.

The 20 Pin Blue connector in this combo is used to provide:
– Constant Power = Yellow
– Ground = Black
– Accessory Power = Red
– Illumination = Orange
– Steering Wheel Control Output Wire = Gray
– Primary Speakers (FL, FR, RR, RL) = RCA

The 40 Pin Grey connector in this combo is used to:
– Amp Turn On for Factory AMP = Blue
– Retain Factory Subwoofer = RCA
– Retain Factory Navigation touch functions including buttons

The 2 Pin Grey connector is used for:
– Power Antenna = Blue
– Antenna Reception

If you need to see how to wire a line out converter to the speaker outputs off your new aftermarket radio please check this video.

If you have questions regarding shipping or product availability please check out our FAQ Section. If you are having issues with your radio after installation check out this article.

FAQ.

  1. Will this allow me to keep my factory navigation working with a new aftermarket radio?
    – Yes your factory navigation will continue to work but there will be no audio prompts.
  2. Can I add an amplifier and subwoofers with your harness?
    – Yes you can. You will just need run your RCAs to the back of the radio and wire tap the blue or blue/white wire of the harness.
  3. Can I add a backup camera with your harness?
    – Yes just follow the instructions provided in the radios owners manual or the cameras manual to complete the installation.
  4. Can I use a random radio I found on Amazon or eBay that has an unknown brand?
    – Most likely not. If the radio you purchased on Amazon is less than $100 it most likely won’t have all the features and ports needed for you to complete the installation.
  5. Do I get to keep all my speakers?
    – Yes all speakers are retained, except for the center dash speaker.
  6. Do I get to keep my steering wheel controls?
    -Yes but an additional part is required. The AXSWC you can find it here. You will get to keep volume up, volume down, next, prev and mode. The call control buttons will not be retained.
  7. Why can’t I keep my center speaker?
    – Most aftermarket radios don’t have a center speaker output therefore there is no audio source for the center speaker. We recommend disconnecting the center speaker during installation.


Posted on Leave a comment

Acura TL Aftermarket Radio DIY KIT Instructions

Download a copy

Disclaimer: Installing an aftermarket radio in your Acura TL will result in the loss of factory route navigation guidance, the loss of center channel audio and the loss of certain hands-free functionality within the factory system. All these features are easily obtained in your new aftermarket radio along with an amazing improvement in sound quality.

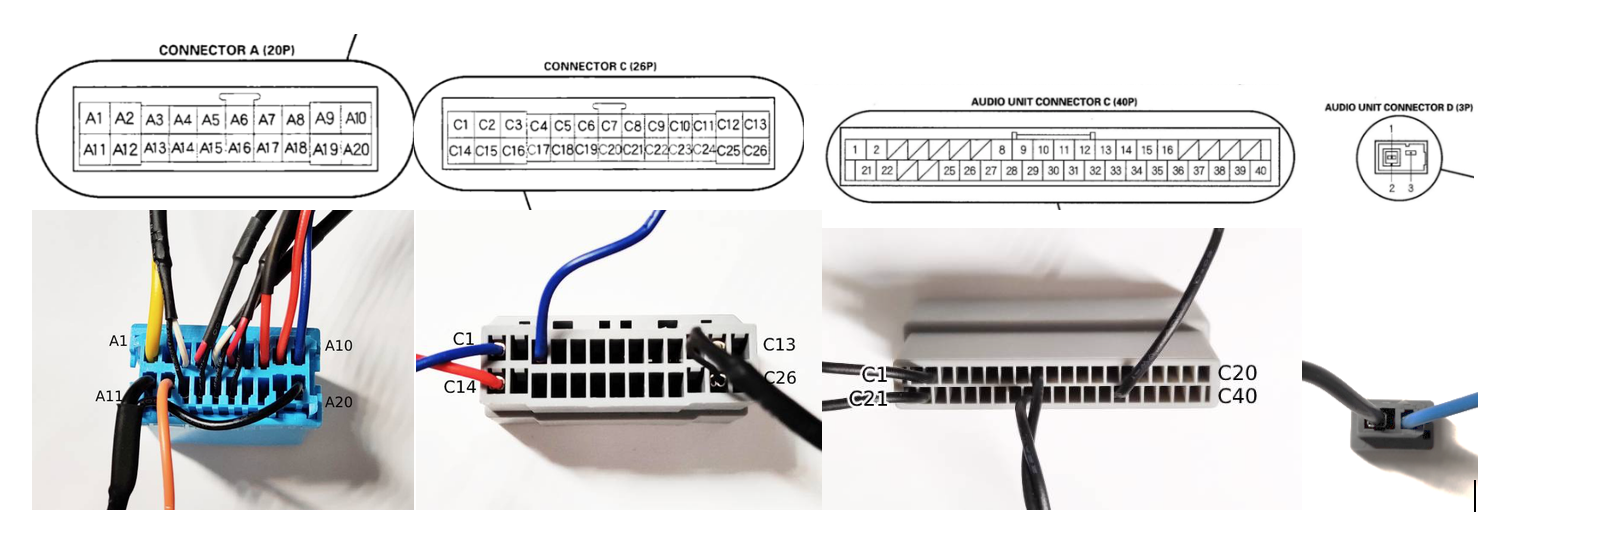
Notice: The following instructions will help you wire together our DIY kit with your aftermarket radio and steering wheel control adapter. We will refer to the blue plug as connector A and the grey plugs as connector C26 & C40. On Acura’s from 2004 to 2006 you will find connector A & C26. On Acura’s from 2007 to 2008 you will find connector A, C40 & D(antenna connector). There is also a white plug on all Acura’s that is not used when installing and aftermarket radio it is for the factory XM unit.

Pin Color Function
A1 Yellow Constant 12V
A3 White(RCA) Front Left + RCA
A4 Red(RCA) Front Right + RCA
A5 White(RCA) Rear Left + RCA
A6 Red(RCA) Rear Right + RCA
A8 Red/Black Steering Wheel Control +
A9 Red Switched 12V
A10 Blue FM Power Antenna (04-06)
A11 Black Ground
A12 Orange Illumination
A13 Black(RCA) Front Left – RCA
A14 Black(RCA) Front Right – RCA
A15 Black(RCA) Rear Left – RCA
A16 Black(RCA) Rear Right – RCA
A20 Black Steering Wheel Control –


Pin C26 Color Function
C1 Blue GA-NET + (CANBUS)
C3 Blue Factory Amp Turn On
C13 White(RCA) Sub + RCA
C14 Red GA-NET – (CANBUS)
C25 Black(RCA) Sub – RCA


Pin C40 Color Function
C2 Black Sub + RCA
C9 Black GA-NET + (CANBUS)
C22 Black Sub – RCA
C29 Red GA-NET – (CANBUS)
C35 Black(RCA) Factory Amp Turn On


Pin D Color Function
D2 Black Antenna Signal FM/AM
D3 Blue Power Antenna (FM/AM)


The 2007 to 2008 Acura TLs do not have pin A10 instead the power antenna 12V signal must be connected to pin D3. Pioneer radios only provide one blue wire for amp turn on and power antenna connect both blue wires D3 and C3/C35 to that blue/white wire to have full functionality. Kenwood’s and Alpines offer an amp turn on wire along with a power antenna wire be sure to match each wire to the correct one.

The steering wheel control interface needs to connected to pin A8 Steering wheel control positive, with our harness pin A20 is already connected to ground. If you have any questions or are stuck please call us at 631-538-0068 or email us at info@mobilemaxcaraudio.com. Thank you for your business and congratulations on the new radio!

2007 2008 Acura TL Wired Radio Receiver Wiring Harness

If you are having trouble wiring a new aftermarket radio in your 3rd Generation Acura TL spanning years 2007 to 2008 then this custom made wiring harness will help. After placing your order we will create a custom wiring harness for your exact radio installation. The custom harness will allow you to install a new aftermarket radio without the need for any wire splicing or wire tapping. This harness will allow you to have a plug and play installation for your Acura TL with a supported compatible radio. A parking bypass is highly recommended with your order if your radio brand is Pioneer, Kenwood or Alpine. You can learn more about the bypass and add one to your cart using this link.

Our plug and play harness integrates with the factory amplifier to retain your front door speakers and tweeters, the rear deck speakers and the factory subwoofer. Your center dash speaker will no longer work. Our custom harness allows your factory navigation, backup camera and touchscreen to continue to function with an aftermarket radio. Included in our harness are the necessary three connectors for your Acura TL and the radio specific connector that will plug into the back of your radio. Our harness uses RCAs to feed a low level signal from the aftermarket radio to the factory amplifier. We also add the connector for the AXSWC steering wheel control interface so you can retain your factory steering wheel controls if desired. The AXSWC is an additional purchase it is not included. The wiring for the AXSWC is completed so if you do purchase it you can just plug it in.

In order for your aftermarket radio to be compatible with this harness it must have at least 5 RCA outputs including FL, FR, RL, RR, and SUB. Also the brand of the aftermarket radio must appear in the selection menu of this listing. If you are unsure if your radio qualifies please call us at 877-542-2872

In order to complete your order we may need your radios model number please include it in the billing checkout notes or if you forget please include a valid phone number where me may reach you in case of any questions.

FAQ.

  1. Will this allow me to keep my factory navigation working with a new aftermarket radio?
    – Yes your factory navigation will continue to work but there will be no audio prompts.
  2. Can I add an amplifier and subwoofers with your harness?
    – Yes you can. You will just need run your RCAs to the back of the radio and wire tap the blue or blue/white wire of the harness.
  3. Can I add a backup camera with your harness?
    – Yes just follow the instructions provided in the radios owners manual or the cameras manual to complete the installation.
  4. Can I use a random radio I found on Amazon or eBay that has an unknown brand?
    – Most likely not. If the radio you purchased on Amazon is less than $100 it most likely won’t have all the features and ports needed for you to complete the installation.
  5. Do I get to keep all my speakers?
    – Yes all speakers are retained, except for the center dash speaker.
  6. Do I get to keep my steering wheel controls?
    -Yes but an additional part is required. The AXSWC you can find it here. You will get to keep volume up, volume down, next, prev and mode. The call control buttons will not be retained.

*When replacing the factory radio in your Acura you will lose the factory Sirius XM, HFL and AUX Port. *

2007 08 Acura TL Aftermarket Radio Install Complete Kit

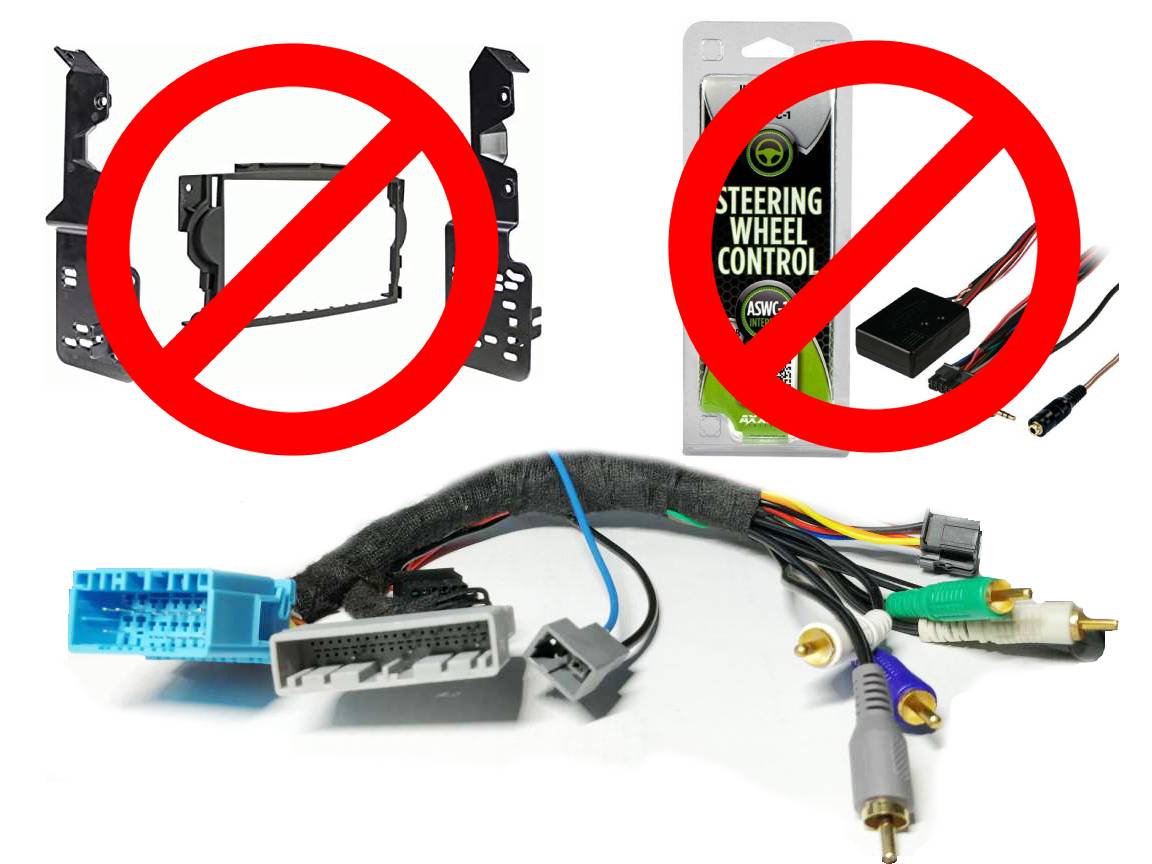
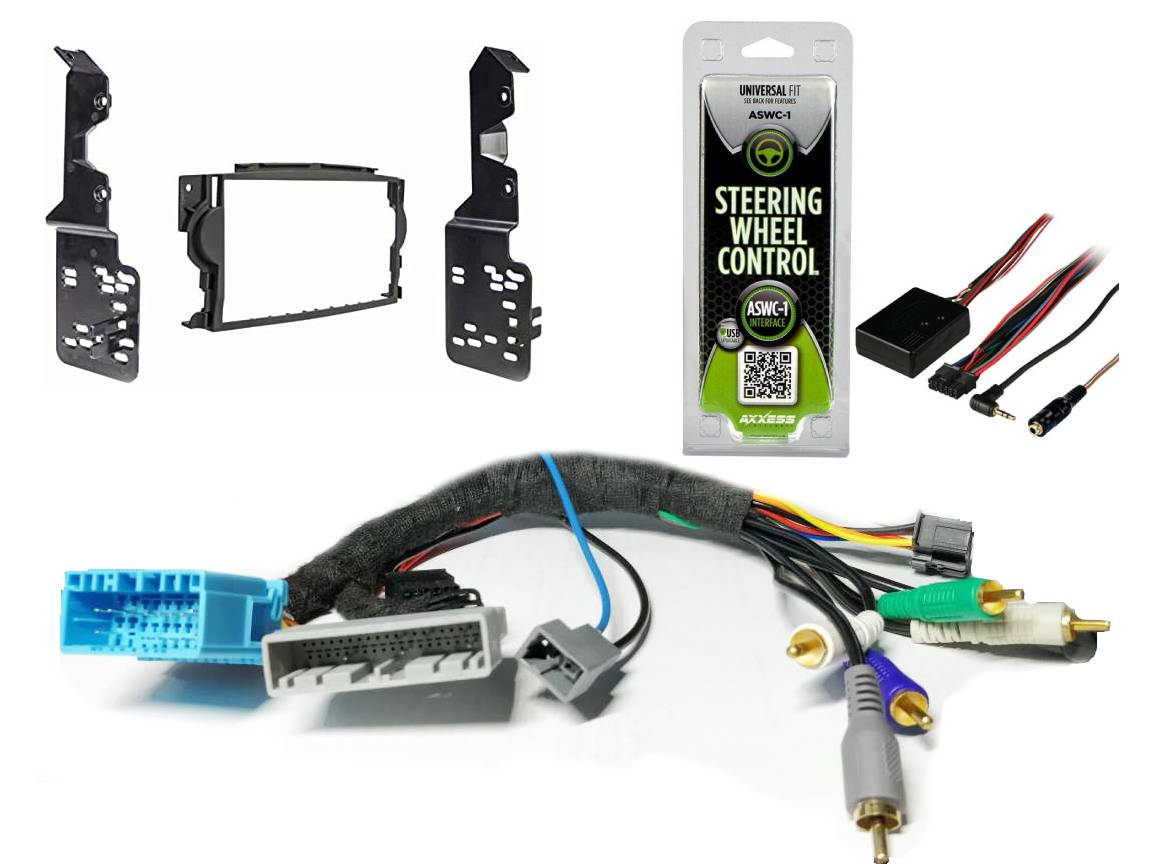
Simplify installing an aftermarket in dash stereo receiver in your 3rd generation Acura TL covering years 2007 and 2008 with our radio installation kit. Our aftermarket radio install kit is complete with everything you will need to install a new stereo in your Acura TL. This kit does not include a radio. Our kit includes all the necessary components to install an aftermarket radio in your Acura. These components are a dash kit, a custom made wiring harness and the AXSWC steering wheel control interface. Our custom harness allows you to have a plug and play installation with a supported compatible radio, the dash kit allows you to install a new radio in the factory location and the AXSWC allows you to control the aftermarket radio with your factory steering wheel controls.

A parking bypass is highly recommended with your order if your radio brand is Pioneer, Kenwood or Alpine. You can learn more about the bypass and add one to your cart using this link.

Your Acura TL has a total of 6 speakers that are powered by the factory amplifier. When replacing the factory radio using our complete kit you are able to keep all of the speakers except the center channel. The front door speakers, tweeters, rear deck speakers and the factory subwoofer will all continue to work; the center dash speaker will not work. Our harness integrates with the factory amplifier to keep all your speakers working. If your factory amplifier does not work this kit will not work.

Your navigation touchscreen and factory backup camera will continue to function but there will be no audio prompts from the factory navigation. You will lose Sirius XM and the factory handsfree link functionality. The steering wheel controls including volume up, volume down, next, previous and mode will work. The call control buttons are not retained. The navigation control buttons are not retained. The components included in this complete install kit are:

  • Custom Made Wiring Harness
  • ABS Molded Dash Kit
  • AXSWC Steering Wheel Control Module

In order for your aftermarket radio to be compatible with this harness it must have at least 5 RCA outputs including FL, FR, RL, RR, and SUB. Also the brand of the aftermarket radio must appear in the selection menu of this listing. If you are unsure if your radio qualifies please call us at 877-542-2872

In order to complete your order we may need your radios model number please include it in the billing checkout notes or if you forget please include a valid phone number where me may reach you in case of any questions.

FAQ.

  1. Will this allow me to keep my factory navigation working with a new aftermarket radio?
    – Yes your factory navigation will continue to work but there will be no audio prompts.
  2. Can I add an amplifier and subwoofers with your harness?
    – Yes you can. You will just need run your RCAs to the back of the radio and wire tap the blue or blue/white wire of the harness.
  3. Can I add a backup camera with your harness?
    – Yes just follow the instructions provided in the radios owners manual or the cameras manual to complete the installation.
  4. Can I use a random radio I found on Amazon or eBay that has an unknown brand?
    – Most likely not. If the radio you purchased on Amazon is less than $100 it most likely won’t have all the features and ports needed for you to complete the installation.
  5. Do I get to keep all my speakers?
    – Yes all speakers are retained, except for the center dash speaker.
  6. Do I get to keep my steering wheel controls?
    -Yes but an additional part is required. The AXSWC in included in this kit. You will get to keep volume up, volume down, next, prev and mode. The call control buttons will not be retained.

*When replacing the factory radio in your Acura you will lose the factory Sirius XM, HFL and CD changer. *

Posted on 15 Comments

Acura TL Aftermarket Radio No Sound | Not Working

Did you install a new aftermarket radio in your Third Generation(2004,2005,2006,2007,2008) Acura TL? Is the aftermarket radio powering on but you don’t hear anything through the speakers?or Do you get sound through the speakers but it gets very distorted at higher volumes? Is your factory navigation touchscreen not working after the install? If you are experiencing any of these symptoms you are in luck because we have the solution for you whether you have an 04-06 or an 07-08 Acura TL.

Continue reading Acura TL Aftermarket Radio No Sound | Not Working

2007 2008 Acura TL Aftermarket Radio Installation DIY Kit

If you are upgrading to an aftermarket radio in your 2007 or 2008 Acura TL this DO IT YOURSELF kit simplifies the installation. There is no need to wire splice any of the factory wiring or to modify the factory radio housing bezel. Instead to install your aftermarket radio simply color match the colors on this harness to the wires on your new aftermarket radio harness. Then assemble the new dash kit to fit your aftermarket radio.

This set of wire harnesses allows you to retain your factory amplifier, subwoofer, backup camera and navigation. The dash kit allows you to replace the factory stereo without making any permanent modifications to your dashboard. Your new aftermarket radio will install in the factory radios location below the factory navigation screen. The radio you choose must have 5/6 RCA ports on the back labeled FL, FR, RR, RL,SUB if your radio does not have these outputs you will need a line out converter. You can find printable wiring instructions here. You can find the dash kit assembly instructions here.

This kit is unterminated which means you will have to wire everything together if you need help you can check out our video guide below. All the wires are color coded and labeled so you may easily add a steering wheel control module, a backup camera, an aftermarket amplifier or a parking bypass. If you are looking for a plug and play wired solution click here.

The dash kit included in this kit can accommodate a double din aftermarket radio. If you need a single din dash kit please reach out via email. The dash kit can easily hold a 6.8″ 6.9″ or 7″ touchscreen radio. If your radio has a screen bigger than 7″ it will stick out past the dash kit and not sit flush against your dashboard. The pictures on this listing show a traditional double din pioneer radio and a single din pioneer radio for your reference. If you need more specifics about the dash kit please check the instructions here.

Our harness combo utilizes RCA connections to send a low level (0v-4v) audio signal from the back of your new aftermarket radio to the factory amplifier in your Acura TL. Our harness combo integrates with the factory amplifier to keep all of your speakers working except the center channel. If you wish to keep the factory steering wheel controls with your new aftermarket radio you may also need the AXSWC steering wheel control interface. If you do plan to retain your steering wheel controls, you will only be able to keep volume up, volume down, next, previous and mode. You will not be able to keep the call control buttons or the navigation control buttons. When you replace the radio you will lose the factory hands free functionality and the factory XM radio along with your factory navigation’s audio prompts.

Please verify your factory amplifier is working and you aren’t having any volume issues before replacing the factory radio. If you are having volume issues please check out our plug and play amplifier. If you wish to bypass the factory amplifier in your Acura and power your speakers directly from your aftermarket radio check out the amplifier bypass.

The 20 Pin Blue connector in this kit is used to provide:
– Constant Power = Yellow
– Ground = Black
– Accessory Power = Red
– Illumination = Orange
– Steering Wheel Control Output Wire = Gray
– Primary Speakers (FL, FR, RR, RL) = RCA

The 40 Pin Grey connector in this combo is used to:
– Amp Turn On for Factory AMP = Blue
– Retain Factory Subwoofer = RCA
– Retain Factory Navigation touch functions including buttons

The 2 Pin Grey connector is used for:
– Power Antenna = Blue
– Antenna Reception

The Dash Kit in this kit is used to:
– Install aftermarket radio in factory radio location
– Provide the necessary brackets to hold new radio in place

If you need to see how to wire a line out converter to the speaker outputs off your radio please check this video.

If you have questions regarding shipping or product availability please check out our FAQ Section. If you are having issues with your radio after installation check out this article.

FAQ.

  1. Will this allow me to keep my factory navigation working with a new aftermarket radio?
    – Yes your factory navigation will continue to work but there will be no audio prompts.
  2. Will my backup camera still work?
    – Yes if your backup camera works before the install it will continue working after the install.
  3. Can I add an amplifier and subwoofers with your harness?
    – Yes you can. You will just need run your RCAs to the back of the radio and wire tap the blue or blue/white wire of the harness.
  4. Can I add a backup camera with your harness?
    – Yes just follow the instructions provided in the radios owners manual or the cameras manual to complete the installation.
  5. Can I use a random radio I found on Amazon or eBay that has an unknown brand?
    – Most likely not. If the radio you purchased on Amazon is less than $100 it most likely won’t have all the features and ports needed for you to complete the installation.
  6. Do I get to keep all my speakers?
    – Yes all speakers are retained, except for the center dash speaker.
  7. Do I get to keep my steering wheel controls?
    -Yes but an additional part is required. The AXSWC you can find it here. You will get to keep volume up, volume down, next, prev and mode. The call control buttons will not be retained.
  8. Why can’t I keep my center speaker?
    – Most aftermarket radios don’t have a center speaker output therefore there is no audio source for the center speaker. We recommend disconnecting the center speaker during installation.
  9. What if my radio doesn’t fit into the Metra dash kit?
    -If your new aftermarket radio does not fit into the dash kit you will have to get a different radio. It is possible to modify the dash kit to fit bigger radio but it requires modifications that might weaken the dash kit or break it so we don’t modifying it.

2004 2005 2006 Acura TL Aftermarket Radio Installation DIY Kit

If you are upgrading to an aftermarket radio in your 2004 2005 or 2006 Acura TL this DO IT YOURSELF kit simplifies the installation. There is no need to wire splice any of the factory wiring or to modify the factory radio housing bezel. Instead to install your aftermarket radio simply color match the colors on this harness to the wires on your new aftermarket radio harness. Then assemble the new dash kit to fit your aftermarket radio.

This set of wire harnesses allows you to retain your factory amplifier, subwoofer and navigation. The dash kit allows you to replace the factory stereo without making any permanent modifications to your dashboard. Your new aftermarket radio will install in the factory radios location below the factory navigation screen. The radio you choose must have 5/6 RCA ports on the back labeled FL, FR, RR, RL,SUB if your radio does not have these outputs you will need a line out converter. You can find printable wiring instructions here. You can find the dash kit assembly instructions here.

This kit is unterminated which means you will have to wire everything together if you need help you can check out our video guide below. All the wires are color coded and labeled so you may easily add a steering wheel control module, a backup camera, an aftermarket amplifier or a parking bypass. If you are looking for a plug and play wired solution click here.

The dash kit included in this kit can accommodate a double din aftermarket radio. If you need a single din dash kit please reach out via email. The dash kit can easily hold a 6.8″ 6.9″ or 7″ touchscreen radio. If your radio has a screen bigger than 7″ it will stick out past the dash kit and not sit flush against your dashboard. The pictures on this listing show a traditional double din pioneer radio and a single din pioneer radio for your reference. If you need more specifics about the dash kit please check the instructions here.

Our harness combo utilizes RCA connections to send a low level (0v-4v) audio signal from the back of your new aftermarket radio to the factory amplifier in your Acura TL. Our harness combo integrates with the factory amplifier to keep all of your speakers working except the center channel. If you wish to keep the factory steering wheel controls with your new aftermarket radio you may also need the AXSWC steering wheel control interface. If you do plan to retain your steering wheel controls, you will only be able to keep volume up, volume down, next, previous and mode. You will not be able to keep the call control buttons. When you replace the radio you will lose the factory hands free functionality and the factory XM radio along with your factory navigation’s audio prompts.

Please verify your factory amplifier is working and you aren’t having any volume issues before replacing the factory radio. If you are having volume issues please check out our plug and play amplifier. If you wish to bypass the factory amplifier in your Acura and power your speakers directly from your aftermarket radio check out the amplifier bypass.

The 20 Pin Blue connector in this kit is used to provide:
– Constant Power = Yellow
– Ground = Black
– Accessory Power = Red
– Illumination = Orange
– Steering Wheel Control Output Wire = Gray
– Primary Speakers (FL, FR, RR, RL) = RCA

The 26 Pin Grey connector in this kit is used to:
– Amp Turn On for Factory AMP = Blue
– Retain Factory Subwoofer = RCA
– Retain Factory Navigation touch functions including buttons

The Dash Kit in this kit is used to:
– Install aftermarket radio in factory radio location
– Provide the necessary brackets to hold new radio in place

If you need to see how to wire a line out converter to the speaker outputs off your radio please check this video.

If you have questions regarding shipping or product availability please check out our FAQ Section. If you are having issues with your radio after installation check out this article.

FAQ.

  1. Will this allow me to keep my factory navigation working with a new aftermarket radio?
    – Yes your factory navigation will continue to work but there will be no audio prompts.
  2. Can I add an amplifier and subwoofers with your harness?
    – Yes you can. You will just need run your RCAs to the back of the radio and wire tap the blue or blue/white wire of the harness.
  3. Can I add a backup camera with your harness?
    – Yes just follow the instructions provided in the radios owners manual or the cameras manual to complete the installation.
  4. Can I use a random radio I found on Amazon or eBay that has an unknown brand?
    – Most likely not. If the radio you purchased on Amazon is less than $100 it most likely won’t have all the features and ports needed for you to complete the installation.
  5. Do I get to keep all my speakers?
    – Yes all speakers are retained, except for the center dash speaker.
  6. Do I get to keep my steering wheel controls?
    -Yes but an additional part is required. The AXSWC you can find it here. You will get to keep volume up, volume down, next, prev and mode. The call control buttons will not be retained.
  7. Why can’t I keep my center speaker?
    – Most aftermarket radios don’t have a center speaker output therefore there is no audio source for the center speaker. We recommend disconnecting the center speaker during installation.
  8. What if my radio doesn’t fit into the Metra dash kit?
    -If your new aftermarket radio does not fit into the dash kit you will have to get a different radio. It is possible to modify the dash kit to fit bigger radio but it requires modifications that might weaken the dash kit or break it so we don’t modifying it.