Posted on Leave a comment

2004 2005 2006 2007 2008 Acura TL Aftermarket Radio DIY Wiring Instructions

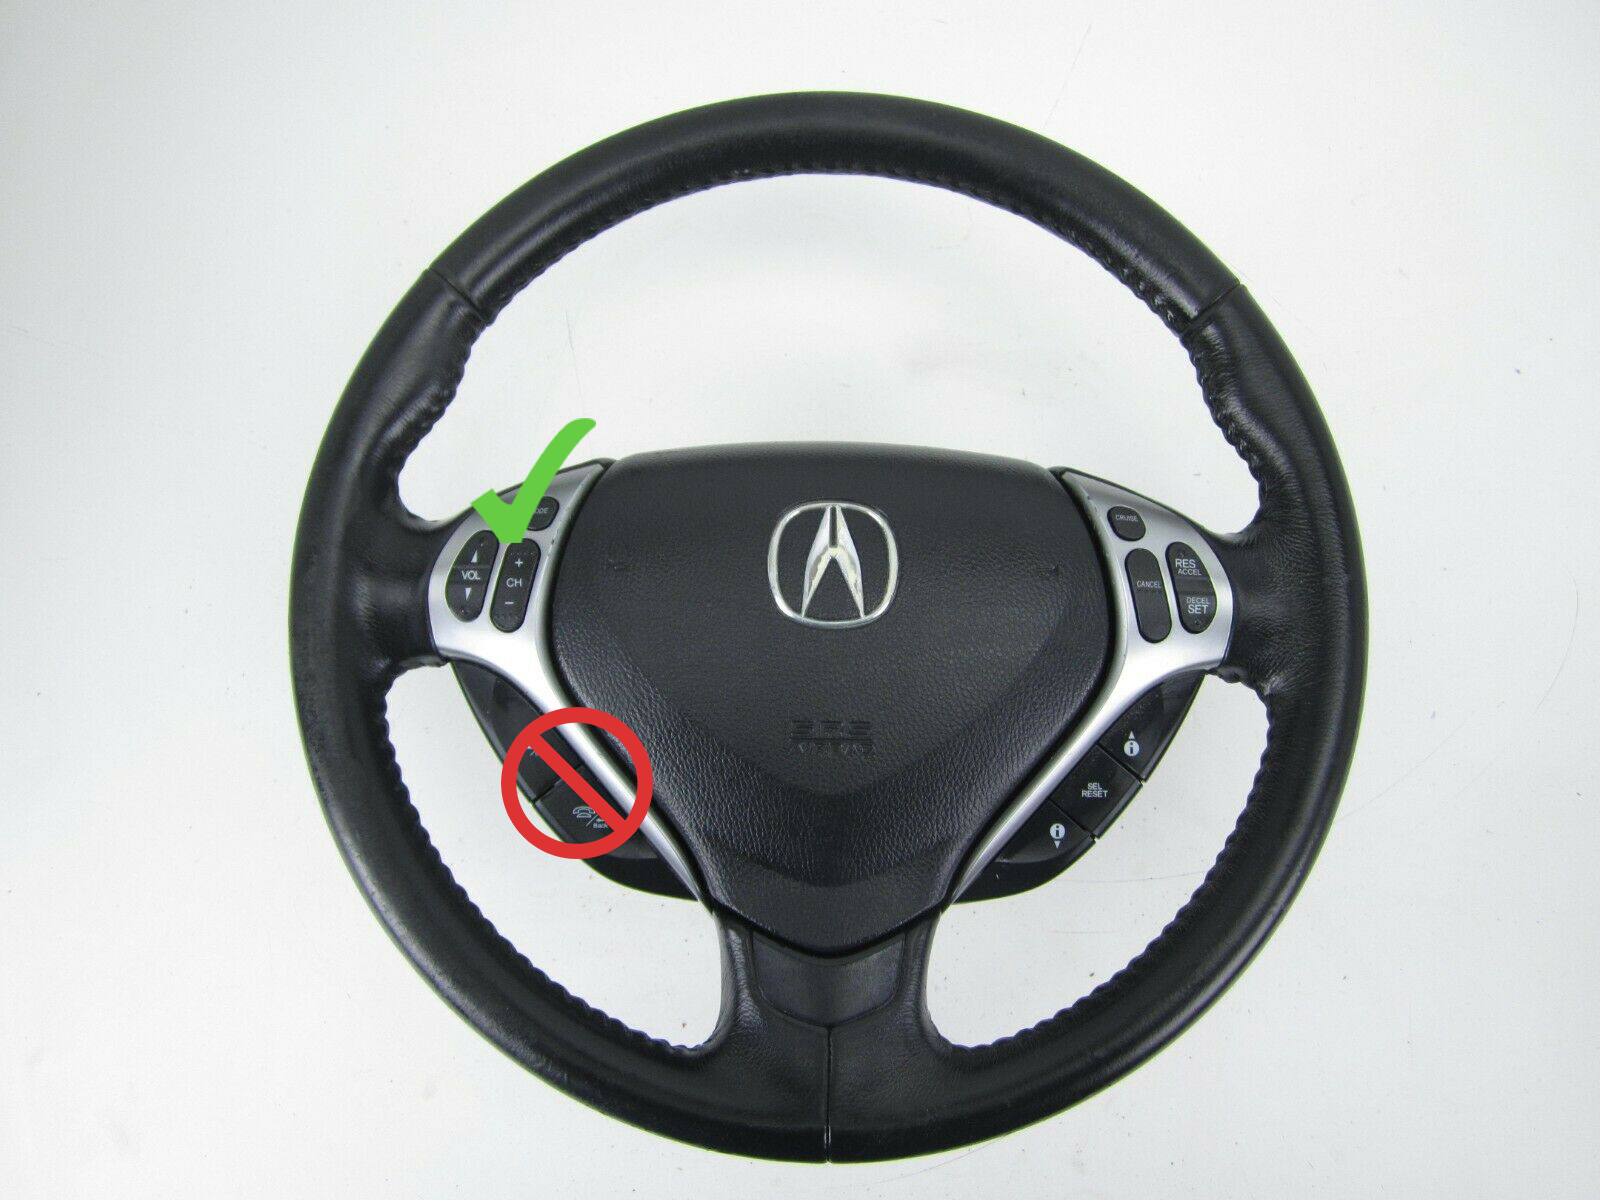
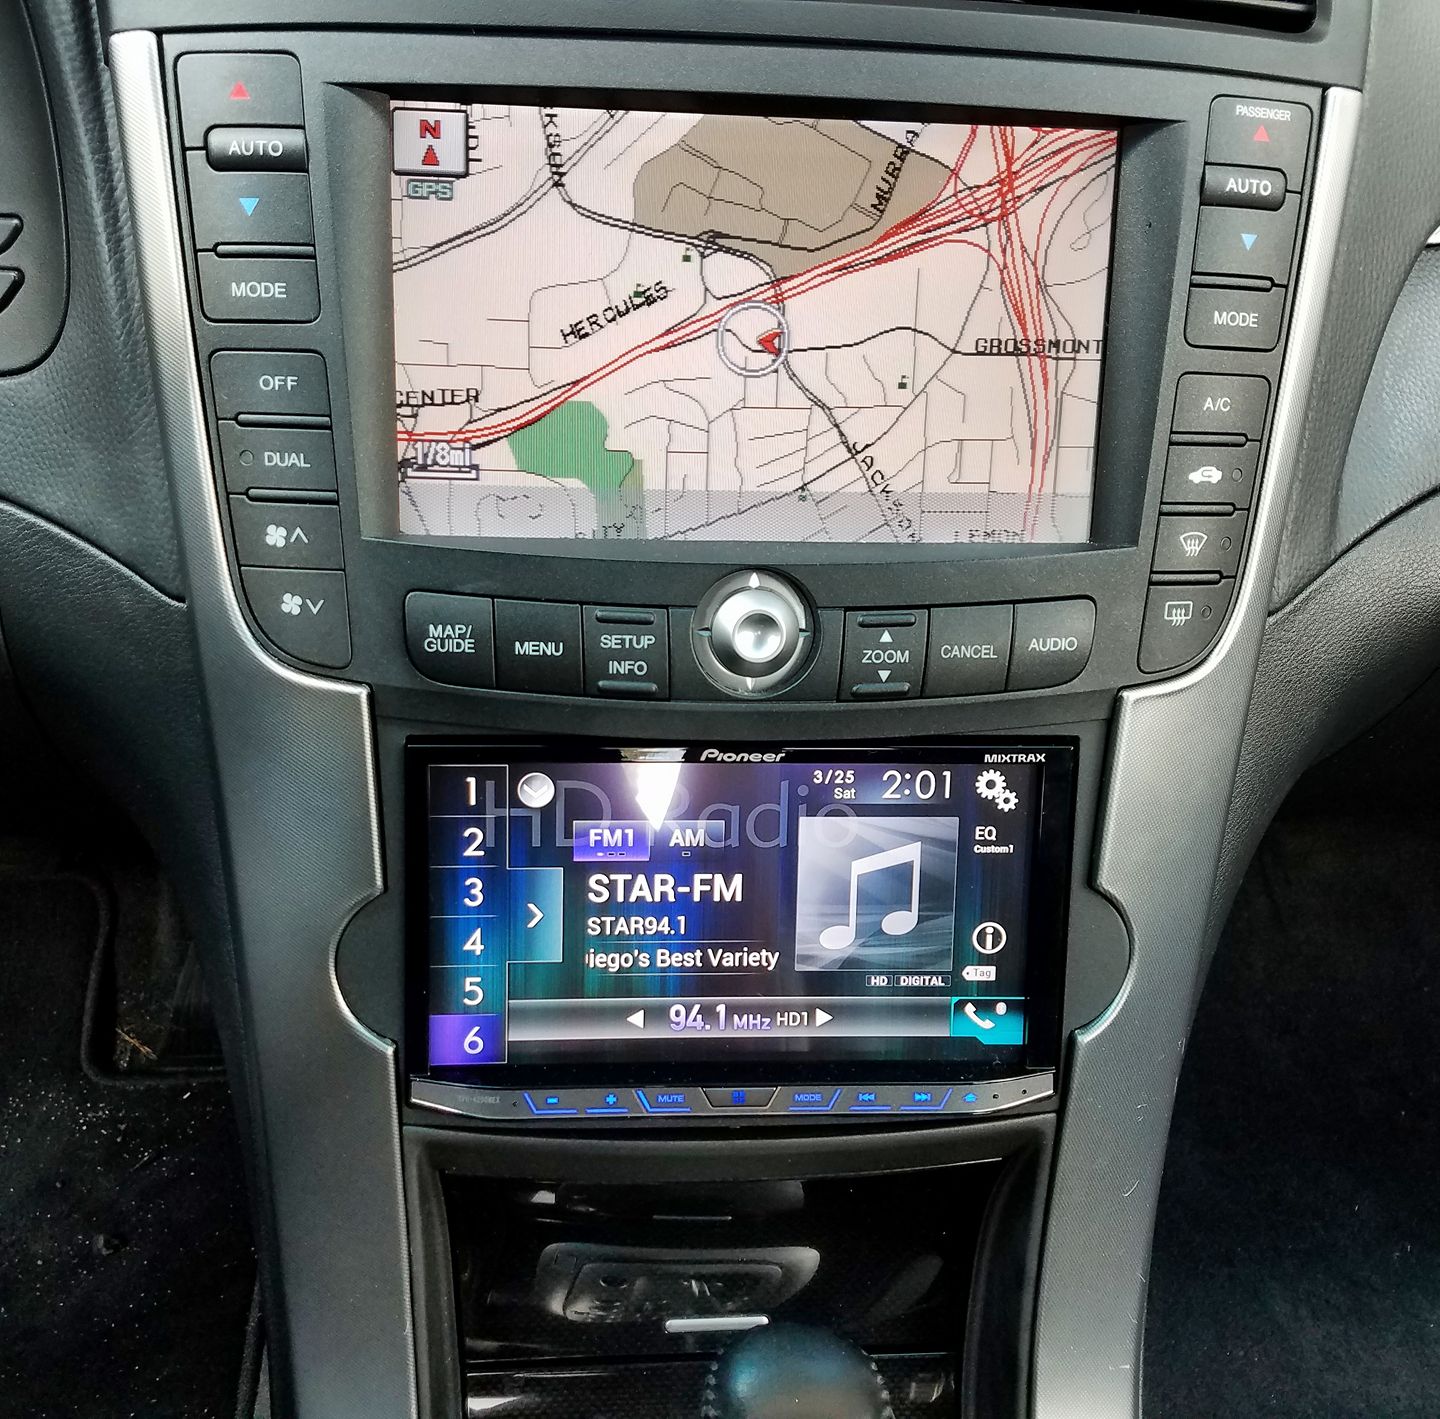
Disclaimer: Installing an aftermarket radio in your Acura TL will result in the loss of the center dash speaker and the factory hands free link. The center speaker is not retained so you will lose factory navigation audio prompts. Also the steering wheel controls that work with the aftermarket radio are volume up, volume down, next track, previous track and mode. The call buttons will not work with the aftermarket radio or the navigation prompt buttons on the steering wheel. Additional parts may be necessary to keep your factory steering wheel controls depending on the radio you are installing.

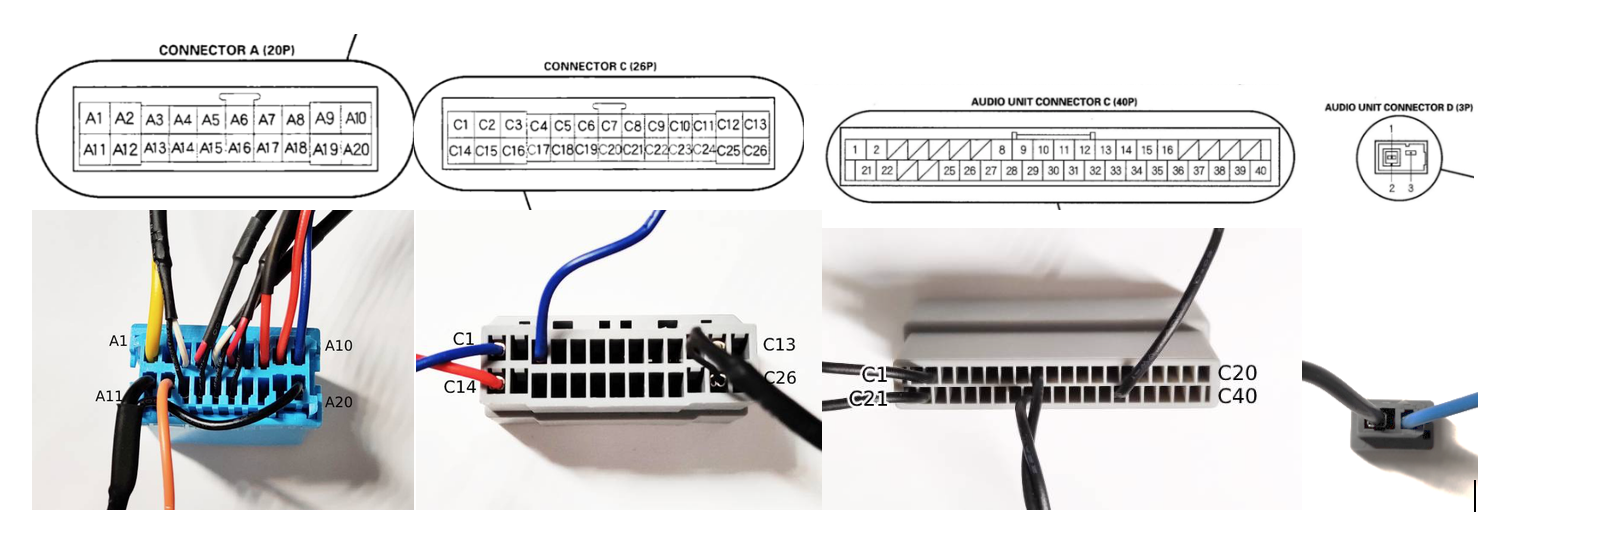
Notice: When replacing the radio in your Acura TL if you have a 2004, 2005 or 2006 there are only two connectors that will need to be wired to make your aftermarket radio work. If you have a 2007 or 2008 Acura TL then 3 connectors must be wired. The white connector behind the radio is not used. To complete the installation you must color match the wires to the wires on your aftermarket radio.

Here is a PDF Version

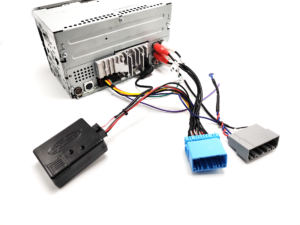
Blue 20 Pin Connector A (All Years)

PIN COLOR FUNCTION
A1 Yellow Constant 12V+
A3 White (RCA) FL+ RCA
A4 Red (RCA) FR+ RCA
A5 White (RCA) RL+ RCA
A6 Red (RCA) RR+ RCA
A8 Gray Steering Wheel Control Output
A9 Red Switched 12V+
A10 Blue FM Antenna Power Input
A11 Black Ground
A12 Orange Illumination Output 12V+
A13 Black (RCA) FL- RCA
A14 Black (RCA) FR- RCA
A15 Black (RCA) RL- RCA
A16 Black (RCA) RR- RCA
A20 Black Steering Wheel Control Ground


Gray 26 Pin Connector B (04-06 Only)

Pin Color Function
B1 Blue Twisted GA-NET+ Resistor Loop
B3 Blue Factory Amplifier Turn on Input 12V+
B13 White (RCA) Subwoofer + RCA
B14 Red Twisted GA-NET+ Resistor Loop
B25 Black (RCA) Subwoofer – RCA


Gray 40 Pin Connector C (07-08 Only)

Pin Color Function
C2 White (RCA) Subwoofer + RCA
C9 Red Twisted GA-NET+ Resistor Loop
C22 Black (RCA) Subwoofer – RCA
C29 Blue Twisted GA-NET+ Resistor Loop
C35 Blue Factory Amplifier Turn on Input 12V+


Gray 2 Pin Connector D (07-08 Only)

Pin Color Function
D2 Black Antenna Signal AM/FM
D3 Blue Antenna Power Input 12V+

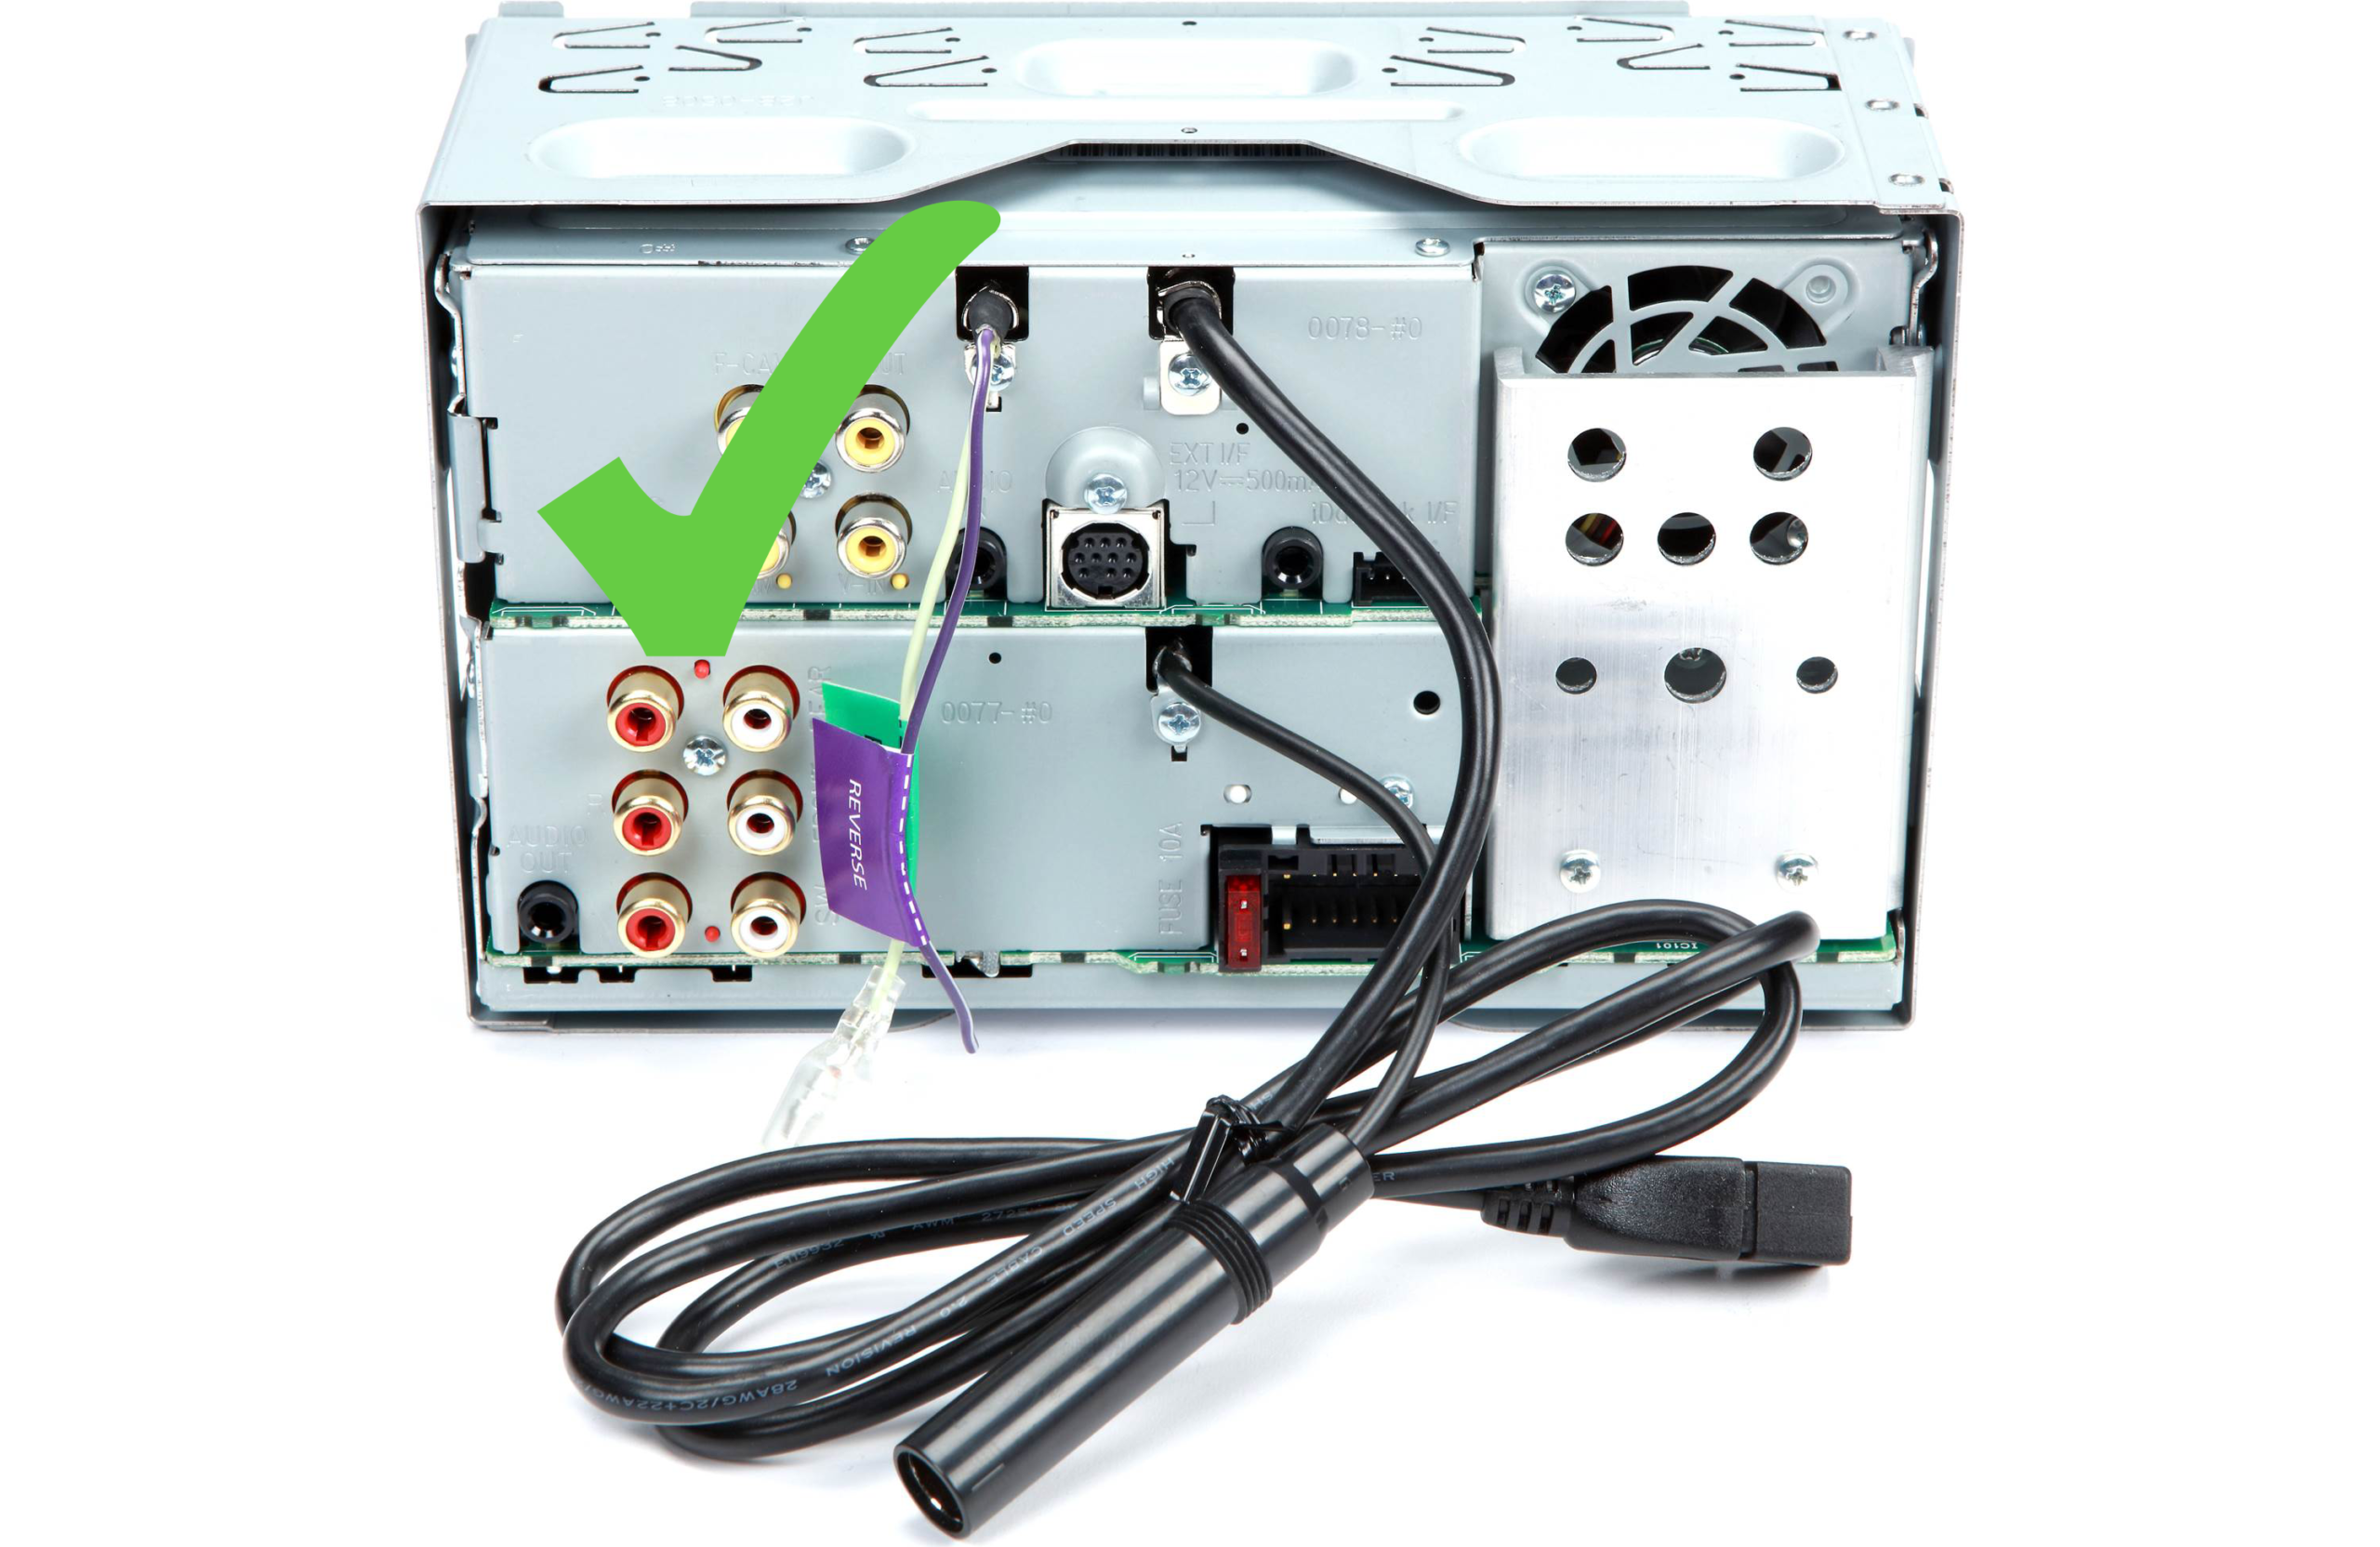
Pioneer/Kenwood/Sony: Most Pioneer, Kenwood, and Sony radios only have one blue/white wire. This blue/white wire must be connected to the blue wires on the connectors provided in our wiring otherwise you will have no sound. If you are having trouble please call or text 877-542-2872

Posted on Leave a comment

POST Aftermarket Radio Installation Questions

After upgrading your radio you may be experiencing some issues. The most common issues we are aware of are speaker hissing, speaker whining, steering wheel controls not working, no audio, no power and power cycling issues.
Aftermarket Radio speakers hissing
If your speakers are hissing or whining your first step is to thoroughly clean and tighten the battery terminals. This seems trivial but will cause the speakers to hiss. If cleaning the battery terminals did not help the next step is to disconnect the factory center dash speaker. You can disconnect this speaker by carefully prying up the grill above the clock and reaching into disconnect the speaker. That speaker is usually the only one hissing after you upgrade the radio.
Aftermarket Radio whining coming from speakers
The whining is most likely alternator feedback and if you hear it through every speaker than it most likely indicates that your factory amplifier is bad/going bad. Even though with the factory radio you did not have this issue if you encounter it after upgrading the radio it is still the amp and not the radio. If you only have whine in one speaker then it could be a bad RCA port or RCA cable but if its in all speakers then you will need to replace the factory amplifier with another used one, have yours repaired or replace it with another amplifier all together we have PNP amps and amp bypass harnesses available.
Aftermarket Radio steering wheel controls not working
If your steering wheel controls are working then the process of elimination to get them working is as follows. If you have a kenwood is the blue/yellow wire connected to the brown wire (with headphone jack). If you have a radio where the 3.5mm headphone jack plugs straight into the back of the radio is the plug seated all the way in. If the connections are correct and secure then your next step is programming. We recommend and only sell the AXSWC so if you are using another module you will need to look for specific instructions of that modules. The AXSCW has a reset button that you must activate is programming wasn’t successful on the first try. All you need to do is hold the programming button for 3 seconds and then let go. The button is on the same side as the LED light it is in the other hole form the LED. After you held the button for three seconds and let go it will begin to flash red/green very quickly. Now press and hold volume up on the steering wheel. The led will flash several times with red and green flashes slowly then quickly, then finally it will turn solid red after about 15 seconds. Once it does release the volume up button cycle the key on and off and the controls should begin working. If they do not work you will need to switch the radio mode or manually program. We have a video demonstration on how to accomplish this on youtube. If you are having trouble just call us at the number on the button of this email. M-F 10-6PM.
Aftermarket Radio no audio
If you have no audio after installing an aftermarket radio this is most likely because the factory amplifier is not turning on first verify you have connected the blue/white wire often labeled remote/amp on from your aftermarket radio the corresponding wire on the grey plug from the accessories we sent you. If this occurs on a plug and play harness it is often due to the manufacturer changing the location of the pin with the blue/white to another location. Verify that the harness we sent you and the harness that came with your radio have the wires in the same locations. If the blue/white wire is in a different location then that is your issue you can either unpin the wire or cut and connect and that will get your sound working. If this is something you rather not do then you can send the harness back to us so we can fix it. The shipping will be covered by us. If your connections are correct but you still aren’t getting sound check the settings of the radio to make sure the amplifier setting is set to on or sometimes it’s a setting call subwoofer that you need to make sure is on to enable the amplifier to work. If none of these solutions work for you please call or email us so we can help fix the issue.
Aftermarket Radio sound only form 3 speakers
If you only have audio out of certain speakers and not others check the connectors for any bent pins or any pins that are starting to come out of the harness this can happen and cause a bad connection or speakers to short out. When you connect the connectors to the factory harness or to the aftermarket radio you should hear a click and encounter some resistance but it shouldn’t take all the force you have to get the connector to come together. If everything checks out but you still have low or faulty audio a component in the harness could be bad reach out to us for a replacement.
Aftermarket Radio not turning on
If you have no power to your new aftermarket radio don’t panic this is often because you blew a fuse during installation. This is common and why often it is recommend to disconnect the battery before installation. Check the fuses at the passenger kick panel look for the radio and accessory fuse to verify they are both good. If you still have no power check the fuse on the back of the aftermarket radio usually right where the connector for the radio connects. If you still have no power you must check the fuses under the hood for blow fuses. The Acura system is very tied together so a fuse that may have nothing to do with the radio directly will cause it not to turn on. Check every single fuse if you cannot get power to the radio. If you connect the factory radio back (make sure to input the radio code) and it does work but the aftermarket radio does not then it might just be a bad or dead radio. You can also test the connectors for power if you have a multimeter to verify that the yellow wire has 12v and the red wire has 12v when you turn the key on.
Aftermarket Radio keeps shutting off by itself
If you installed an aftermarket radio and the radio keep shutting off as you are driving or when you hit a bump. This means one of the connections is not seated properly or there is a fault. You can test for faults with a multimeter and set it to continuity than begin turning and twisting the harness while check if the continuity stops. Before the continuity test make sure all the connectors are seated properly as that can also cause an issue.
Posted on Leave a comment

Plug and Play Harness Questions

Our harnesses allow you to complete a DIY installation or a Plug and Play installation. A DIY installation requires you to wire the harnesses provided by us and the harnesses that came with your radio together. The harnesses we provide remove the need to wire splice or cut any factory wiring. The connectors will just plug into the factory connections and provide color coded wires for you to match to the wiring that came with your aftermarket radio.

With our DIY products the harnesses eliminate the need to wire splice/cut any of the factory wiring and instead give you harnesses that plug into the factory wiring and provide clear labeled wires/instructions for you to follow and wire your radio together. You can install aftermarket equipment such as subwoofers and amplifiers with our harnesses. Our Plug and Play installation harnesses are already wired with all the necessary connections for your installation. Those connections include the connectors for your specific vehicle and the connection that plugs into your aftermarket radio. With our PNP harness all you have to do is plug the components in and start enjoying your new radio.

Our plug and play harnesses require no wiring at all. They are custom made to the radio you plan to install. In order to prepare and ship a PNP harness you must provide us with the radio brand you plan to install and sometimes the radio model. The harness is then made specific to your vehicle and radio combination. The brand of radio you plan to install might be a pioneer, or a Sony, Kenwood etc. But the model number of the radio will be something like pictured below.

Some radios require you to connect one or two wires yourself as they are physically attached to the radio and we cannot connect them for you. The harness will have these labeled whether they are for the steering wheel controls or the parking break. The steering wheel control wires are often blue/yellow on kenwood and brown on other radios. You will need to hook up the blue/yellow to the brown wire provided in our harness. The parking break wire is another connection you will have to make it will either need to be hooked up to your parking break or you can add a parking break bypass to your order and remove the need to make this extra connection.

Posted on Leave a comment

Acura TL Aftermarket Radio Install Questions

Our accessories allow you to retain the factory steering wheel controls excluding the call control buttons. These buttons include volume up, volume down, mode, next track and previous track. The other buttons can be retained but require modifications to the steering wheel wiring and manual programming which result in an installation that is not plug and play.

If you want a plug and play installation then only the buttons referenced above will auto program. When replacing the factory radio with an aftermarket stereo you will also lose the center channel audio. Although you lose the center channel when upgrading the stereo, the new stereo will allow the factory system to be much louder and have better bass response.

The components in our kits allow you to keep the factory subwoofer of your Acura functioning with the factory radio as well. There is a SUB RCA that you will connect to the aftermarket radios SUB output and that will keep your factory subwoofer functioning. If you would like to add aftermarket subwoofers to your Acura you can do so with our harness/kit as well. You will just need to split the RCA to send signal to the factory sub and the other subwoofer or you can disconnect the factory sub.

Lastly, If you have factory navigation and it is working then our harness will allow it to keep working with the aftermarket radio. The touchscreen will respond and you will be able to look at the map but you will loose any audible warnings such as turn by turn directions. The factory backup camera if equipped will still work. You will also lose the factory HFL or bluetooth hands free but this feature is found in your new radio so it is unneeded. If your factory navigation is not working you can still replace the radio without an issue. If you want to place an aftermarket radio where the factory navigation screen goes, this can be done but you will need to make permanent modifications to your vehicle. We don’t recommend or support replacing the factory navigation with another radio, this includes the tesla style radio.

As for radio selection you can use any radio that has six RCA ports on the back for audio (3 pairs) and also offers a steering wheel control input. Many amazon/eBay non branded radio will not work either because they don’t have the correct inputs/outputs or because they will not fit correctly in the dash kit. When replacing the radio the part that is replaced is where you adjust the volume. So the two knobs are replaced with an opening for a standard double din radio. This opening can accommodate a standard single din radio and a pocket or a double din radio. The bigger double din radios will not fit. Other radios may fit incorrectly and leave a gap we recommend using a name brand radio from sony, kenwood, jvc, boss, pioneer, or jensen to ensure you have the best installation experience.

If when upgrading your radio you want to install a backup camera this is also a possibility and universal backup camera can be installed. It will just require you run wires from the rear of the vehicle to the front. Almost all backup cameras are compatible with our accessories. If you are looking for an OEM style camera you can visit our store to find one like the one pictured below.


Posted on 2 Comments

3G Acura TL Climate Control Display Lights

If your climate control bulbs aren’t lighting up this article should help you determine the cause. First a disclaimer everyone’s situation is different the reason your bulbs may not be working may not be the same reason as someone else, if you proceed to troubleshoot and cause damage to your vehicle you are solely responsible.

My situation is:

Only a few lights don’t work:

This is most likely due to bad bulbs please check your Acura parts source for the correct part number for your vehicle Type S bulbs are different. Here are the common part numbers

39055-SEP-A31
39055-SEP-A22
39054-SEP-A01


None of my lights work:

The first step here is to check your fuses and make sure none are blown the TLs electrical system is pretty tied together and if one fuse goes out it sometimes takes out another, also the illumination fuse is under the hood and in the kick panel so both must be good for the lighting to work correctly.

All of my my fuses are good but no lights work:

This is the worst one. According to https://acurazine.com/forums/3g-tl-problems-fixes-114/light-bulbs-around-navigation-screen-out-851060/ and other posts/forums this leads to the electronics within the climate control display going bad. This happens when you put a bulb in the wrong orientation or put the wrong bulb in a location. This means that the electronics inside the board must be repaired and we currently don’t know anyone who does this repair. This almost always leads to just having to replace the climate control display. If you have navigation yes this means the entire navigation screen. Before condemning the climate control you can try replacing the bulbs to see if maybe they all just went out at once, this can happen but it is very rare.

Climate control displays are not interchangeable between all TLs only from models 04-06 and then 07-08 so a 2008 display will not work in a 2004 and vice versa.

Can I replace the bulbs with LED lights?

Yes you can we don’t really know too much about this topic but you would need nano wedge bulbs that are 14v and 8v and the color you want them to be.

Posted on Leave a comment

Acura TL Aftermarket Radio DIY KIT Instructions

Download a copy

Disclaimer: Installing an aftermarket radio in your Acura TL will result in the loss of factory route navigation guidance, the loss of center channel audio and the loss of certain hands-free functionality within the factory system. All these features are easily obtained in your new aftermarket radio along with an amazing improvement in sound quality.

Notice: The following instructions will help you wire together our DIY kit with your aftermarket radio and steering wheel control adapter. We will refer to the blue plug as connector A and the grey plugs as connector C26 & C40. On Acura’s from 2004 to 2006 you will find connector A & C26. On Acura’s from 2007 to 2008 you will find connector A, C40 & D(antenna connector). There is also a white plug on all Acura’s that is not used when installing and aftermarket radio it is for the factory XM unit.

Pin Color Function
A1 Yellow Constant 12V
A3 White(RCA) Front Left + RCA
A4 Red(RCA) Front Right + RCA
A5 White(RCA) Rear Left + RCA
A6 Red(RCA) Rear Right + RCA
A8 Red/Black Steering Wheel Control +
A9 Red Switched 12V
A10 Blue FM Power Antenna (04-06)
A11 Black Ground
A12 Orange Illumination
A13 Black(RCA) Front Left – RCA
A14 Black(RCA) Front Right – RCA
A15 Black(RCA) Rear Left – RCA
A16 Black(RCA) Rear Right – RCA
A20 Black Steering Wheel Control –


Pin C26 Color Function
C1 Blue GA-NET + (CANBUS)
C3 Blue Factory Amp Turn On
C13 White(RCA) Sub + RCA
C14 Red GA-NET – (CANBUS)
C25 Black(RCA) Sub – RCA


Pin C40 Color Function
C2 Black Sub + RCA
C9 Black GA-NET + (CANBUS)
C22 Black Sub – RCA
C29 Red GA-NET – (CANBUS)
C35 Black(RCA) Factory Amp Turn On


Pin D Color Function
D2 Black Antenna Signal FM/AM
D3 Blue Power Antenna (FM/AM)


The 2007 to 2008 Acura TLs do not have pin A10 instead the power antenna 12V signal must be connected to pin D3. Pioneer radios only provide one blue wire for amp turn on and power antenna connect both blue wires D3 and C3/C35 to that blue/white wire to have full functionality. Kenwood’s and Alpines offer an amp turn on wire along with a power antenna wire be sure to match each wire to the correct one.

The steering wheel control interface needs to connected to pin A8 Steering wheel control positive, with our harness pin A20 is already connected to ground. If you have any questions or are stuck please call us at 631-538-0068 or email us at info@mobilemaxcaraudio.com. Thank you for your business and congratulations on the new radio!

Posted on 15 Comments

Acura TL Aftermarket Radio No Sound | Not Working

Did you install a new aftermarket radio in your Third Generation(2004,2005,2006,2007,2008) Acura TL? Is the aftermarket radio powering on but you don’t hear anything through the speakers?or Do you get sound through the speakers but it gets very distorted at higher volumes? Is your factory navigation touchscreen not working after the install? If you are experiencing any of these symptoms you are in luck because we have the solution for you whether you have an 04-06 or an 07-08 Acura TL.

Continue reading Acura TL Aftermarket Radio No Sound | Not Working

Posted on 2 Comments

Acura TL Factory Amplifier Replacement

Are you not satisfied with the sound quality of your Acura TL’s factory sound system? Are you starting to consider replacing the factory amplifier? We recommend you start with replacing the stereo if you are really looking for the best bang for your buck when it comes to upgrading. If you are set on upgrading the factory amplifier the information below should help. If you find that your Acura isn’t as loud as you would expect it to be the cause is often a factory amplifier going bad. The bad amplifier will limit the audio output and you will experience very low audio levels. This is a common failure of the Acura TL factory amplifier. The best solution is to simple replace the amplifier with one of our plug and play amps or another factory amplifier that does not suffer from the same problem.

This video will help you also.

Continue reading Acura TL Factory Amplifier Replacement

Posted on 5 Comments

Acura TL Factory Subwoofer Replacement

Are you looking to add more bass to your Acura TL? You would be surprised at the upgraded sound quality and bass if you upgrade your factory radio and use the factory speakers. You can find more information on that here. If you are a bass head or have already made your mind up that you are going to get rid of the factory subwoofer once and for all prepare for a challenge my friend. Check out our subwoofer and amp upgrade packages.

Continue reading Acura TL Factory Subwoofer Replacement