Posted on 4 Comments

Acura TL Factory Amplifier Replacement

Are you not satisfied with the sound quality of your Acura TL’s factory sound system? Are you starting to consider replacing the factory amplifier? We recommend you start with replacing the stereo if you are really looking for the best bang for your buck when it comes to upgrading. If you are set on upgrading the factory amplifier the information below should help. If you find that your Acura isn’t as loud as you would expect it to be the cause is often a factory amplifier going bad. The bad amplifier will limit the audio output and you will experience very low audio levels. This is a common failure of the Acura TL factory amplifier. The best solution is to simple replace the amplifier with one of our plug and play amps or another factory amplifier that does not suffer from the same problem.

This video will help you also.

Continue reading Acura TL Factory Amplifier Replacement

Posted on 5 Comments

Acura TL Factory Subwoofer Replacement

Are you looking to add more bass to your Acura TL? You would be surprised at the upgraded sound quality and bass if you upgrade your factory radio and use the factory speakers. You can find more information on that here. If you are a bass head or have already made your mind up that you are going to get rid of the factory subwoofer once and for all prepare for a challenge my friend. Check out our subwoofer and amp upgrade packages.

Continue reading Acura TL Factory Subwoofer Replacement

2004 05 06 Acura TL Aftermarket Radio Install Complete Kit

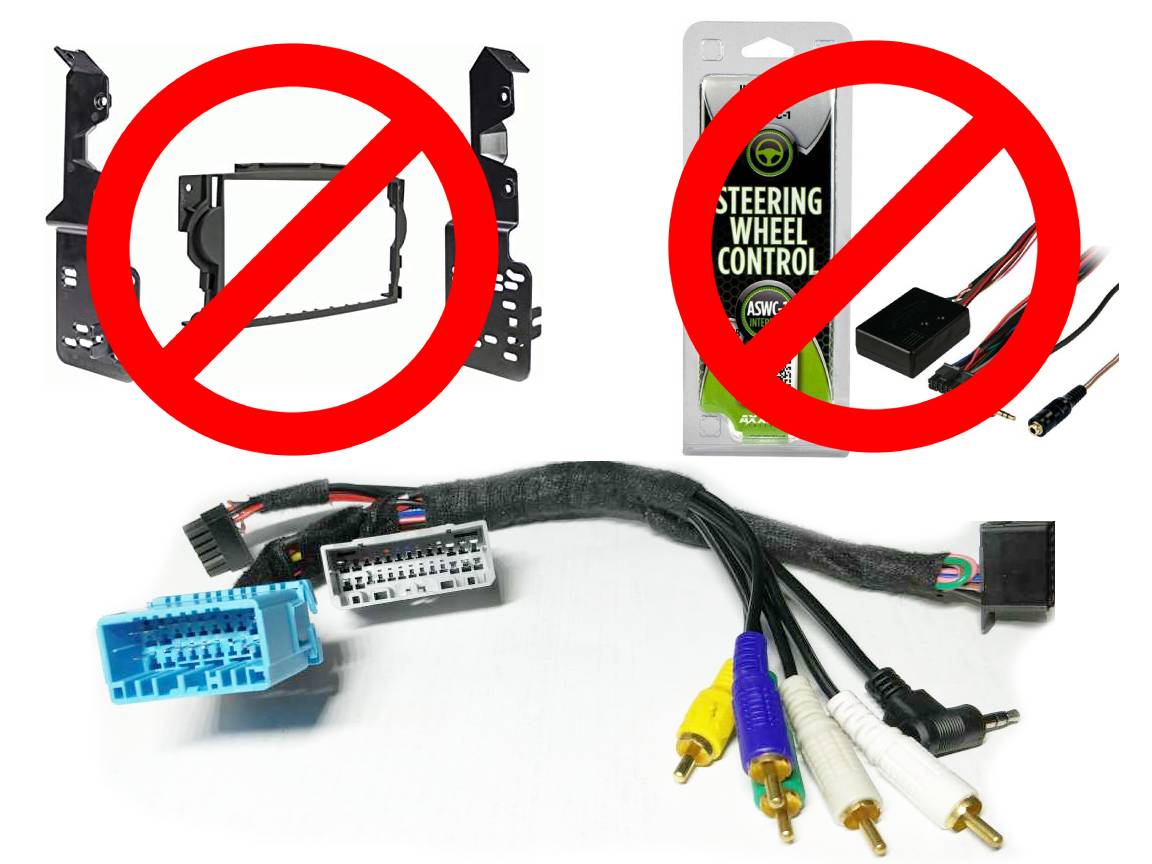
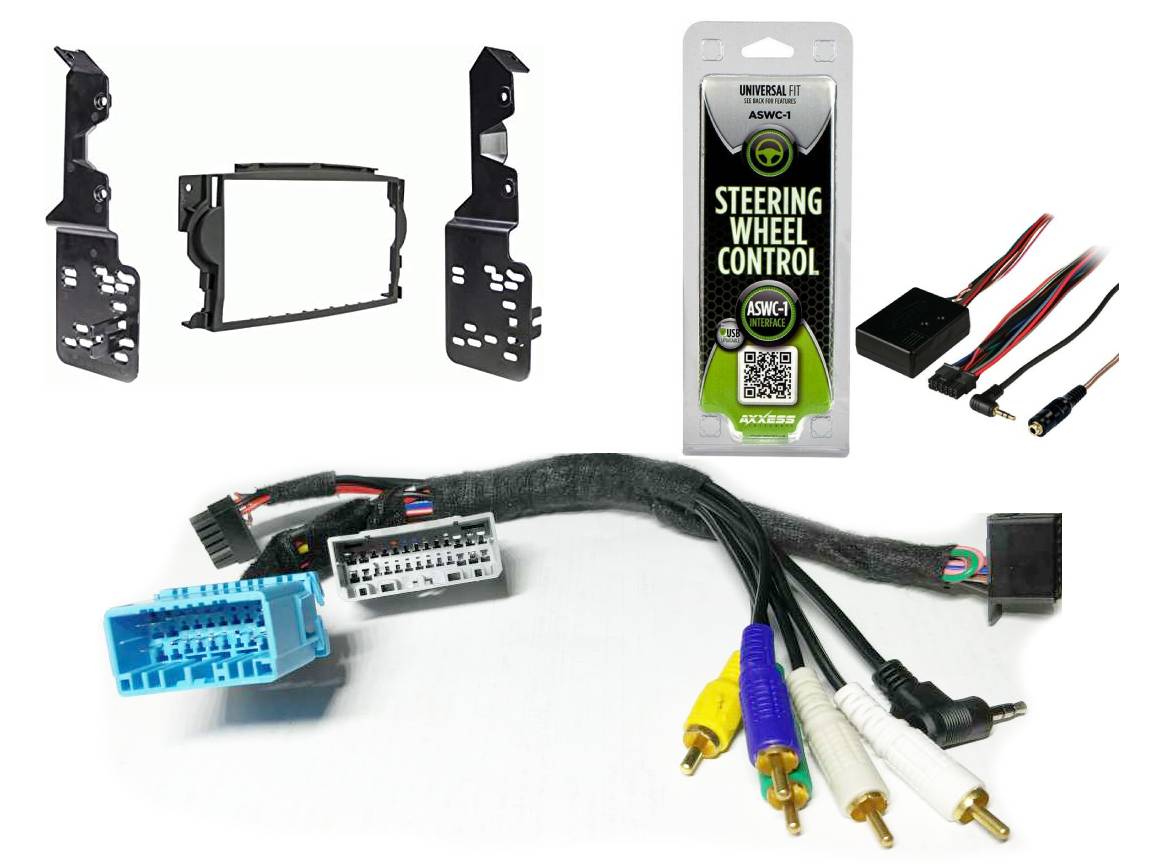
Simplify installing a new aftermarket in-dash stereo receiver in your 3rd generation Acura TL covering years 2004 2005 and 2006 with our radio installation complete kit. Our install kit is complete with all the necessary accessories you will need to install a new stereo in your Acura TL. This kit does not include a radio. If you are looking for a kit including a radio check out our radio packages. The accessories included in this kit are the dash kit, a custom made wiring harness and the AXSWC steering wheel control interface. Our custom harness allows you to have a plug and play installation with a supported compatible radio. The dash kit allows you to install a new aftermarket radio in the factory radios location and the AXSWC allows you to control the new aftermarket radio with your factory steering wheel controls.

The AXSWC included in this kit will allow you use volume up, volume down, next, previous and mode to control the new aftermarket radio. You will not be able to keep the call control buttons or the navigation control buttons. The steering wheel controls should auto program when you first turn on the new aftermarket radio. If the steering wheel controls do no auto program please check the AXSWC instructions or call us at 877-542-2872 for help.

The dash kit included in this kit can accommodate a double din aftermarket radio. If you need a single din dash kit please reach out via email. The dash kit can easily hold a 6.8″ 6.9″ or 7″ touchscreen radio. If your radio has a screen bigger than 7″ it will stick out past the dash kit and not sit flush against your dashboard. If you are using an Amazon or eBay branded radio there is a possibility the aftermarket radio will not fit properly inside the dash kit. The pictures on this listing show a traditional double din pioneer radio and a single din pioneer radio for your reference. If you need more specifics about the dash kit please check the instructions here

The custom harness included in this radio install kit will allow you to install a new aftermarket car stereo receiver without the need for any wire splicing or wire tapping. A parking bypass is highly recommended with your order if your radio brand is Pioneer, Kenwood or Alpine. You can learn more about the bypass and what it does by using this link. The wiring harness is comprised of four different connectors. There are two connectors that plug into the factory radio wiring harnesses then there is one connector that plugs into your specific aftermarket radio. The aftermarket radio specific connector changes depending on what radio brand/model you are going to install but the two primary connectors remain the same. The last connector is for the AXSWC steering wheel control interface. The wire harness is also color coded and labeled so you can easily add a backup camera, an aftermarket amplifier or a parking bypass yourself.

Our plug and play harness integrates with the factory amplifier to retain your front door speakers and tweeters, the rear deck speakers and the factory subwoofer. Your center dash speaker will no longer work. Our custom harness allows your factory navigation and touchscreen to continue to function with an aftermarket radio . Our harness uses RCAs to feed a low level signal from the aftermarket radio to the factory amplifier. Please verify your factory amplifier is working and you aren’t having any volume issues before replacing the factory radio. If you are having volume issues they are most often caused by the factory amplifier. If you want to replace your factory amplifier please check out our plug and play amplifier. If you wish to bypass the factory amplifier in your Acura and power your speakers directly from your aftermarket radio check out the amplifier bypass.

When you upgrade the stereo with our harness your navigation touchscreen and factory backup camera will continue to function but there will be no audio prompts from the factory navigation. You will lose Sirius XM and the factory handsfree link functionality.

In order for your aftermarket radio to be compatible with this harness it must have at least 5 RCA outputs including FL, FR, RL, RR, and SUB. The brands in the selection menu below have been verified by our staff to work with our harness. If you are unsure if your radio will work with our harness please call us at 877-542-2872. Other radio brands may work with our harness but they have not been verified by our staff so they are not listed in the dropdown.

In order to complete your order we will need your aftermarket radios model number please include it in the billing checkout notes or if you forget please include a valid phone number at checkout where me may reach you in case of any questions.

If you have questions regarding shipping or product availability please check out our FAQ Section. If you are having issues with your radio after installation check out this article.

FAQ.

  1. Will this allow me to keep my factory navigation working with a new aftermarket radio?
    – Yes your factory navigation will continue to work but there will be no audio prompts.
  2. Can I add an amplifier and subwoofers with your harness?
    – Yes you can. You will just need run your RCAs to the back of the radio and wire tap the blue or blue/white wire of the harness.
  3. Can I add a backup camera with your harness?
    – Yes just follow the instructions provided in the radios owners manual or the cameras manual to complete the installation.
  4. Can I use a random radio I found on Amazon or eBay that has an unknown brand?
    – Most likely not. If the radio you purchased on Amazon is less than $100 it most likely won’t have all the features and ports needed for you to complete the installation.
  5. Do I get to keep all my speakers?
    – Yes all speakers are retained, except for the center dash speaker.
  6. Do I get to keep my steering wheel controls?
    – Yes. The AXSWC in included in this kit. You will get to keep volume up, volume down, next, prev and mode. The call control buttons will not be retained.
  7. Why can’t I keep my center speaker?
    – Most aftermarket radios don’t have a center speaker output therefore there is no audio source for the center speaker. We recommend disconnecting the center speaker during installation.
  8. Can I install a radio where the factory navigation screen goes?
    -This is possible but requires you to create custom wiring and fabrication. It is a really advanced project that is not DIY friendly.
  9. Does this kit include a radio?
    – No this listing is just for the accessories necessary to install an aftermarket radio if you are looking for a radio check out our radio packages.
  10. What if the radio I bought doesn’t fit into the Metra dash kit?
    -If your new aftermarket radio does not fit into the dash kit you will have to get a different radio. It is possible to modify the dash kit to fit bigger radio but it requires modifications that might weaken the dash kit or break it so we don’t modifying it.

If you are unsure about how to hook up your wiring harness please watch the instructional video below. The RCAs on the harness connect to the RCA ports on the back of your aftermarket radio (some radios come with an additional harness where the RCAS are). The black power plug of the aftermarket radio will plug right into your aftermarket radio and the grey and blue connectors will plug into the factory harnesses. If you have the AXSWC then that will plug into the small black molex plug. If you have any issues with your harness or installation please call 877-542-2872.

2004 2005 2006 Acura TL Wired Radio Receiver Wiring Harness

If you are having trouble installing a new aftermarket radio in your 3rd Generation Acura TL spanning years 2004 2005 2006 or you want an easy plug-and-play installation, this custom-made wiring harness removes the need for you to do any wiring. After placing your order, our team will create a custom wire harness for your exact aftermarket radio installation. The custom harness we create will allow you to install a new aftermarket car stereo receiver without the need for any wire splicing or wire tapping. This wiring harness, when used with a compatible aftermarket radio, will result in a plug-and-play installation for your Acura. A parking bypass is highly recommended with your order if your radio brand is Pioneer, Kenwood, or Alpine. You can learn more about the bypass and what it does by using this link.

This wire harness is comprised of four different connectors. There are two connectors that plug into the factory radio wiring harnesses, and then there is one connector that plugs into your specific aftermarket radio. The aftermarket radio-specific connector changes depending on what radio brand or model you are going to install, but the two primary connectors remain the same. The last connector is for the AXSWC steering wheel control interface. The AXSWC is an additional purchase; it is not included with your wire harness. The wire harness is also color-coded and labeled, so you can easily add a backup camera, an aftermarket amplifier, or a parking bypass yourself.

If you plan to retain your steering wheel controls, you will only be able to keep volume up, volume down, next, previous, and mode. You will not be able to keep the call control buttons. When you replace the radio, you will lose the factory hands-free functionality and the factory XM radio, along with your factory navigation’s audio prompts.

Our plug-and-play harness integrates with the factory amplifier to retain your front door speakers and tweeters, the rear deck speakers, and the factory subwoofer. Your center dash speaker will no longer work. Our custom harness allows your factory navigation and touchscreen to continue to function with an aftermarket radio. Our harness uses RCAs to feed a low-level signal from the aftermarket radio to the factory amplifier. Please verify your factory amplifier is working and you aren’t having any volume issues before replacing the factory radio. If you are having volume issues, they are most often caused by the factory amplifier. If you want to replace your factory amplifier, please check out our plug-and-play amplifier. If you wish to bypass the factory amplifier in your Acura and power your speakers directly from your aftermarket radio, check out the amplifier bypass.

In order for your aftermarket radio to be compatible with this harness, it must have at least five RCA outputs, including FL, FR, RL, RR, and SUB. The brands in the selection menu below have been verified by our staff to work with our harness. If you are unsure if your radio will work with our harness, please call us at 877-542-2872. Other radio brands may work with our harness, but they have not been verified by our staff, so they are not listed in the dropdown.

In order to complete your order, we will need your aftermarket radio model number. Please include it in the billing checkout notes, or if you forget, please include a valid phone number at checkout where we may reach you in case of any questions.

If you have questions regarding shipping or product availability, please check out our FAQ Section. If you are having issues with your radio after installation, check out this article.

FAQ.

  1. Will this allow me to keep my factory navigation working with a new aftermarket radio?
    – Yes, your factory navigation will continue to work, but there will be no audio prompts.
  2. Can I add an amplifier and subwoofers to your harness?
    – Yes, you can. You will just need to run your RCAs to the back of the radio and wire tap the blue or blue/white wire of the harness.
  3. Can I add a backup camera to your harness?
    – Yes, just follow the instructions provided in the radio owner’s manual or the camera manual to complete the installation.
  4. Can I use a random radio I found on Amazon or eBay that has an unknown brand?
    Most likely not. If the radio you purchased on Amazon is less than $100, it most likely won’t have all the features and ports needed for you to complete the installation.
  5. Do I get to keep all my speakers?
    – Yes, all speakers are retained, except for the center dash speaker.
  6. Do I get to keep my steering wheel controls?
    -Yes, but an additional part is required. The AXSWC can be found here. You will get to keep volume up, volume down, next, prev, and mode. The call control buttons will not be retained.
  7. Why can’t I keep my center speaker?
    Most aftermarket radios don’t have a center speaker output; therefore, there is no audio source for the center speaker. We recommend disconnecting the center speaker during installation.

If you are unsure about how to hook up your wiring harness, please watch the instructional video below. The RCAs on the harness connect to the RCA ports on the back of your aftermarket radio (some radios come with an additional harness where the RCAS are). The black power plug of the aftermarket radio will plug right into your aftermarket radio, and the gray and blue connectors will plug into the factory harnesses. If you have the AXSWC, then that will plug into the small black Molex plug. If you have any issues with your harness or installation, please call 877-542-2872.

 

2007 2008 Acura TL Navigation & Subwoofer/Amp Retention

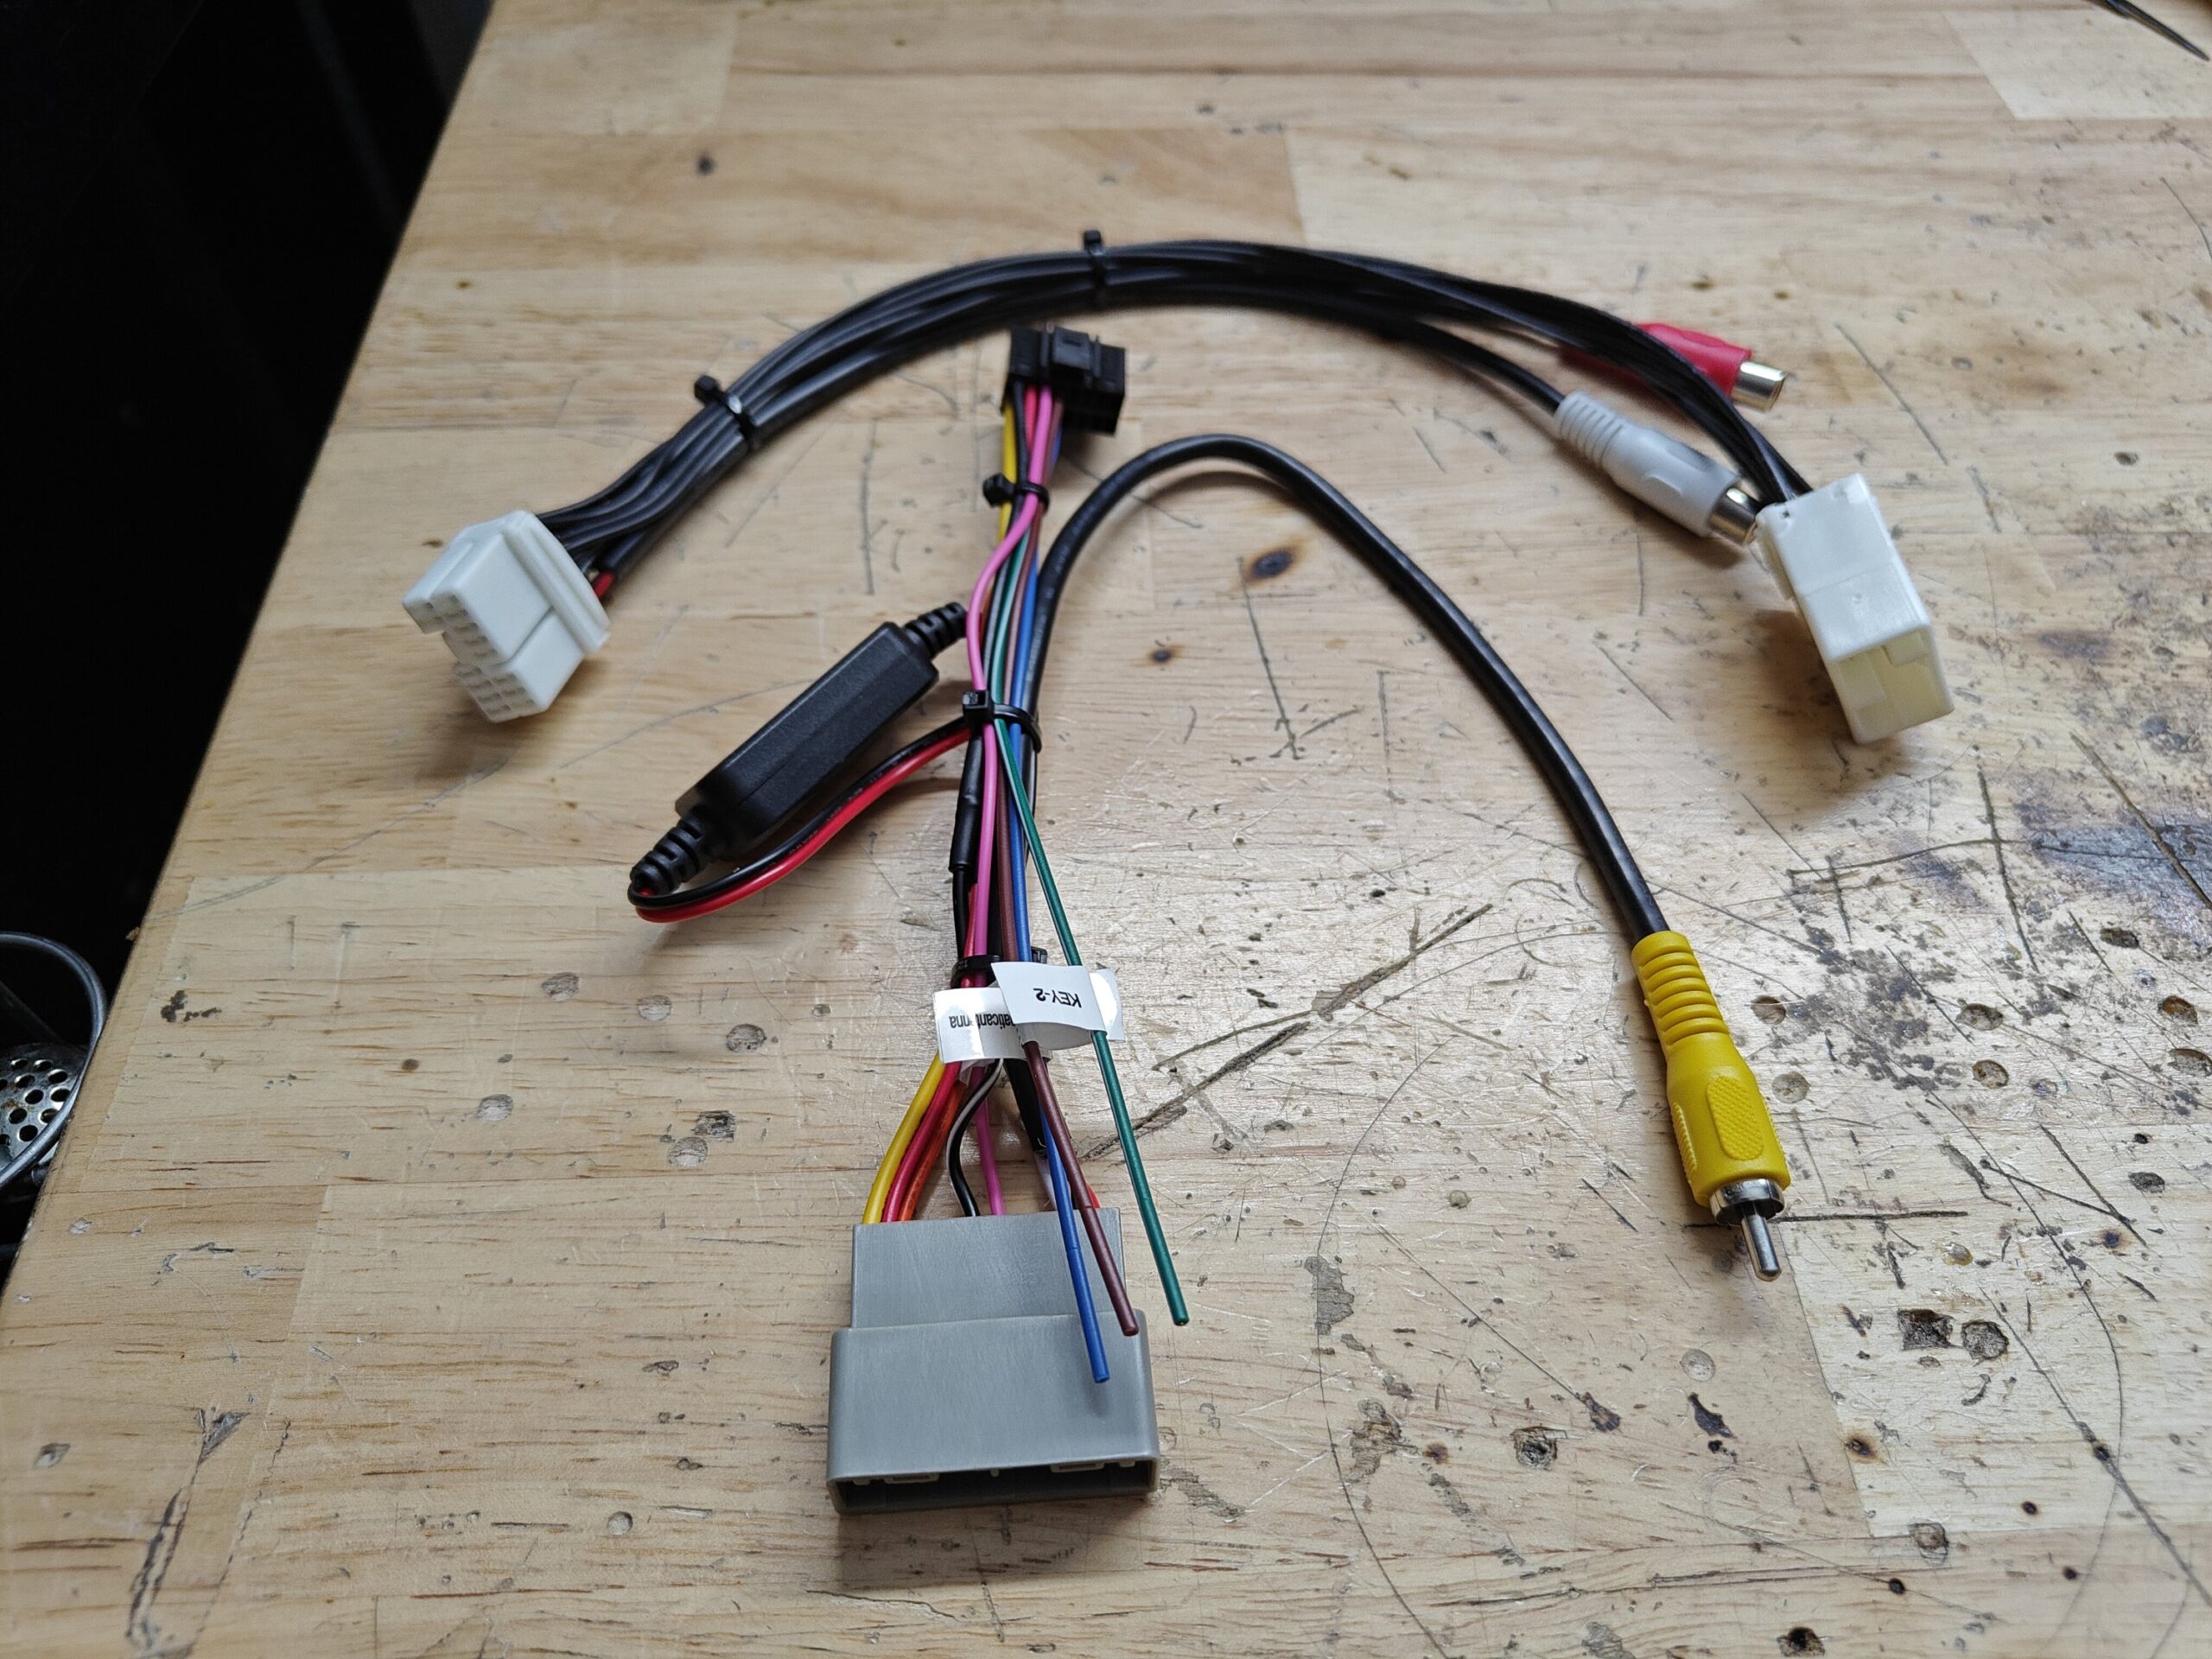
This harness is used to wire an aftermarket radio to your Acura TL. When adding an aftermarket radio to your vehicle you will need the standard 20 pin connector/harness in addition to this harness.

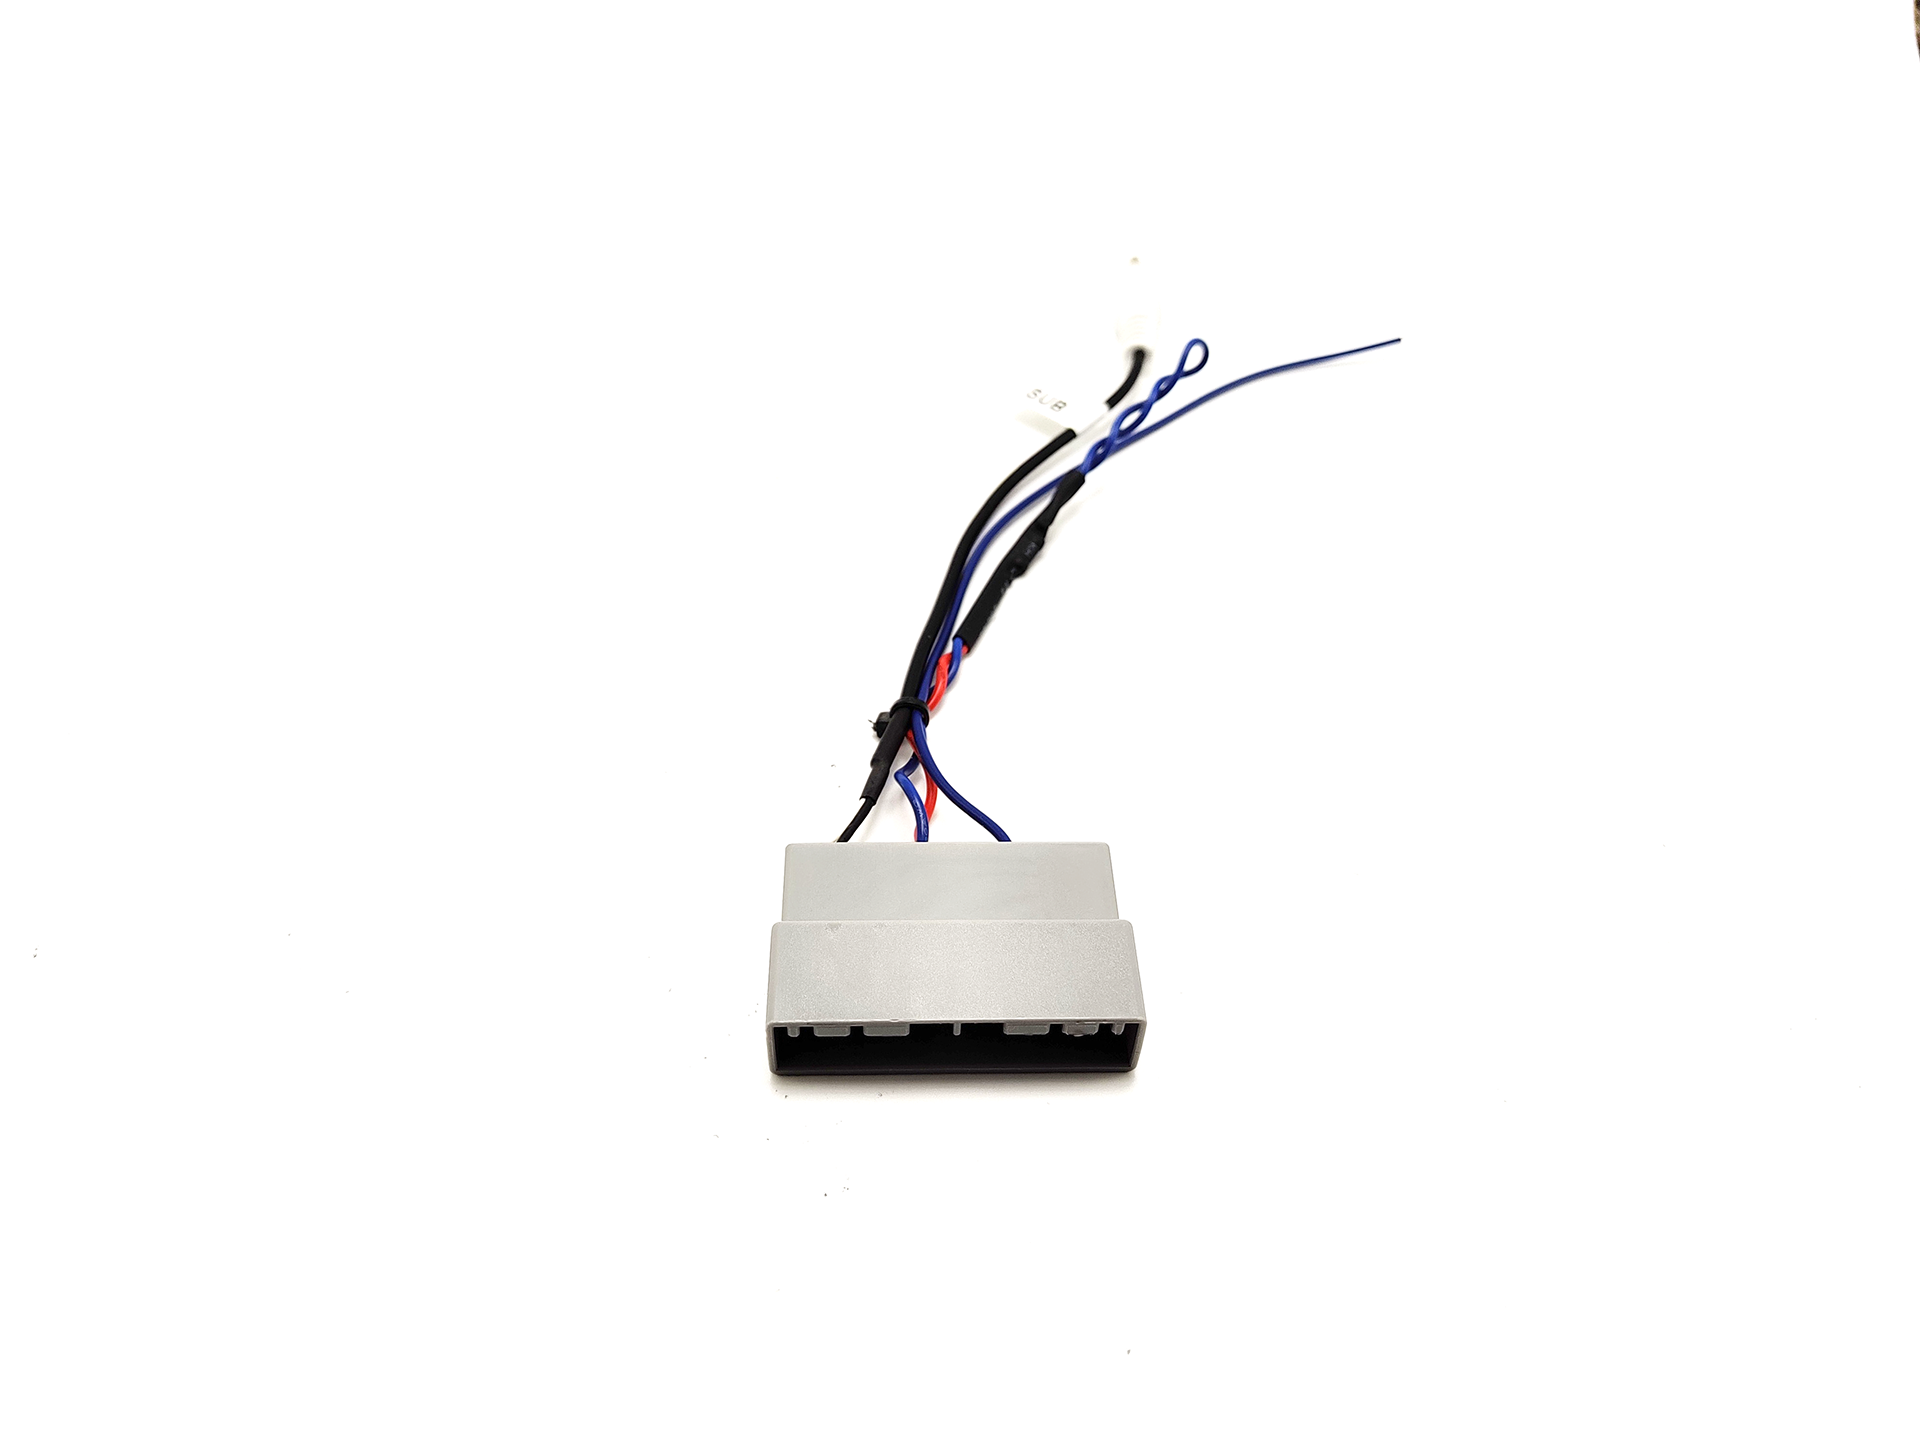
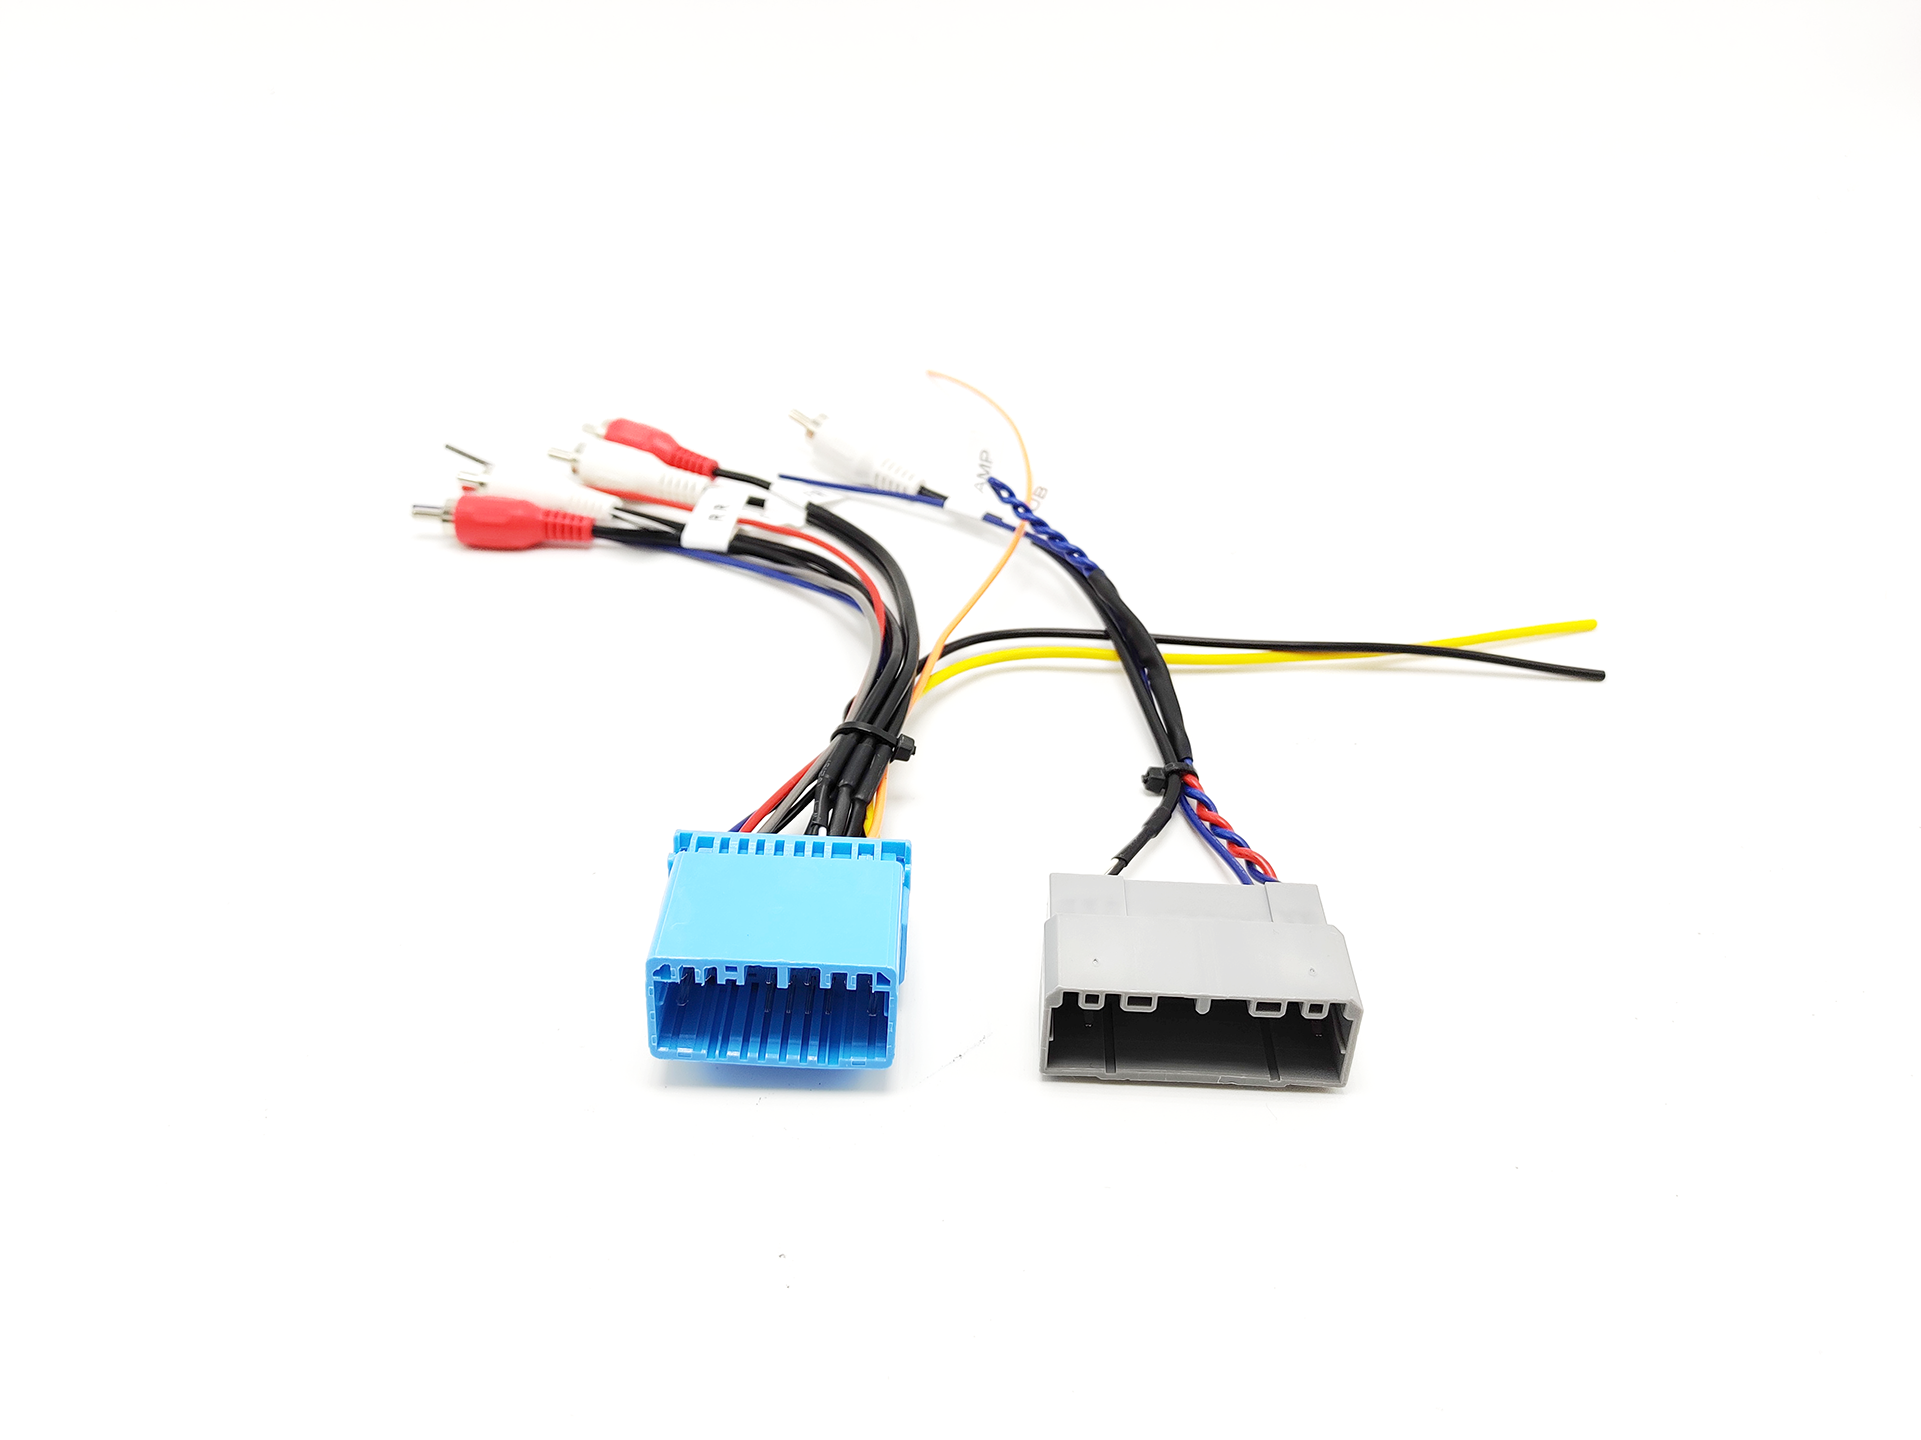
This harness includes the needed 68ohm resistor to keep your navigation working with an aftermarket radio. It also includes the amp turn on wire needed to power on your factory amp, this wire will need to be connected to the blue wire from your aftermarket radio. Then it contains a single RCA to connect to the subwoofer out of your aftermarket radio. Note most aftermarket radios offer dual sub outputs but the TL only has one subwoofer.

THIS HARNESS IS PLUG AND PLAY NO SPLICING OR WIRING TAPPING WIRES FROM YOUR VEHICLE!!

2004 2005 2006 Acura TL Navigation & Subwoofer/Amp Retention

This harness is used to wire an aftermarket radio to your Acura TL. When adding an aftermarket radio to your vehicle you will need the standard 20 pin connector/harness in addition to this harness.

This harness includes the needed 68ohm resistor to keep your navigation working with an aftermarket radio. It also includes the amp turn on wire needed to power on your factory amp, this wire will need to be connected to the blue wire from your aftermarket radio. Then it contains a single RCA to connect to the subwoofer out of your aftermarket radio. Note most aftermarket radios offer dual sub outputs but the TL only has one subwoofer.

THIS HARNESS IS PLUG AND PLAY NO SPLICING OR WIRING TAPPING WIRES FROM YOUR VEHICLE!!

2004 2005 2006 Acura TL Aftermarket Radio Installation DIY Harness Combo

If you are upgrading to an aftermarket radio in your 2004 2005 or 2006 Acura TL this combination of harnesses simplifies the installation. There is no need to cut or splice any of the factory wiring. Instead to install your aftermarket radio simply color match the colors on this harness to the wires on your aftermarket radio harness. This harness combo allows you to retain your factory amplifier, subwoofer and navigation. The radio you choose must have 5/6 RCA ports on the back labeled FL, FR, RR, RL,SUB if your radio does not have these outputs you will need a line out converter. You can find printable instructions here.

Our harness combo utilizes RCA connections to send a low level (0v-4v) audio signal from the back of your new aftermarket radio to the factory amplifier in your Acura TL. Our harness combo integrates with the factory amplifier to keep all of your speakers working except the center channel. If you wish to keep the factory steering wheel controls with your new aftermarket radio you may also need the AXSWC steering wheel control interface. If you do plan to retain your steering wheel controls, you will only be able to keep volume up, volume down, next, previous and mode. You will not be able to keep the call control buttons. When you replace the radio you will lose the factory hands free functionality and the factory XM radio along with your factory navigation’s audio prompts.

Please verify your factory amplifier is working and you aren’t having any volume issues before replacing the factory radio. If you are having volume issues please check out our plug and play amplifier. If you wish to bypass the factory amplifier in your Acura and power your speakers directly from your aftermarket radio check out the amplifier bypass.

The 20 Pin Blue connector in this combo is used to provide:
– Constant Power = Yellow
– Ground = Black
– Accessory Power = Red
– Illumination = Orange
– Steering Wheel Control Output Wire = Gray
– Primary Speakers (FL, FR, RR, RL) = RCA

The 26 Pin Grey connector in this combo is used to:
– Amp Turn On for Factory AMP = Blue
– Retain Factory Subwoofer = RCA
– Retain Factory Navigation touch functions including buttons

If you need to see how to wire a line out converter to the speaker outputs off your new aftermarket radio please check this video.

If you have questions regarding shipping or product availability please check out our FAQ Section. If you are having issues with your radio after installation check out this article.

FAQ.

  1. Will this allow me to keep my factory navigation working with a new aftermarket radio?
    – Yes your factory navigation will continue to work but there will be no audio prompts.
  2. Can I add an amplifier and subwoofers with your harness?
    – Yes you can. You will just need run your RCAs to the back of the radio and wire tap the blue or blue/white wire of the harness.
  3. Can I add a backup camera with your harness?
    – Yes just follow the instructions provided in the radios owners manual or the cameras manual to complete the installation.
  4. Can I use a random radio I found on Amazon or eBay that has an unknown brand?
    – Most likely not. If the radio you purchased on Amazon is less than $100 it most likely won’t have all the features and ports needed for you to complete the installation.
  5. Do I get to keep all my speakers?
    – Yes all speakers are retained, except for the center dash speaker.
  6. Do I get to keep my steering wheel controls?
    -Yes but an additional part is required. The AXSWC you can find it here. You will get to keep volume up, volume down, next, prev and mode. The call control buttons will not be retained.
  7. Why can’t I keep my center speaker?
    – Most aftermarket radios don’t have a center speaker output therefore there is no audio source for the center speaker. We recommend disconnecting the center speaker during installation.


2007 2008 2009 Acura RDX Navigation Display Screen Upgrade

Summary

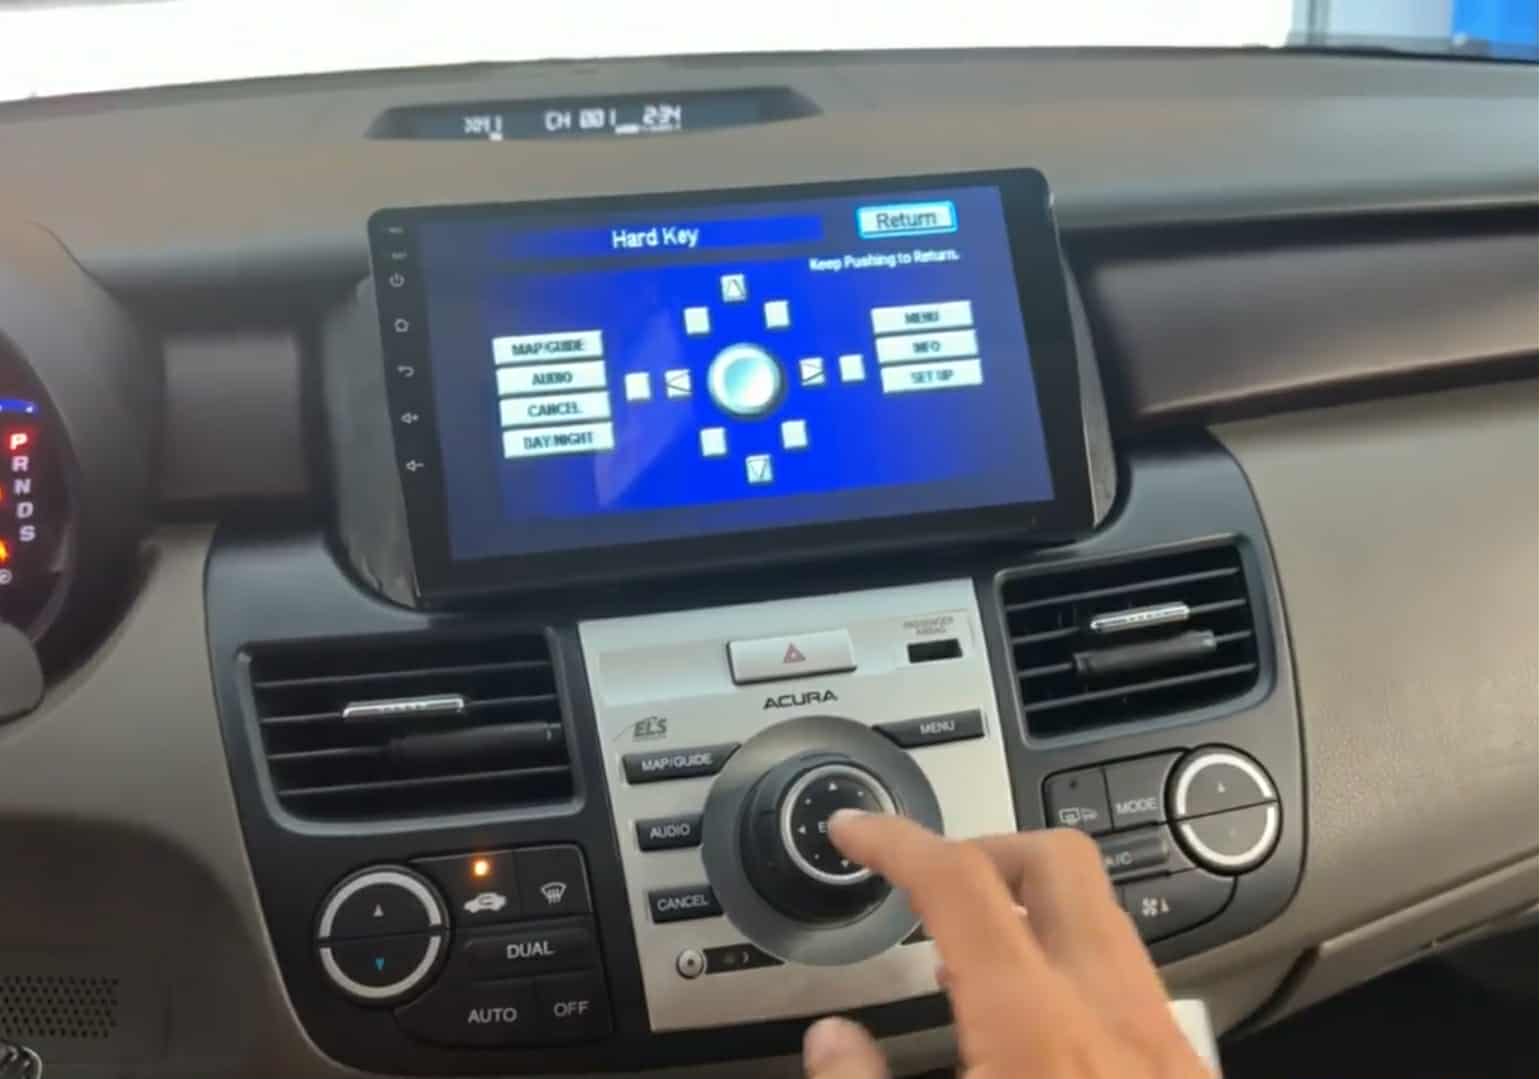
Modernize your infotainment system in your Acura RDX with our navigation display screen upgrade. This upgrade is completely plug and play. The new upgraded navigation display is touchscreen and runs a modern operating system that allows you to enjoy Apple CarPlay, Android Auto and Bluetooth Audio Streaming. The new display also allows you to run native apps like youtube and Netflix while connected to the internet.

Installation of the new screen requires completely disassembly of the vehicles factory infotainment system and is quite lengthy. You don’t have to modify and of the vehicles factory wiring but you will have to snake wires and connect them together at different points shown in the installation video. The new upgraded display screen has the ability to show the factory navigation system but it does require a video converter to be added to your harness. The video converter is optional and you don’t need it unless you want to keep the factory navigation system operational. If you install this new display screen you will lose the ability to adjust the factory equalizer inside the factory radio. You can adjust the equalizer from the new display screen to achieve your sound goals but if you like to adjust the factory subwoofer level from song to song that will no longer be possible.

This screen can be installed in vehicles with or without navigation. If you don’t have navigation you will lose the ability to see the current climate information. You can still control the blower speed and temperature inside the car but you will not be able to see the current settings in vehicles without navigation. If you have navigation you can see from the video below that the climate information continues to work like it did before. If you car is a 2010 2011 or 2012 please email us or call us to place your order as this product has not been fully tested on those vehicles yet. The installation should be similar but some parts are different and we want to ensure you get the desired result when you install this item.

Product Configurations

The first configuration listed: DROID-464GB-NAV-SWC-CAM is exactly what you see in the video below. This configuration converts the OEM navigation video with a video converter so you can see it on the new display, it changes the steering wheel controls to the new display, and keeps the factory backup camera on the new display.

The second configuration listed DROID-464GB-CAM is different from the video. This version does not keep the factory navigation video. This version keeps the steering wheel controls on the factory radio. This configuration does retain the factory backup camera on the new display.

The third configuration listed DROID-464GB is also different from the video. This version does not keep the factory navigation video. This version also does not keep the OEM backup camera. This version keeps the steering wheel controls on the OEM radio.

The fourth configuration listed is DROID-464GB-BASE-SWC is nothing like the video. This version is meant for vehicles without factory navigation. This version changes the steering wheel controls to work the new display.

On any of these version you can install an aftermarket backup camera. If you want to upgrade the OEM camera with our plug and play camera you will need to retain the OEM backup camera first. If you buy the screen first and then decide you keep the OEM camera that is possible as well, we sell the camera harness separately.

At this time we are not selling just the harnesses or brackets. We are only selling complete packages.

Installation

Installing the system requires you to make connections behind the OEM radio and at the factory navigation ROM drive. The factory radio is located right in front of the shifter and you will need to connect wires from the radio to the new display screen. There is plenty of space to run wires behind the OEM radio and display so you can connect everything without issue. The primary power connection for the new display is behind the OEM navigation display. The audio connections for the new display are behind the OEM radio. If you want the steering wheel controls to control the new upgraded display and not the factory radio you will need to connect an additional connector behind the radio and also another wire behind the new display screen. Our recommendation is that you keep the steering wheel controls on the factory radio and only use the audio connector behind the radio. This means you will make one connection behind the radio and one connection behind the screen.

If you are planning on keeping the factory navigation video on the new display screen you will also need the video converter we have available which will raise the price of the product. This is optional and not required but if you do purchase it, it will be wired already you won’t have to make any connections for it. If you want to keep the factory backup camera then you will also need to connect wires at the navigation drive located next to the gas pedal. Follow the instructions shown in the video to make sure all of your connections are correct. Then snake the wire from the navigation drive up the new navigation display.

Non Navigation Vehicles

If your RDX does not have navigation it is referred to as the base model. If you own a base model RDX you can still change the OEM monochrome display with this new touchscreen display but you will lose the ability to see the climate information. Installation is a bit different as all connections are done behind the OEM radio and you will snake the wires from behind the OEM radio up to the new display. With the OEM display removed you won’t be able to see the climate or any of the factory radio information such as radio stations or cd tracks. Instead the OEM radio will just be used as a passthrough for audio. You will leave the factory radio in XM mode and control all audio through the tablet. If you have a base model it makes sense to change the steering wheel controls from the OEM radio to the new tablet by connection the additional harness behind the OEM radio and at the display screen.

Product Feedback

We sell a similar product for the Acura TSX and people really like it. This product is great for those who want a new display and the ability to use Apple CarPlay or Android Auto. This is a perfect fit especially if your factory navigation system is already broken and you don’t care about it. This product is not recommend to anyone who wants build any sort of competition system in audio quality or loudness. You are still limited by the factory amplifier when you install this product and while the system sounds good. If you have to add amplifiers to the system you still have to work with the factory radio and that is always a challenge. If you are more interested in sound quality over software features I recommend replacing the OEM stereo and amplifier we will have videos on how to do that coming soon.


2022 2023 2024 2025 Honda Acura Subwoofer Harness Adapter

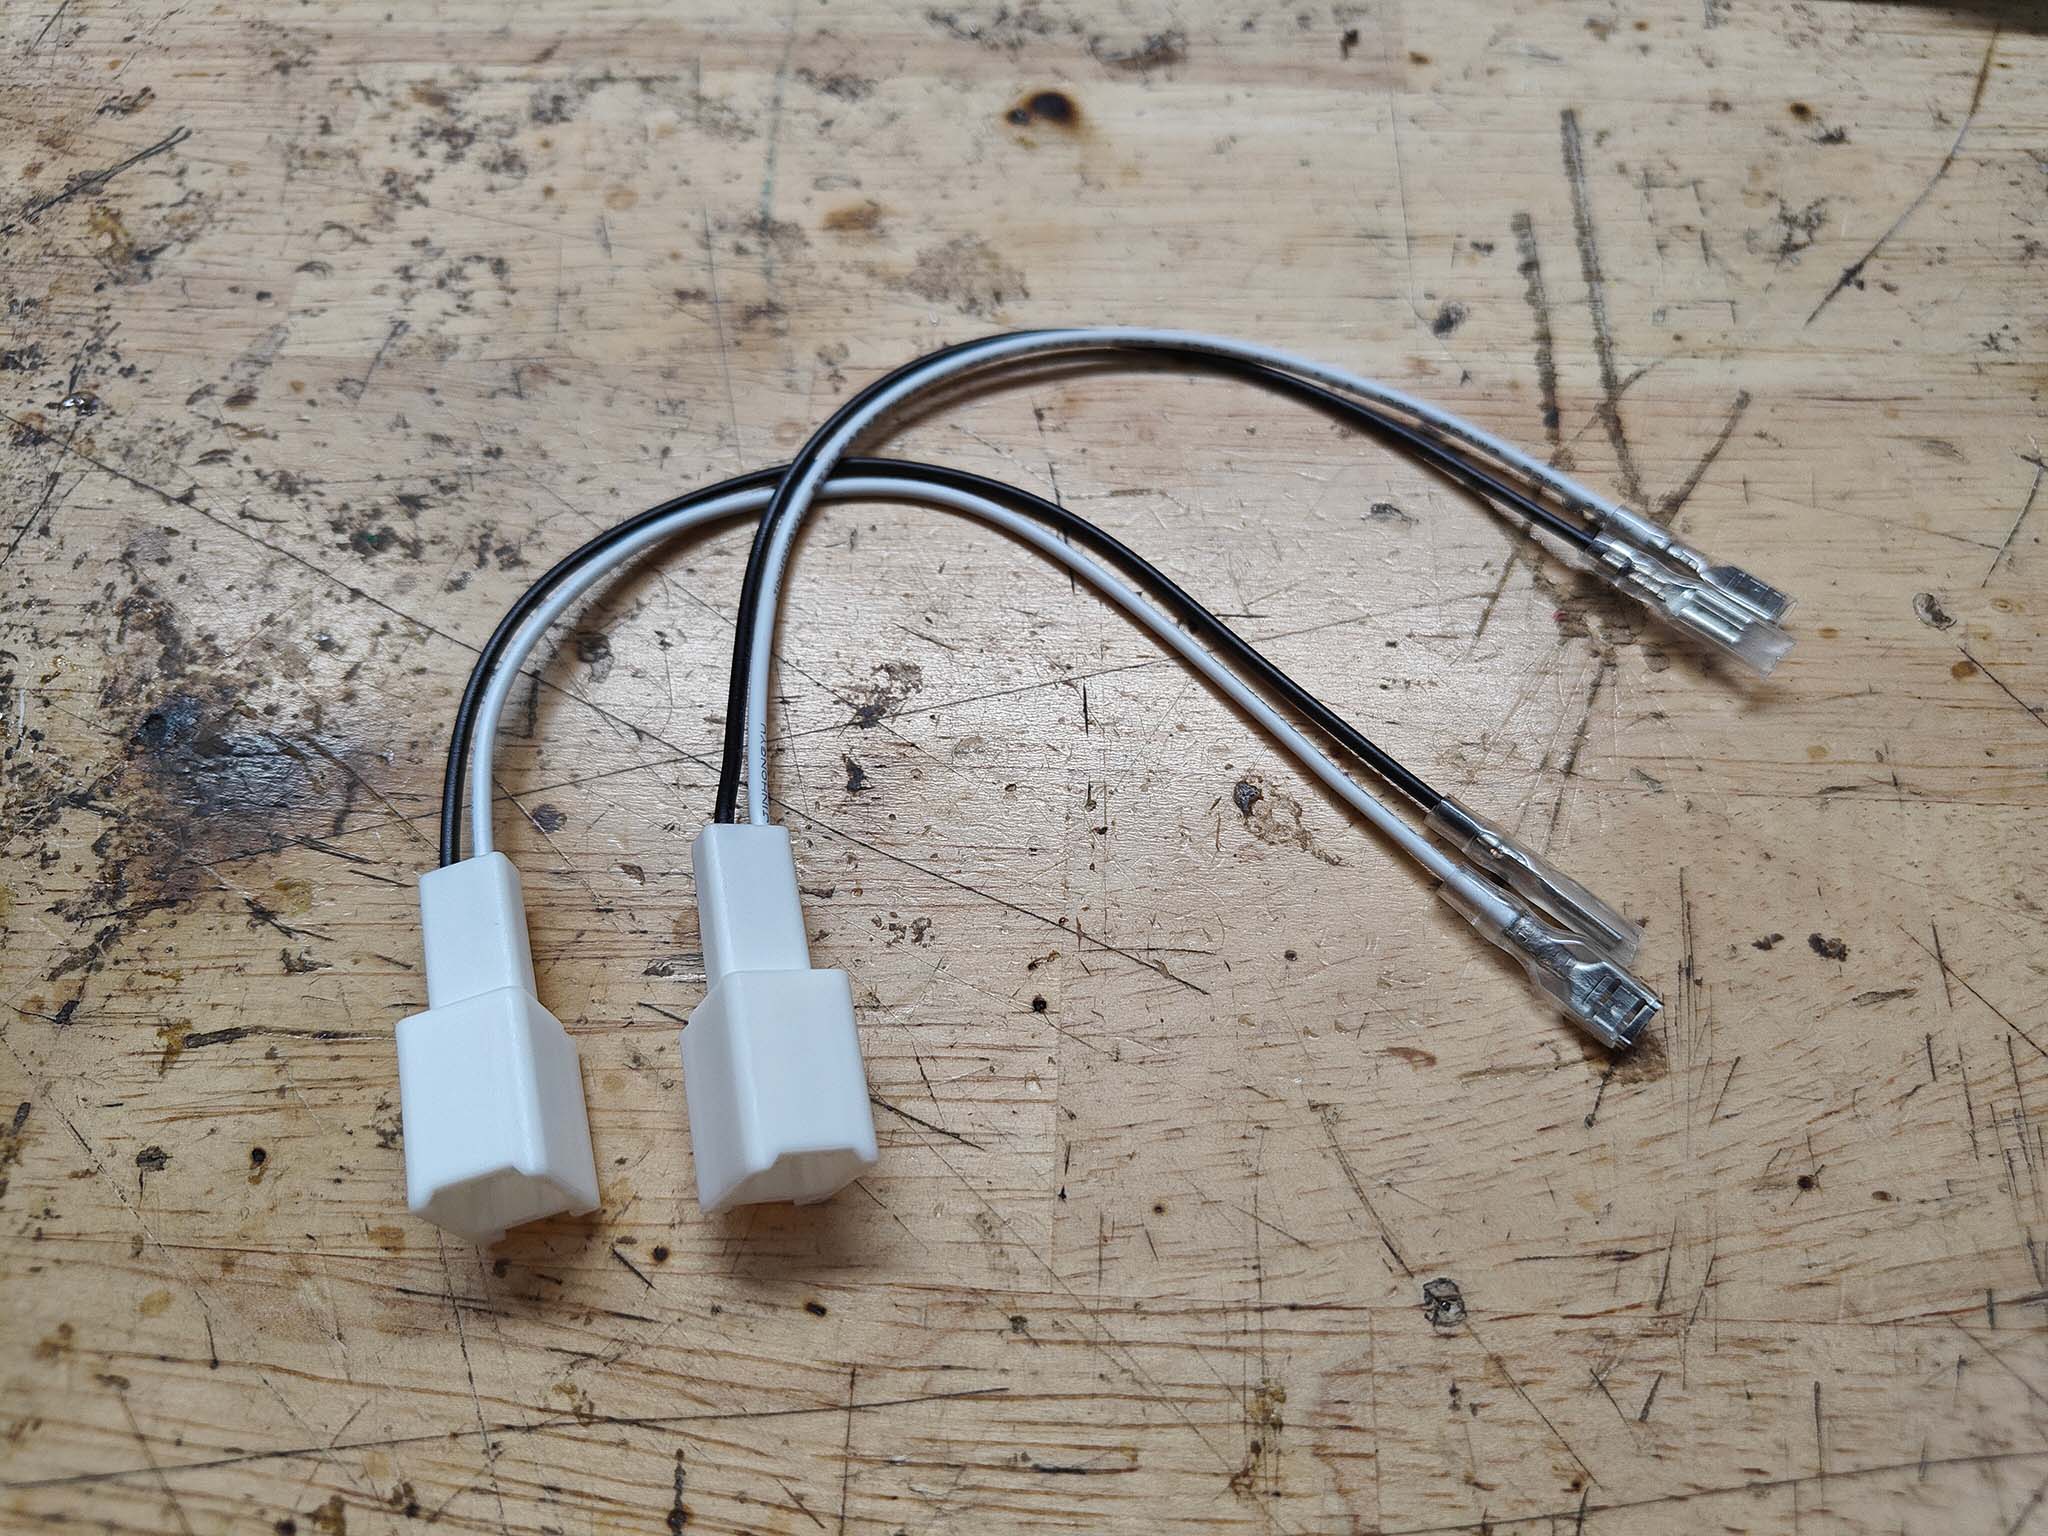
This is the new connector used on the subwoofers for the 2021-2024 Acura TLX, 2023-2025 Honda Civic, and 2022-2025 Honda Accord. The OEM male connector is white, the factory speaker wire colors are often red and white. The red wire is positive and the white wire is negative. This listing is for a pair of connectors.

2010 2011 2012 2013 Acura MDX Android 13 Aftermarket Radio Harness for HDD Factory Navigation Stereos

You may have seen our videos on the 9″ android screen upgrade on youtube. If you have a 2007-2008, or a 2008-2009 Acura MDX then you will have no issues installing the system they sent. If your MDX has navigation and its from years 2010-2011 or 2012-2013 then the harnesses they sent will not work for your installation. You will instead need the harnesses being sold on this page. The harnesses that were sent with the android radio from your amazon, eBay or AliExpress seller will not fit your 2010-2013 Acura MDX. In our video we talk about repining the harness to make it work but we have found a better way. Instead of shipping you one harness for just power and the camera we now ship another harness for the audio as well.

You will receive two harnesses from us along with a 3ft RCA wire to connect everything together. The way audio is routed with our harnesses setup is through XM radio. So you will lose the ability to listen to the factory XM radio if you install our product. If your MDX is built for Canada it will not have XM and the audio harness will not work but the power harness will work. You can easily tell if you have XM because of the XM button on the radio and when you press it, it should ask you to sign up and play ads or let you listen to XM radio.

Please ensure you connect all the white harnesses that came with your android stereo to the stereo before making the connections we sent you.

The primary harness in this package is the power and camera harness, this will provide constant power, accessory power, ground, illumination and the backup camera video signal to the new android screen. Please beware that if the camera does not appear correctly when you first go into reverse its because you have to change the backup camera video format setting with the settings of the android screen. You can often find this setting behind the factory setup screen or by touching the screen while in reverse. You want to change the format from “AHD” to “CVBS” or “PAL” to get the factory camera to show up correctly. If you install a new camera this change is not necessary. This harness hooks into where the factory navigation screen was hooked into and plugs into the screen.

The second harness is the XM Audio harness, this harness hooks into the factory radio and you then run the provided RCAs from the harness to the Audio Out L (white) and Audio Out R (Red) RCAS on the back of the android stereo. If you have no audio after installation its because you probably connected to the AUX IN RCAs and not the Audio Out so double check that. Now after installation to listen to the android audio output make sure to raise the android screen radio volume to 37. Then hit the XM button on the factory radio and use the factory volume controls to reach the audio level you want. If you aren’t satisfied with the audio output, I hate to say it but welcome to the club, that is one of the shortfalls of the android screen.

Another common thing that trips people up after install is the Bluetooth setup. When you are setting up bluetooth it is best to disconnect and forget the built in bluetooth in the Acura for the best results. The HFL will just cause problems in the long run so its best to just disconnect it. It’s behind the center console attached to the rear vents. The panel comes off by pulling it, its just clips pressed into place.

These harnesses are all you will need to get the android navigation screen upgrade working in your Acura MDX from years 2010 to 2013 with the HDD button.


2004 2005 2006 2007 2008 Acura TSX Audio Upgrade Package – Amplifier + Speakers

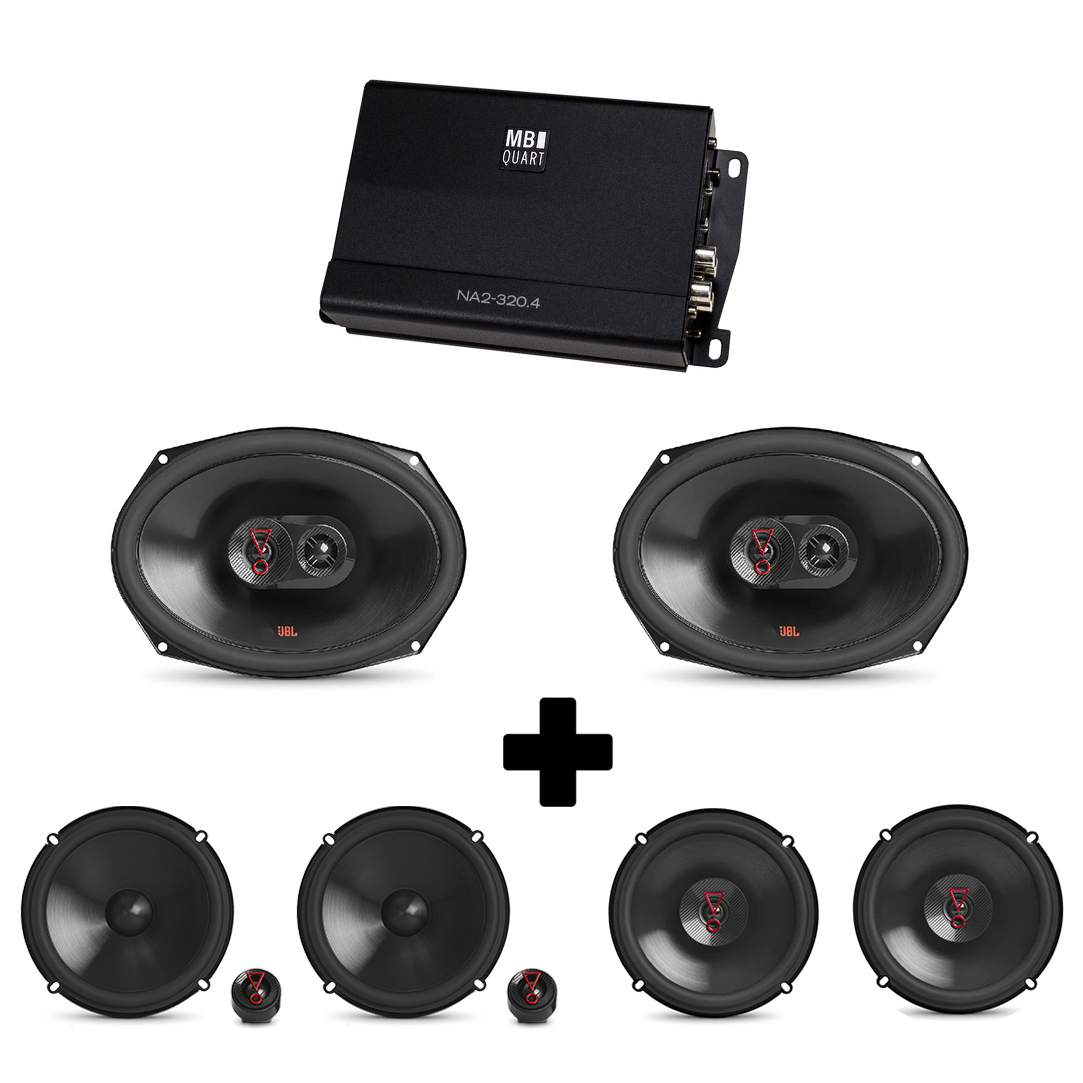
This package consists of our best selling JBL speakers and our best selling four channel amplifier. This package packs plenty of punch and gets loud for those looking for a quality affordable upgrade. If you have questions about each individual component, please checkout there specific product pages.

THE AMP IN THIS PACKAGE IS CURRENTLY ON BACKORDER UNTIL 7/1

Honda Acura XM AUX Audio RCA Harness

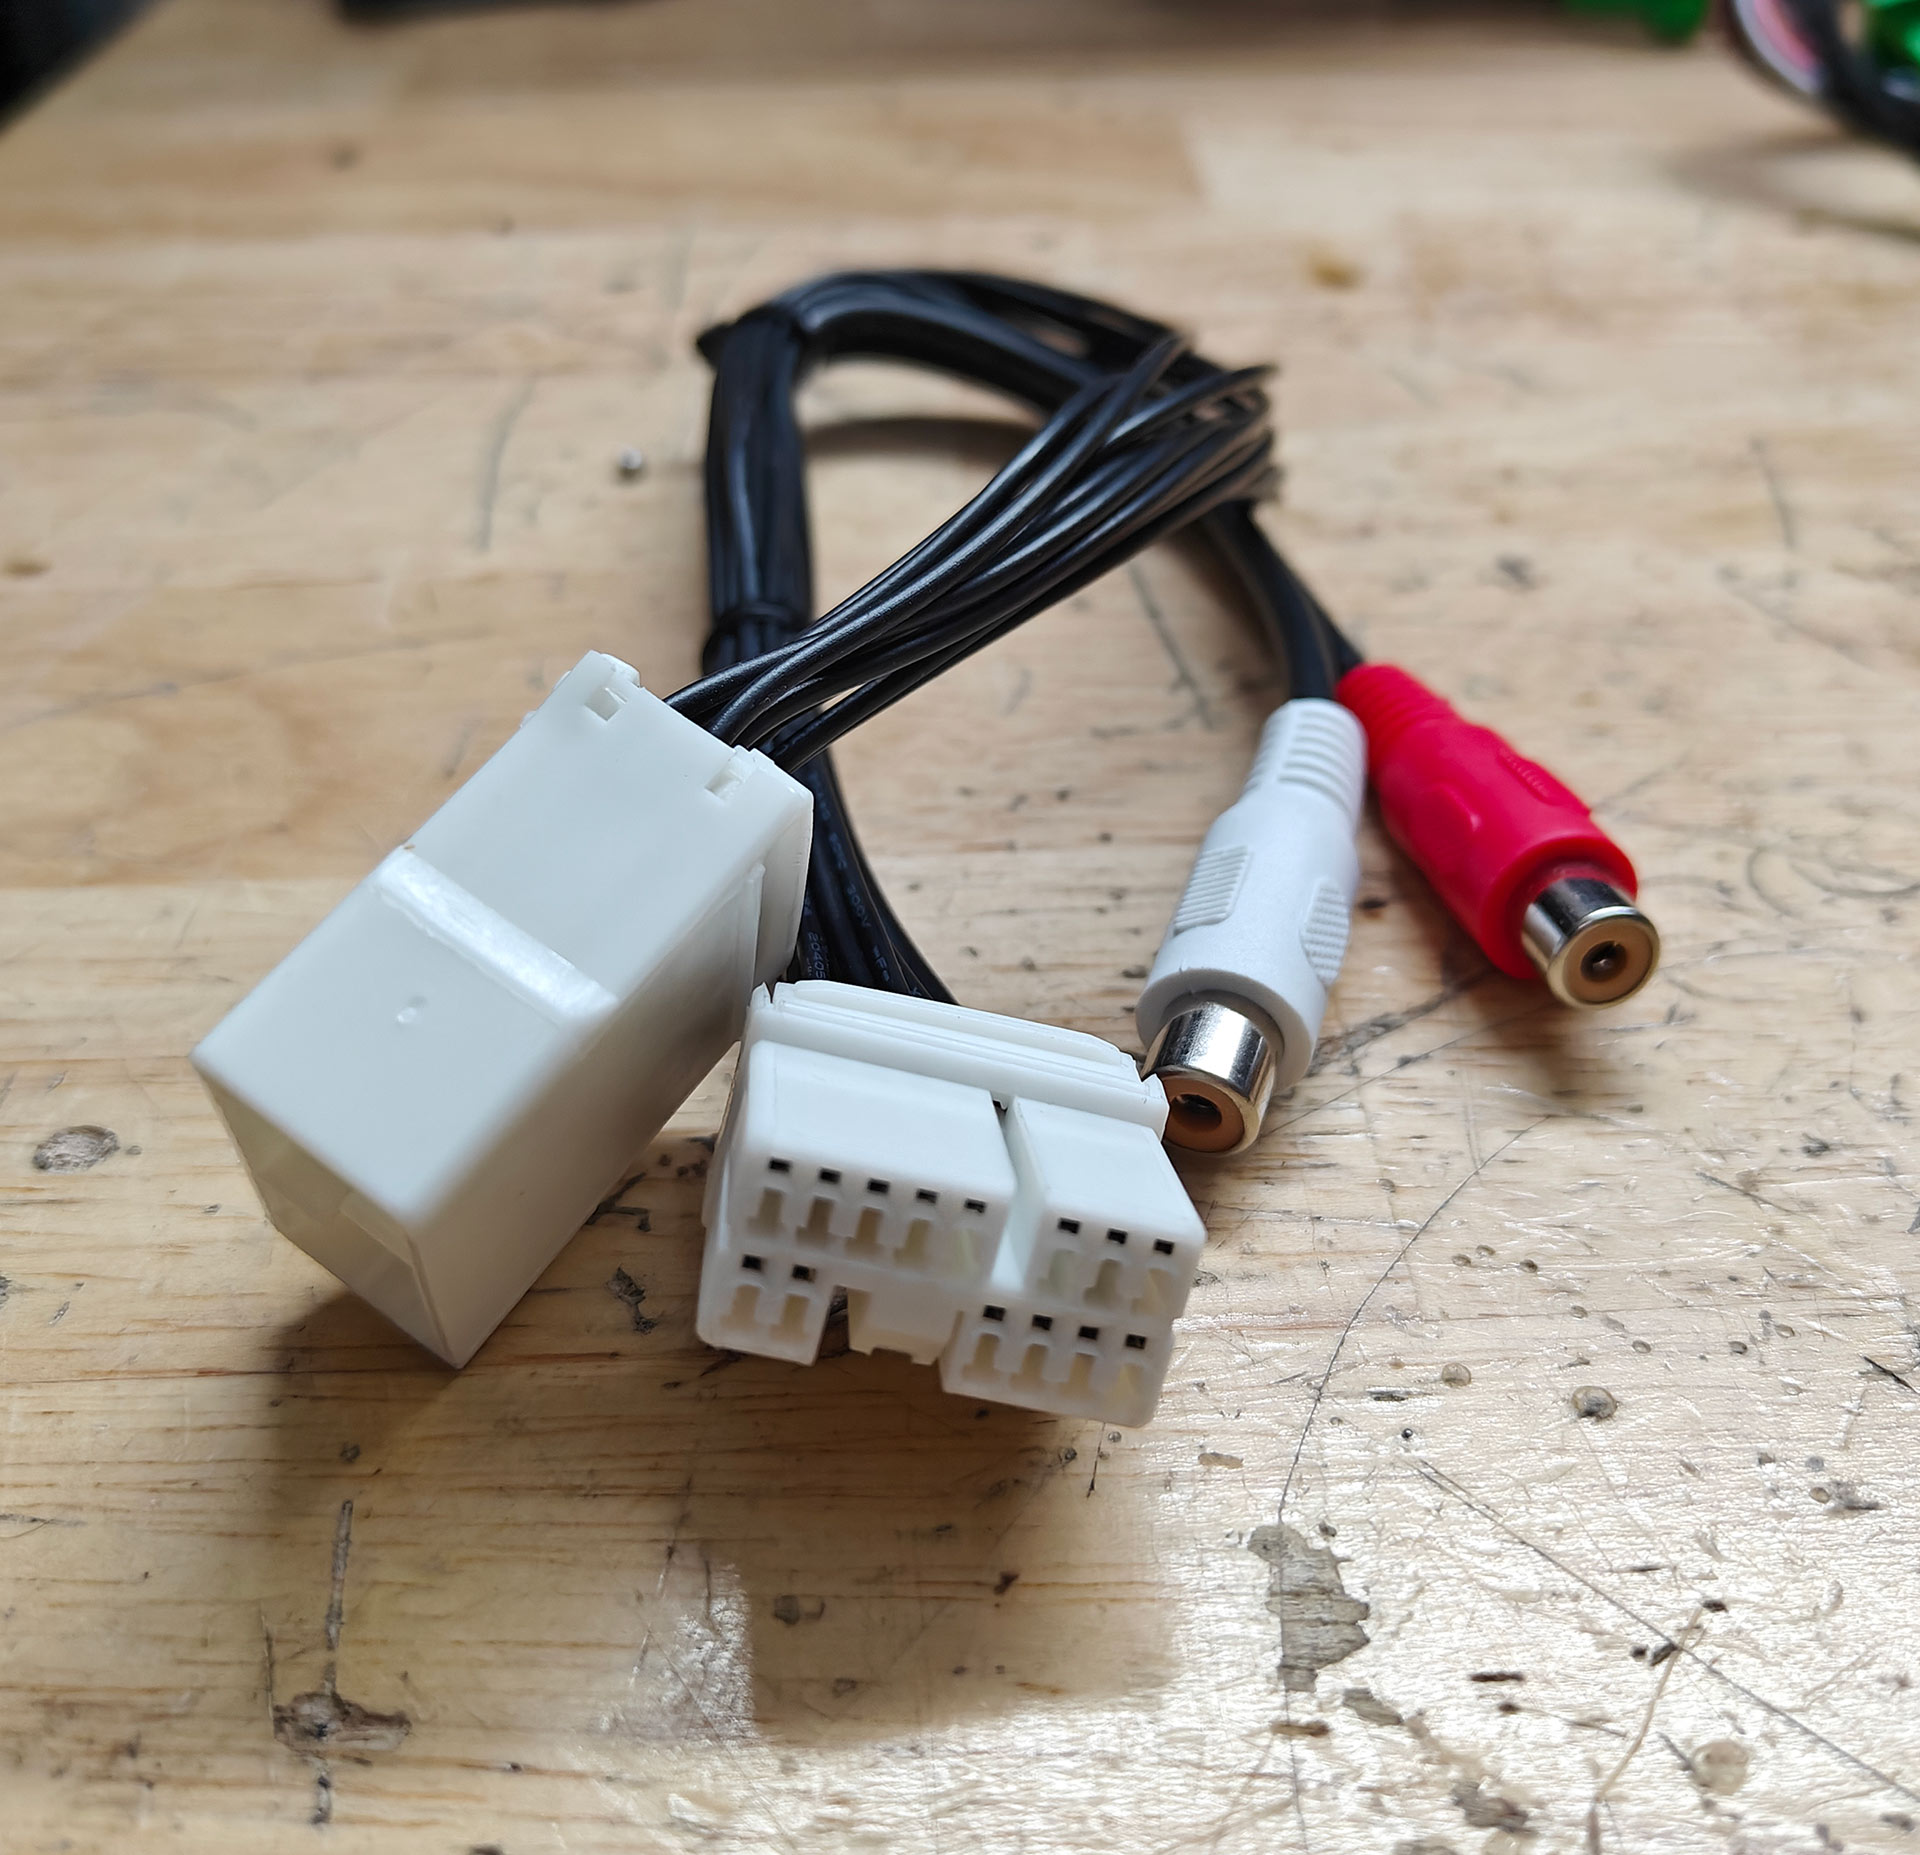
If you want to send audio to your factory radio in your Acura or Honda you can inject audio into the XM audio feed with this harness. This harness will disable the XM radio functionality and instead play your audio source through the XM port. The information shown on the screen will still be from the XM radio so it will either say a radio station or show the subscribe messages but you will hear the audio from your source instead.

This harness is used with the 9″ android screens that are available online in the Acura TL, TSX and MDX currently but you could use it for other stereos. This harness will only work if your car has the factory XM unit.