2007 08 09 2010 2011 12 13 Acura MDX Amplifier Bypass (Non Navigation)

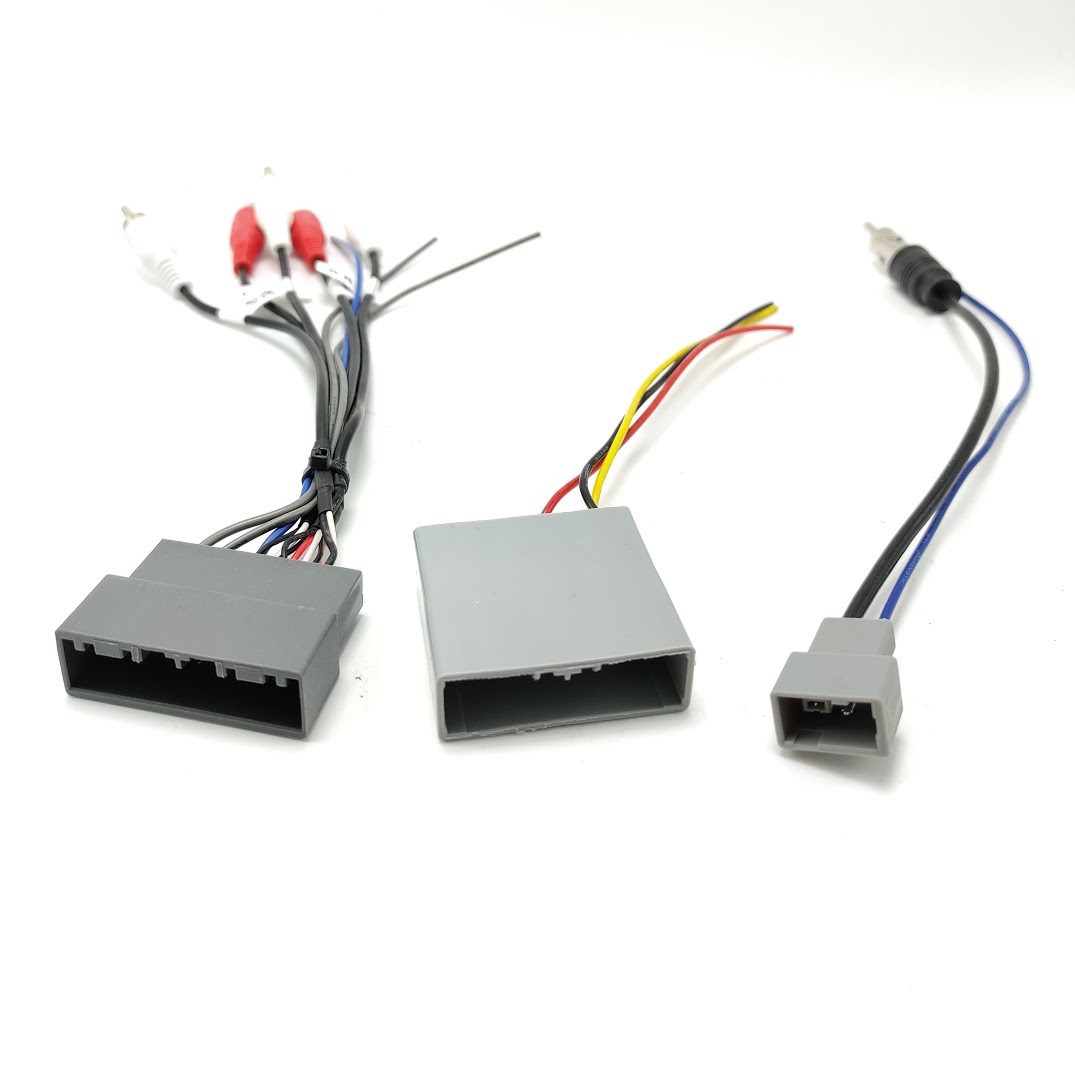
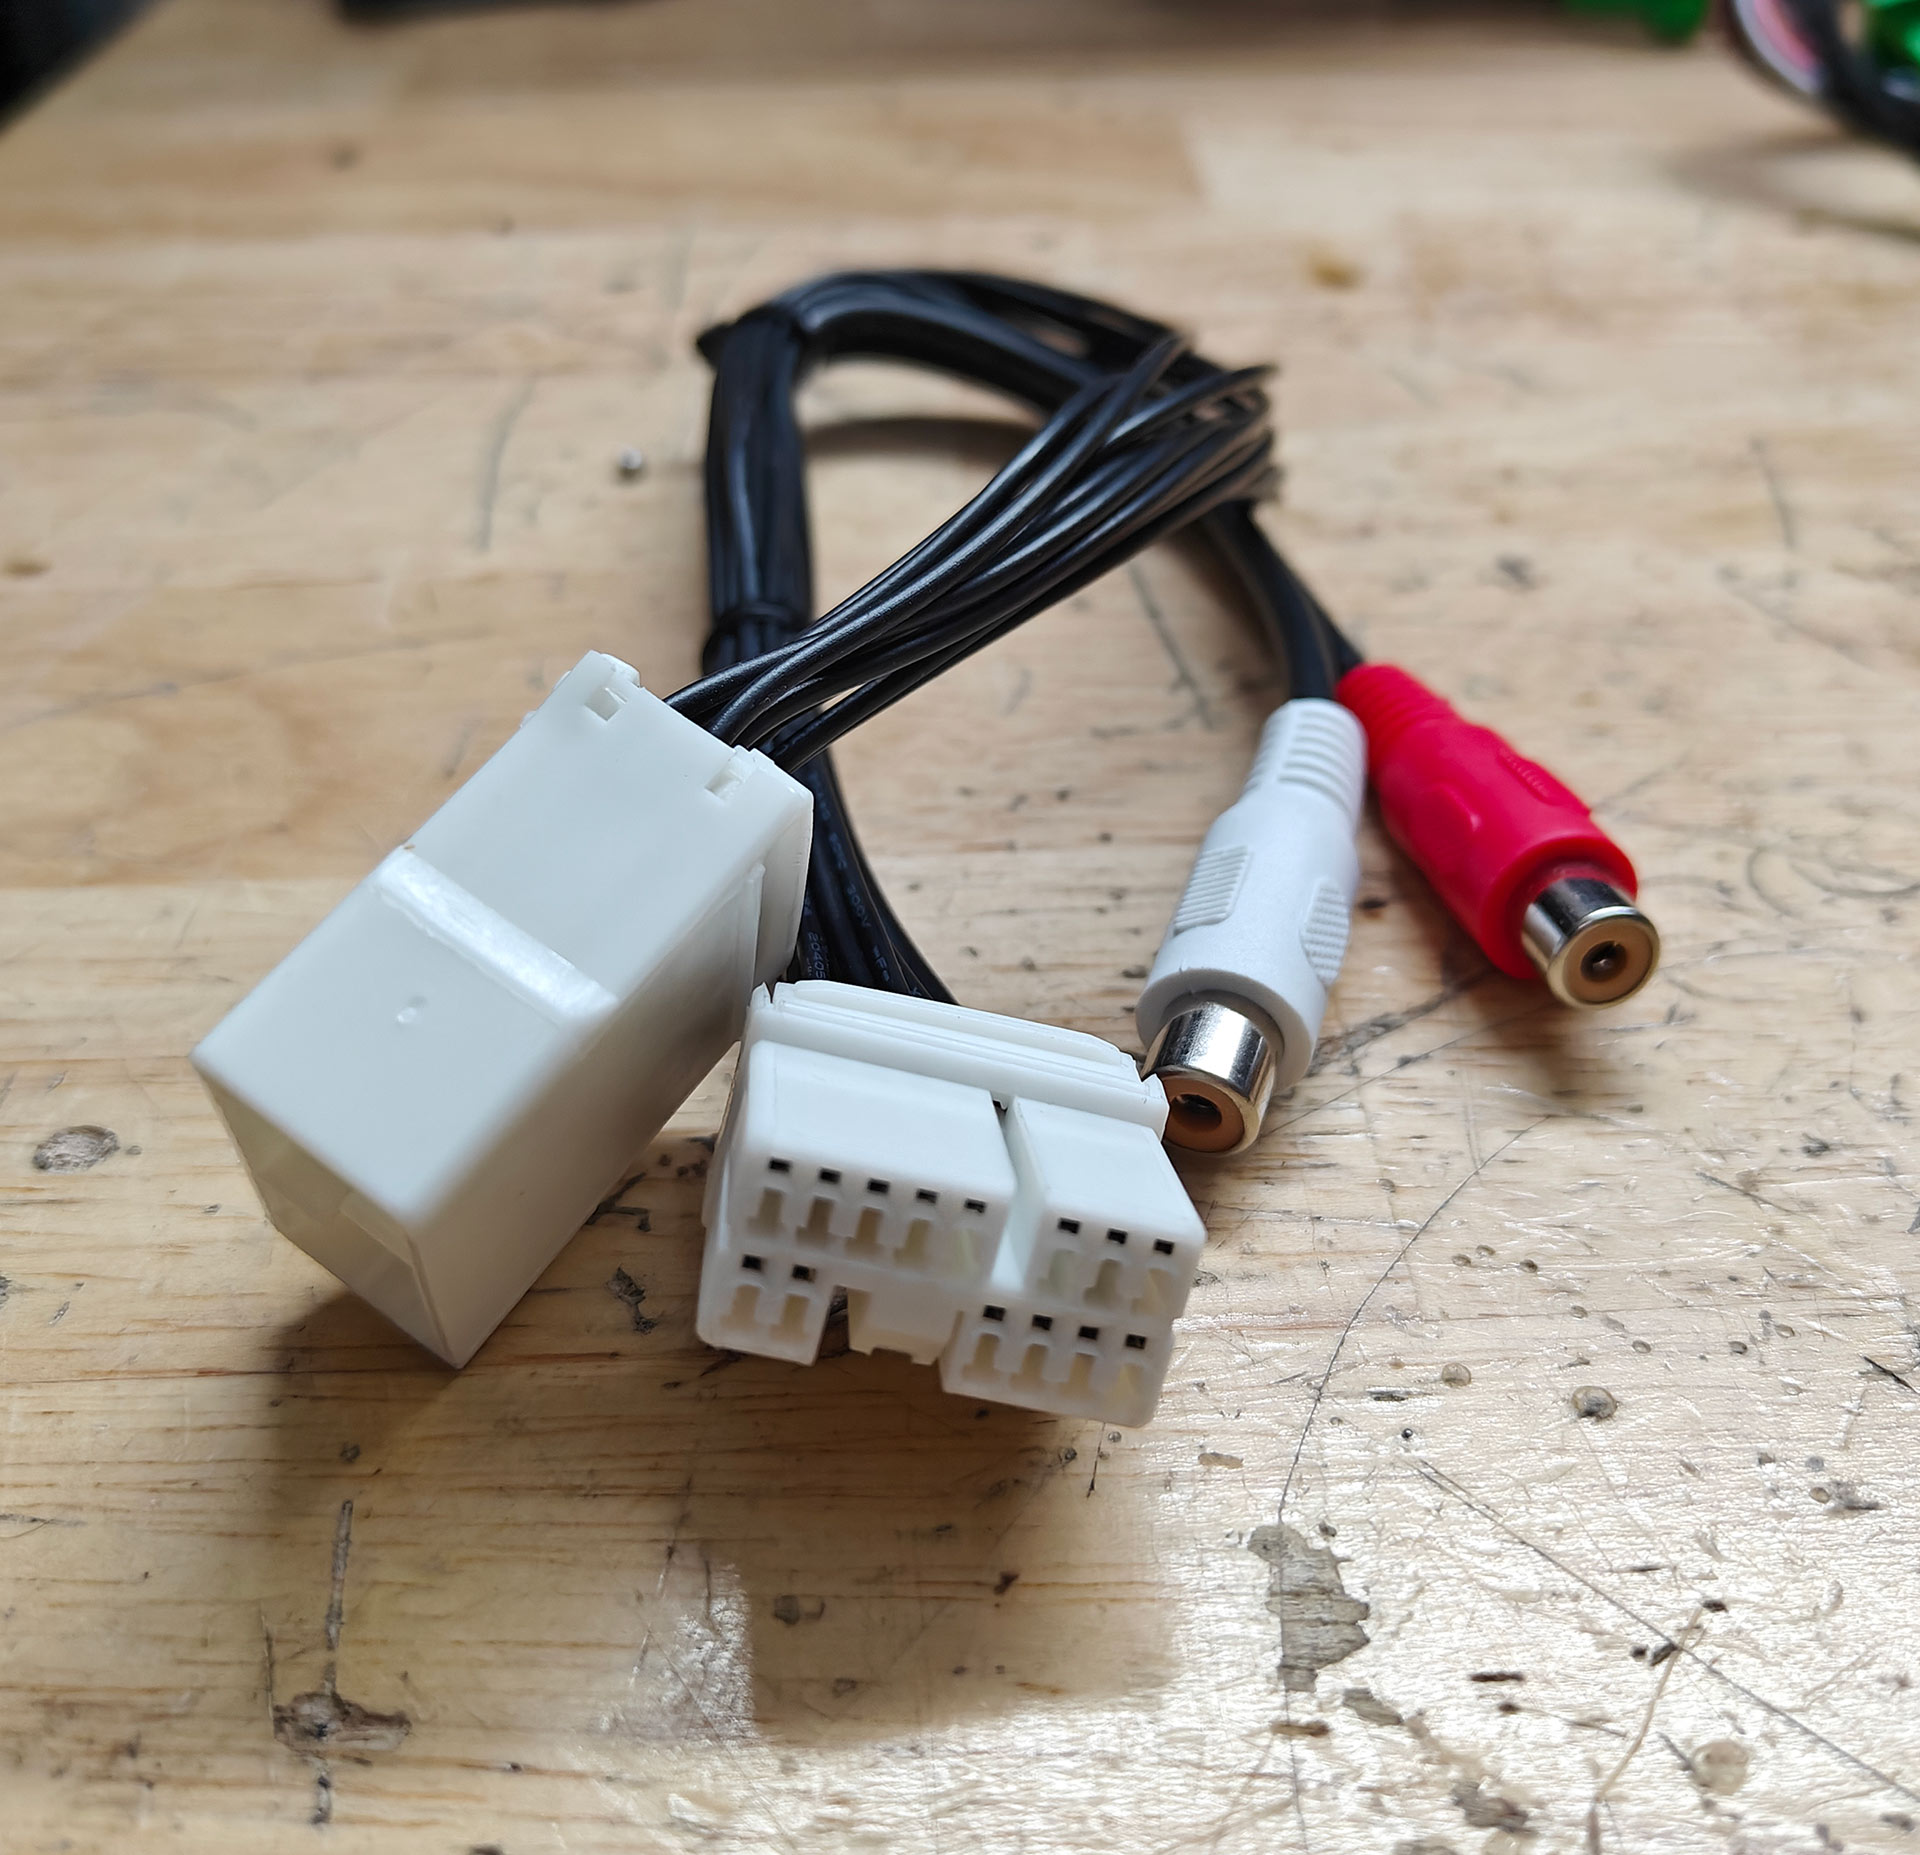
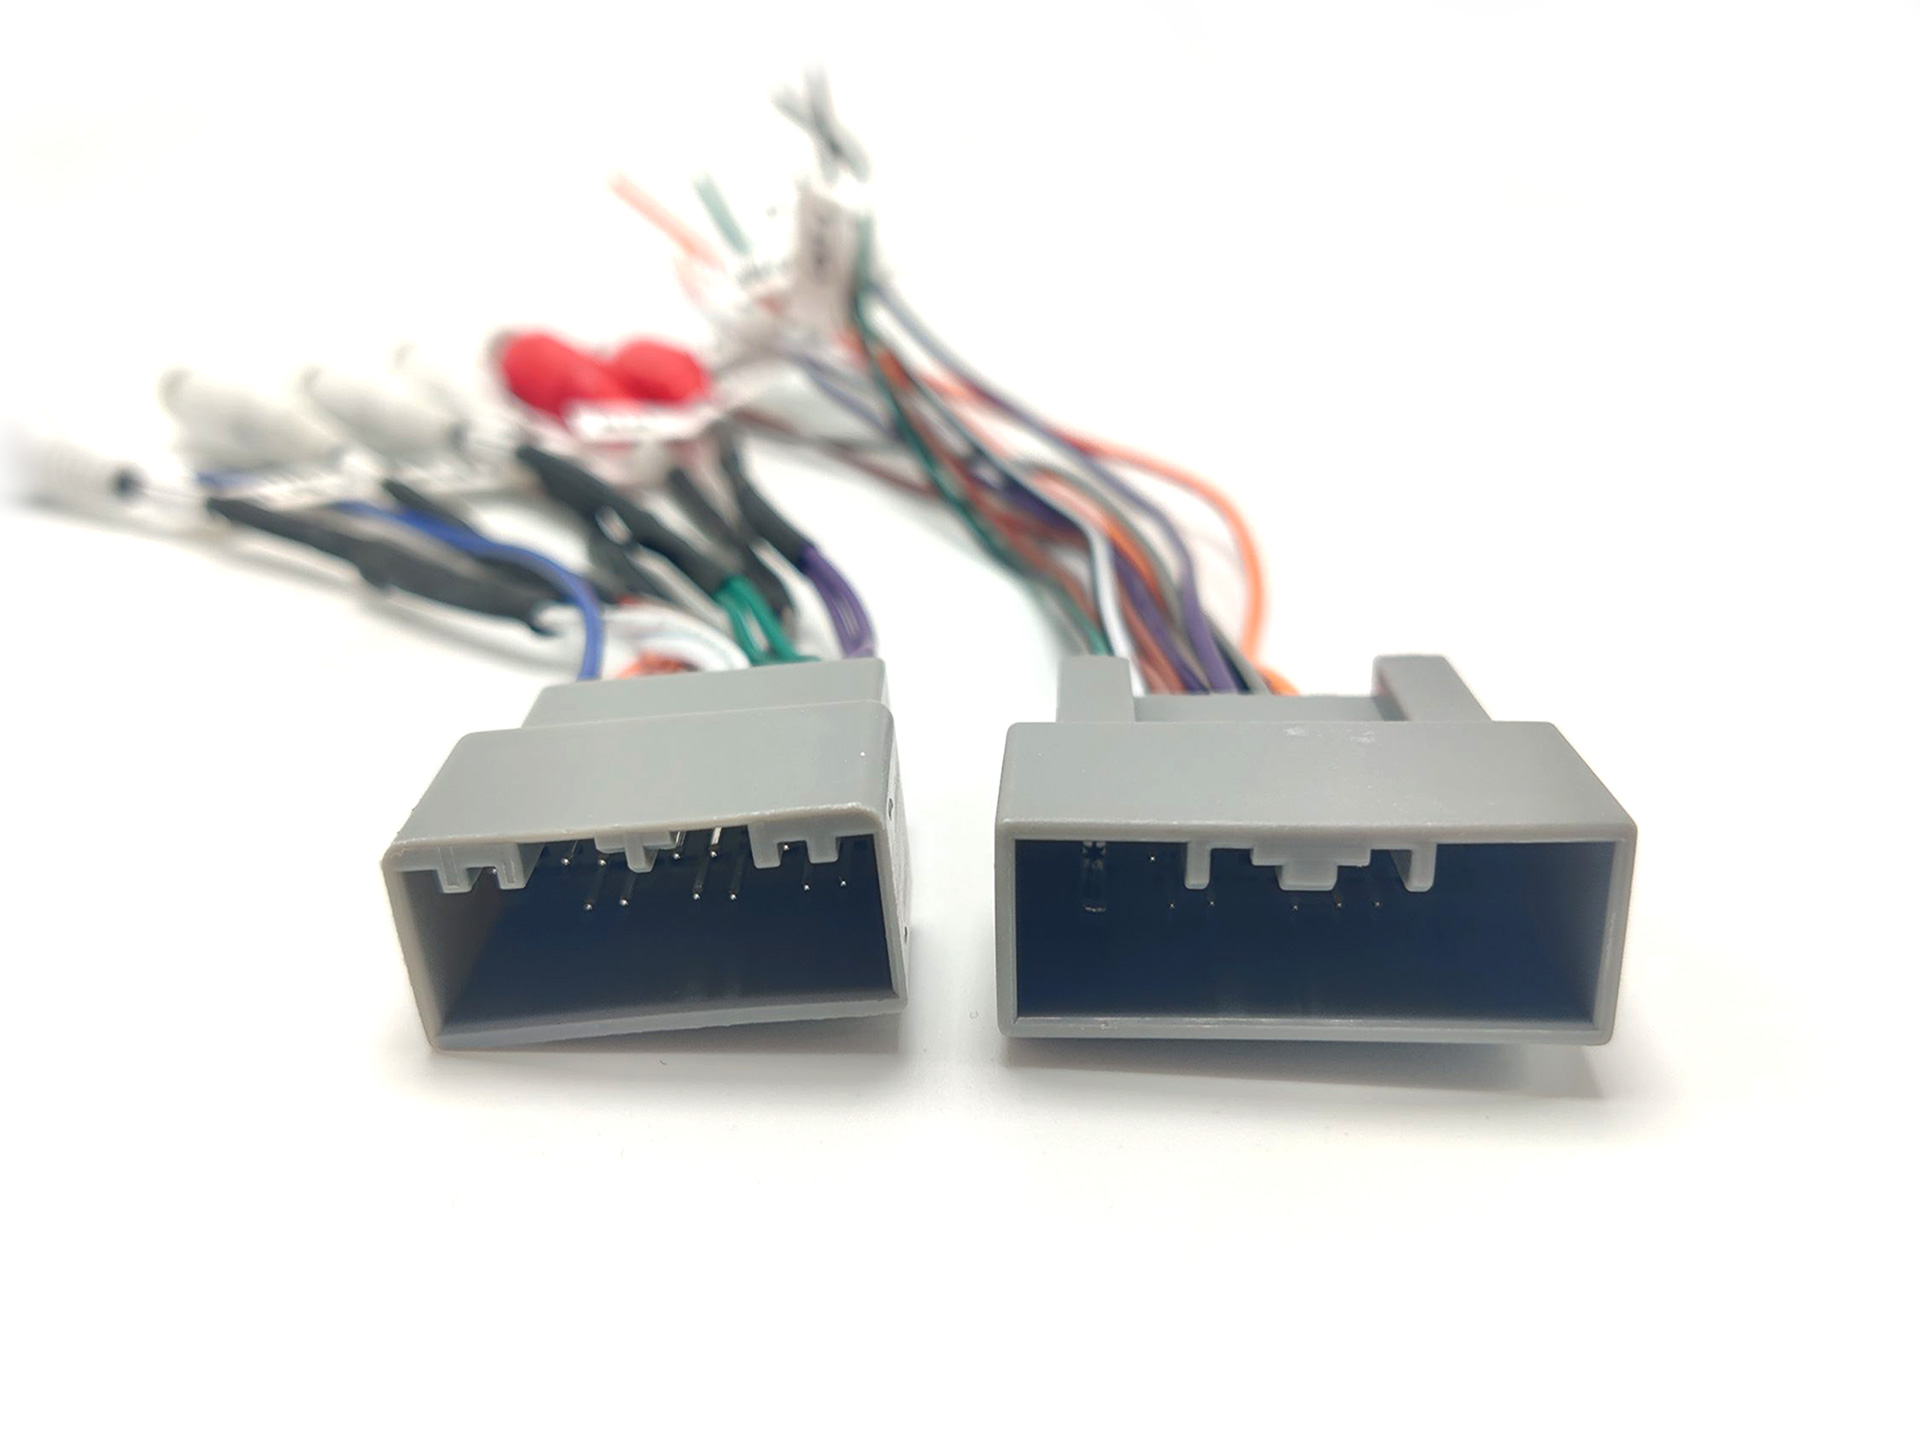
Install a new amplifier in your 2007 2008 2009 2010 2011 2012 2013 Acura MDX without navigation with our amp bypass. The first connector in this bypass receives the signal from the factory radio and provides you with a remote output and 6 RCA outputs The second connector provides you a connection to all of the speakers available in the vehicle.

20 Pin Grey Connector has the following:

  • FL RCA
  • FR RCA
  • RL RCA
  • RR RCA
  • SUB RCA
  • CENTER RCA
  • Remote ON

18 Pin Grey Connector has the following:

  • SUB COIL A Speaker Wire Pair
  • SUB COIL B Speaker Wire Pair
  • FL Speaker Wire Pair
  • FR Speaker Wire Pair
  • CNT Speaker Wire Pair
  • RR Speaker Wire Pair
  • RL Speaker Wire Pair

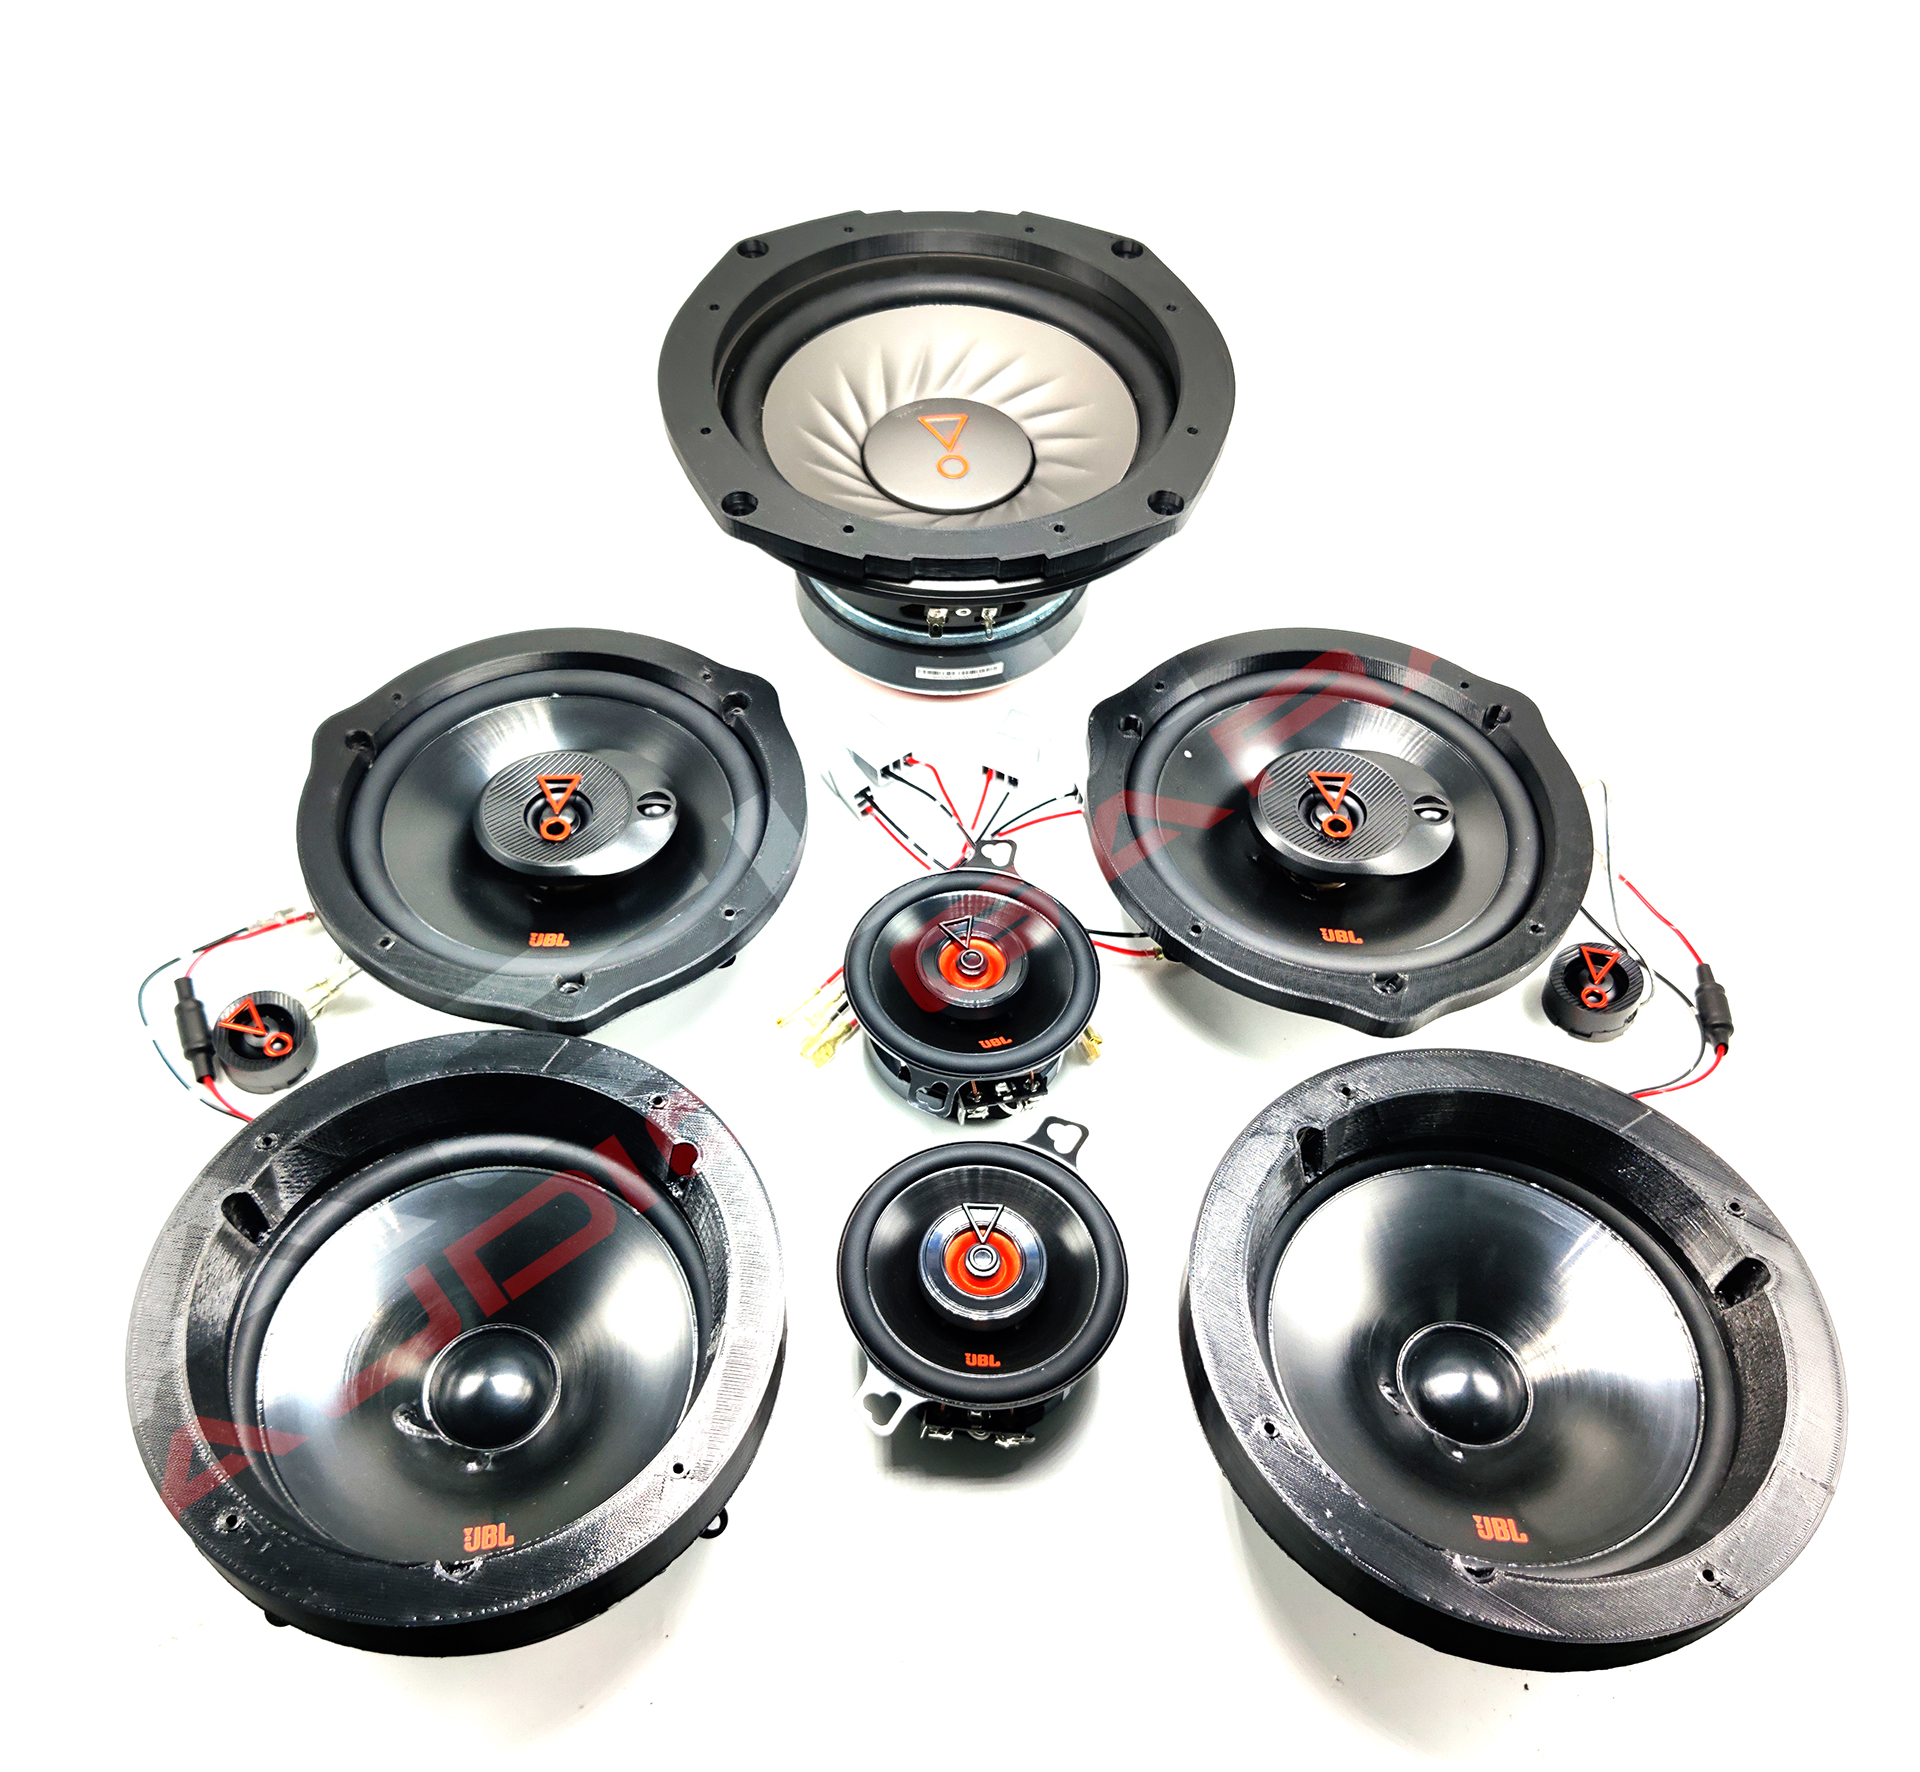
2009 to 2024 Acura ILX TL TLX TSX MDX JBL Speaker Upgrade Set

If you are looking to upgrade the speakers in your Acura this package contains everything you will need to upgrade all of the speakers. This upgrade works with the factory amplifier or aftermarket amplifiers. These speakers come with the necessary accessories to make installation plug and play. There is no need for wire cutting/splicing or metal bending/cutting.

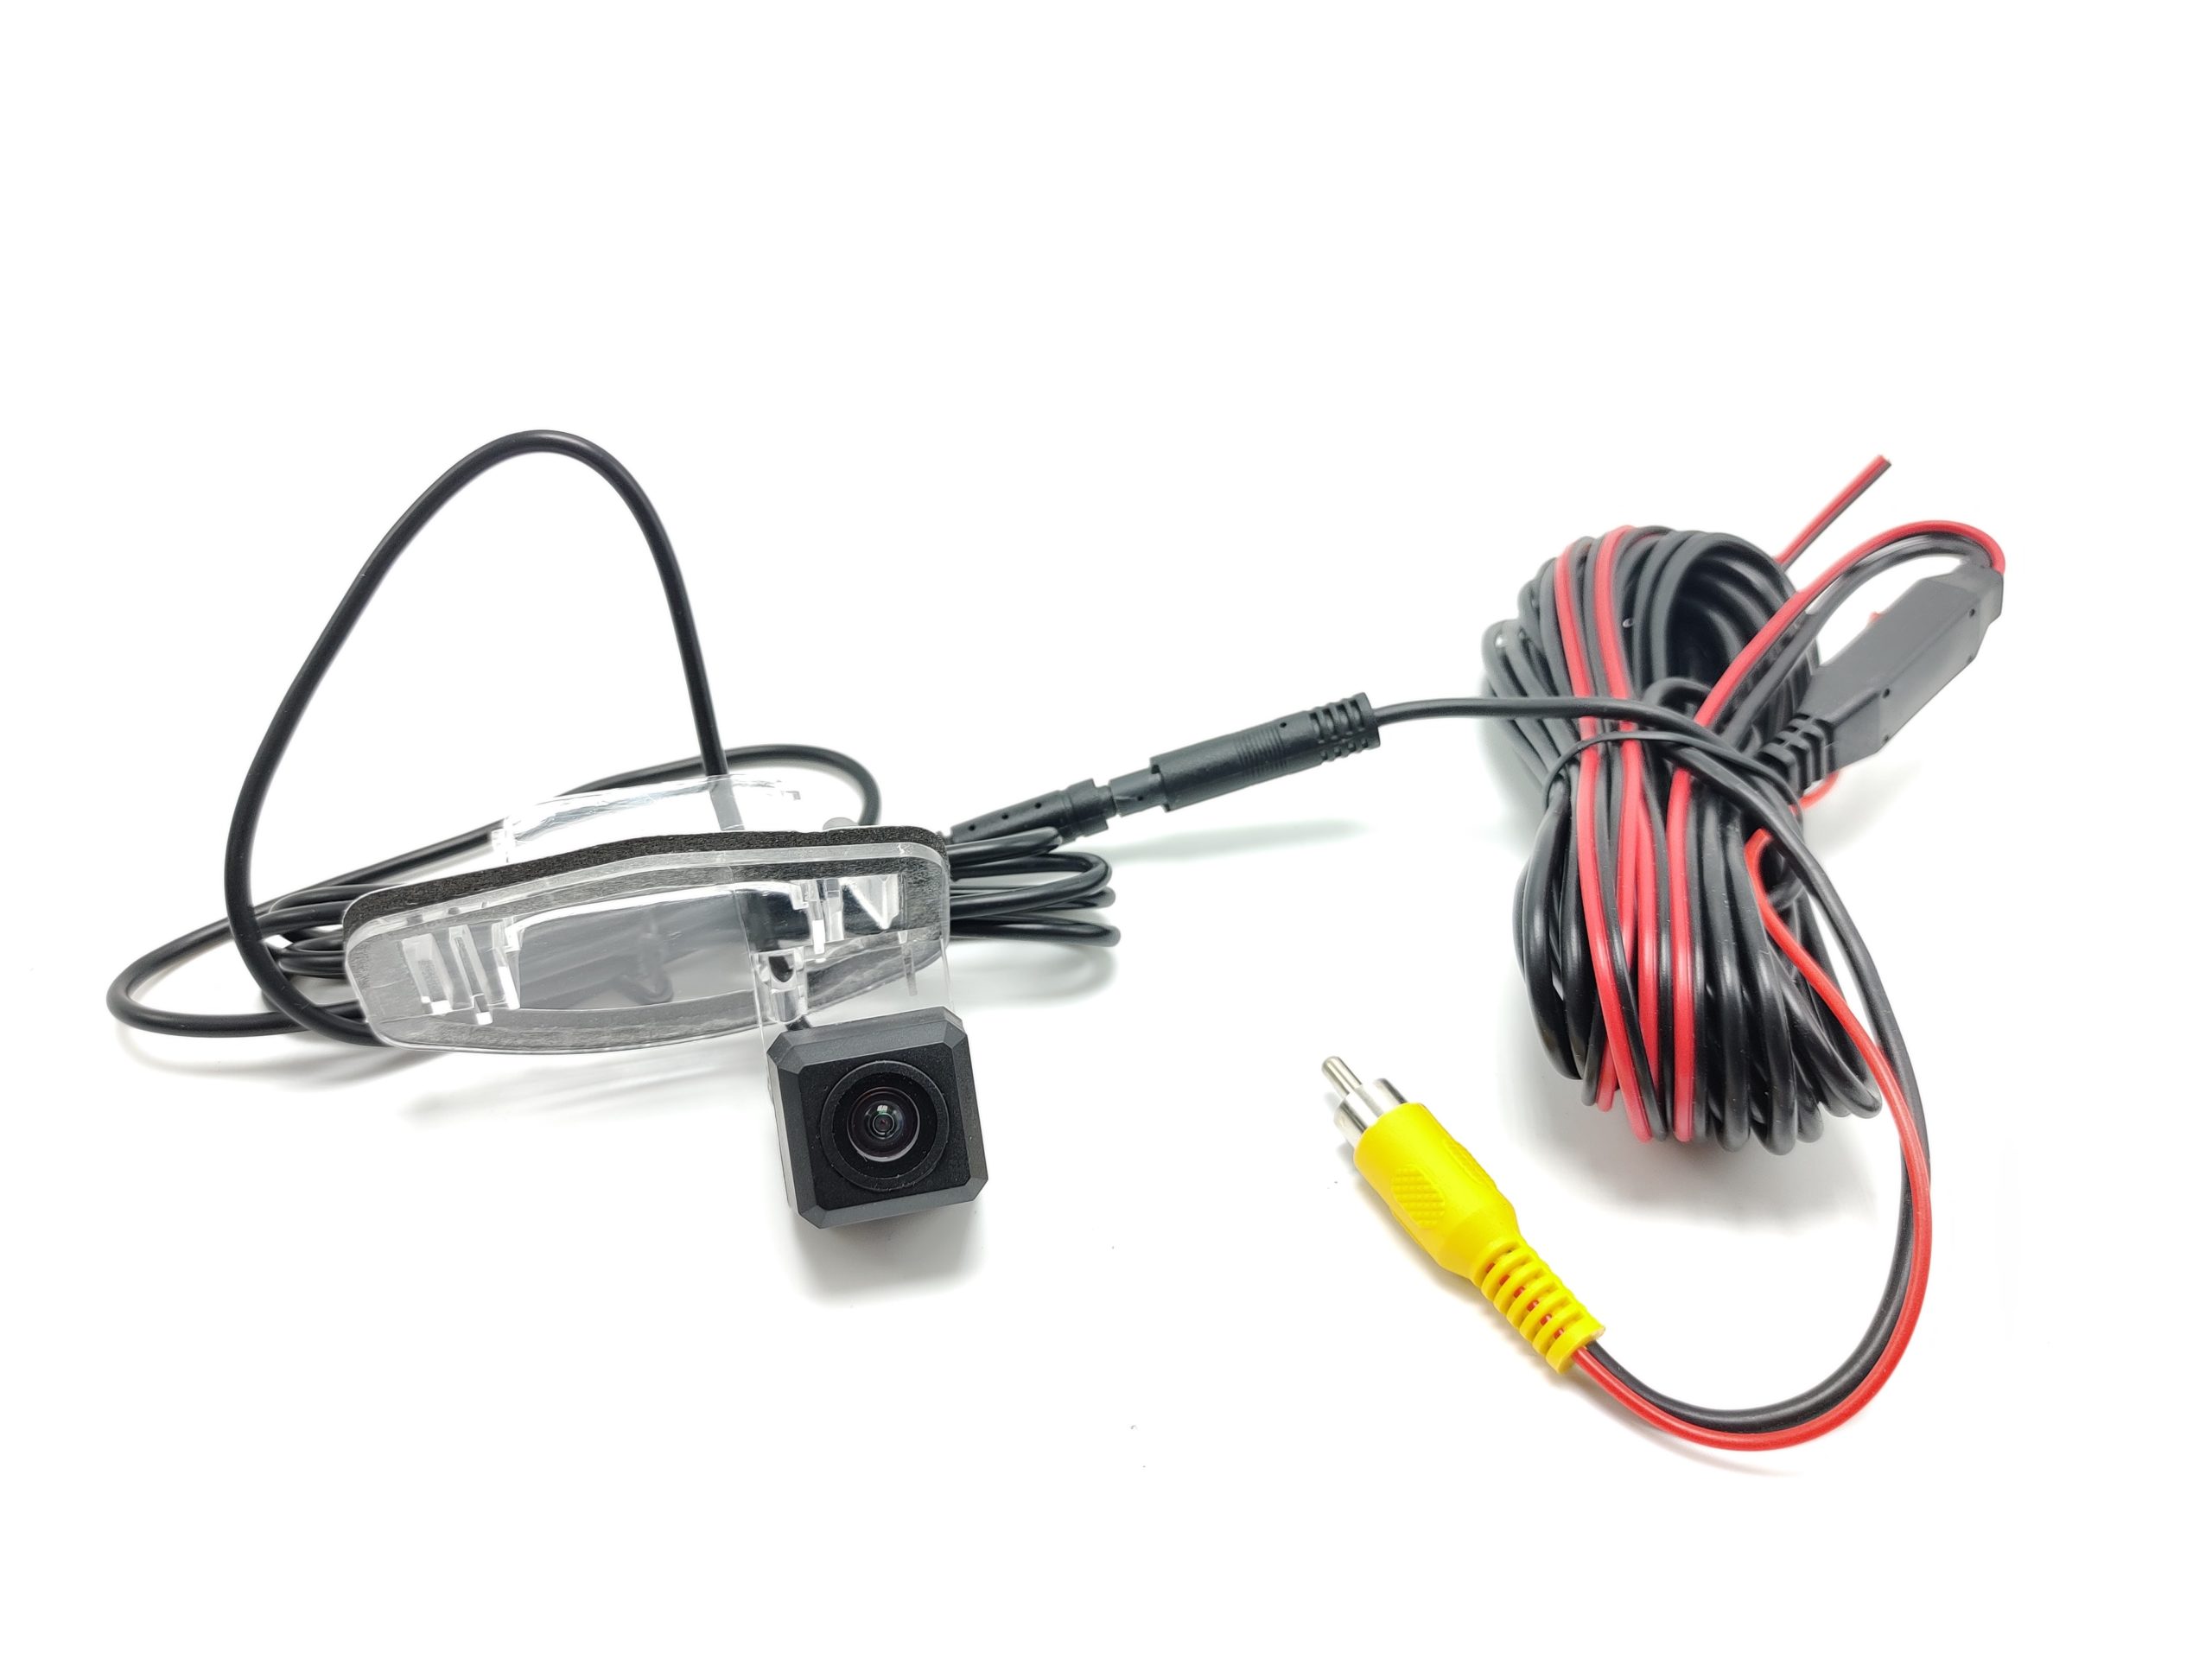
Acura TL MDX TSX License Plate Light Backup Camera

If you are thinking about adding a backup camera to your Acura this camera installs with ease. By replacing the license plate light housing with the housing provided with the camera you are able to install the backup camera without having to drill any new holes and the final installation looks OEM.

This camera comes in two options with fixed parking lines or with active parking lines. If you are going to be using the parking line adjustments on your radio we recommend you get the fixed parking line version and then disable them. You can view the difference in the parking lines in the images.

There are two ways to install this camera. You can set it up to always be on so you can hit the camera button on your radio and view it at anytime or have the power only power on when you are in reverse. The reverse only installation is easier to complete.

Below are the specifications of the cameras

The specs of the fixed parking line camera are as follows:

  • IP Rating: IP68
  • Resolution (TV lines): 800
  • Lens Angle (Deg.): 170°
  • Power Supply (DCV): 12V
  • Minimum Illumination: 0.1LUX

The specs of the active parking line camera are as follows:

  • IP Rating: IP67
  • Resolution (TV lines): 600
  • Lens Angle (Deg.): 170°
  • Power Supply (DCV): 9V-12V
  • Minimum Illumination: 0.1LUX

You can view our installation video here.

This camera works with the following Models:

  • 2007 2008 2009 2010 2011 2012 Acura MDX
  • 2004 2005 2006 2007 2008 Acura TL
  • 2004 2005 2006 2007 2008 Acura TSX
  • 2009 2010 2011 2012 2013 2013 Acura TSX Sedan
  • 2007 2008 2009 Acura RDX

2007 08 09 10 11 12 2013 Acura MDX Aftermarket PNP Radio Complete Kit

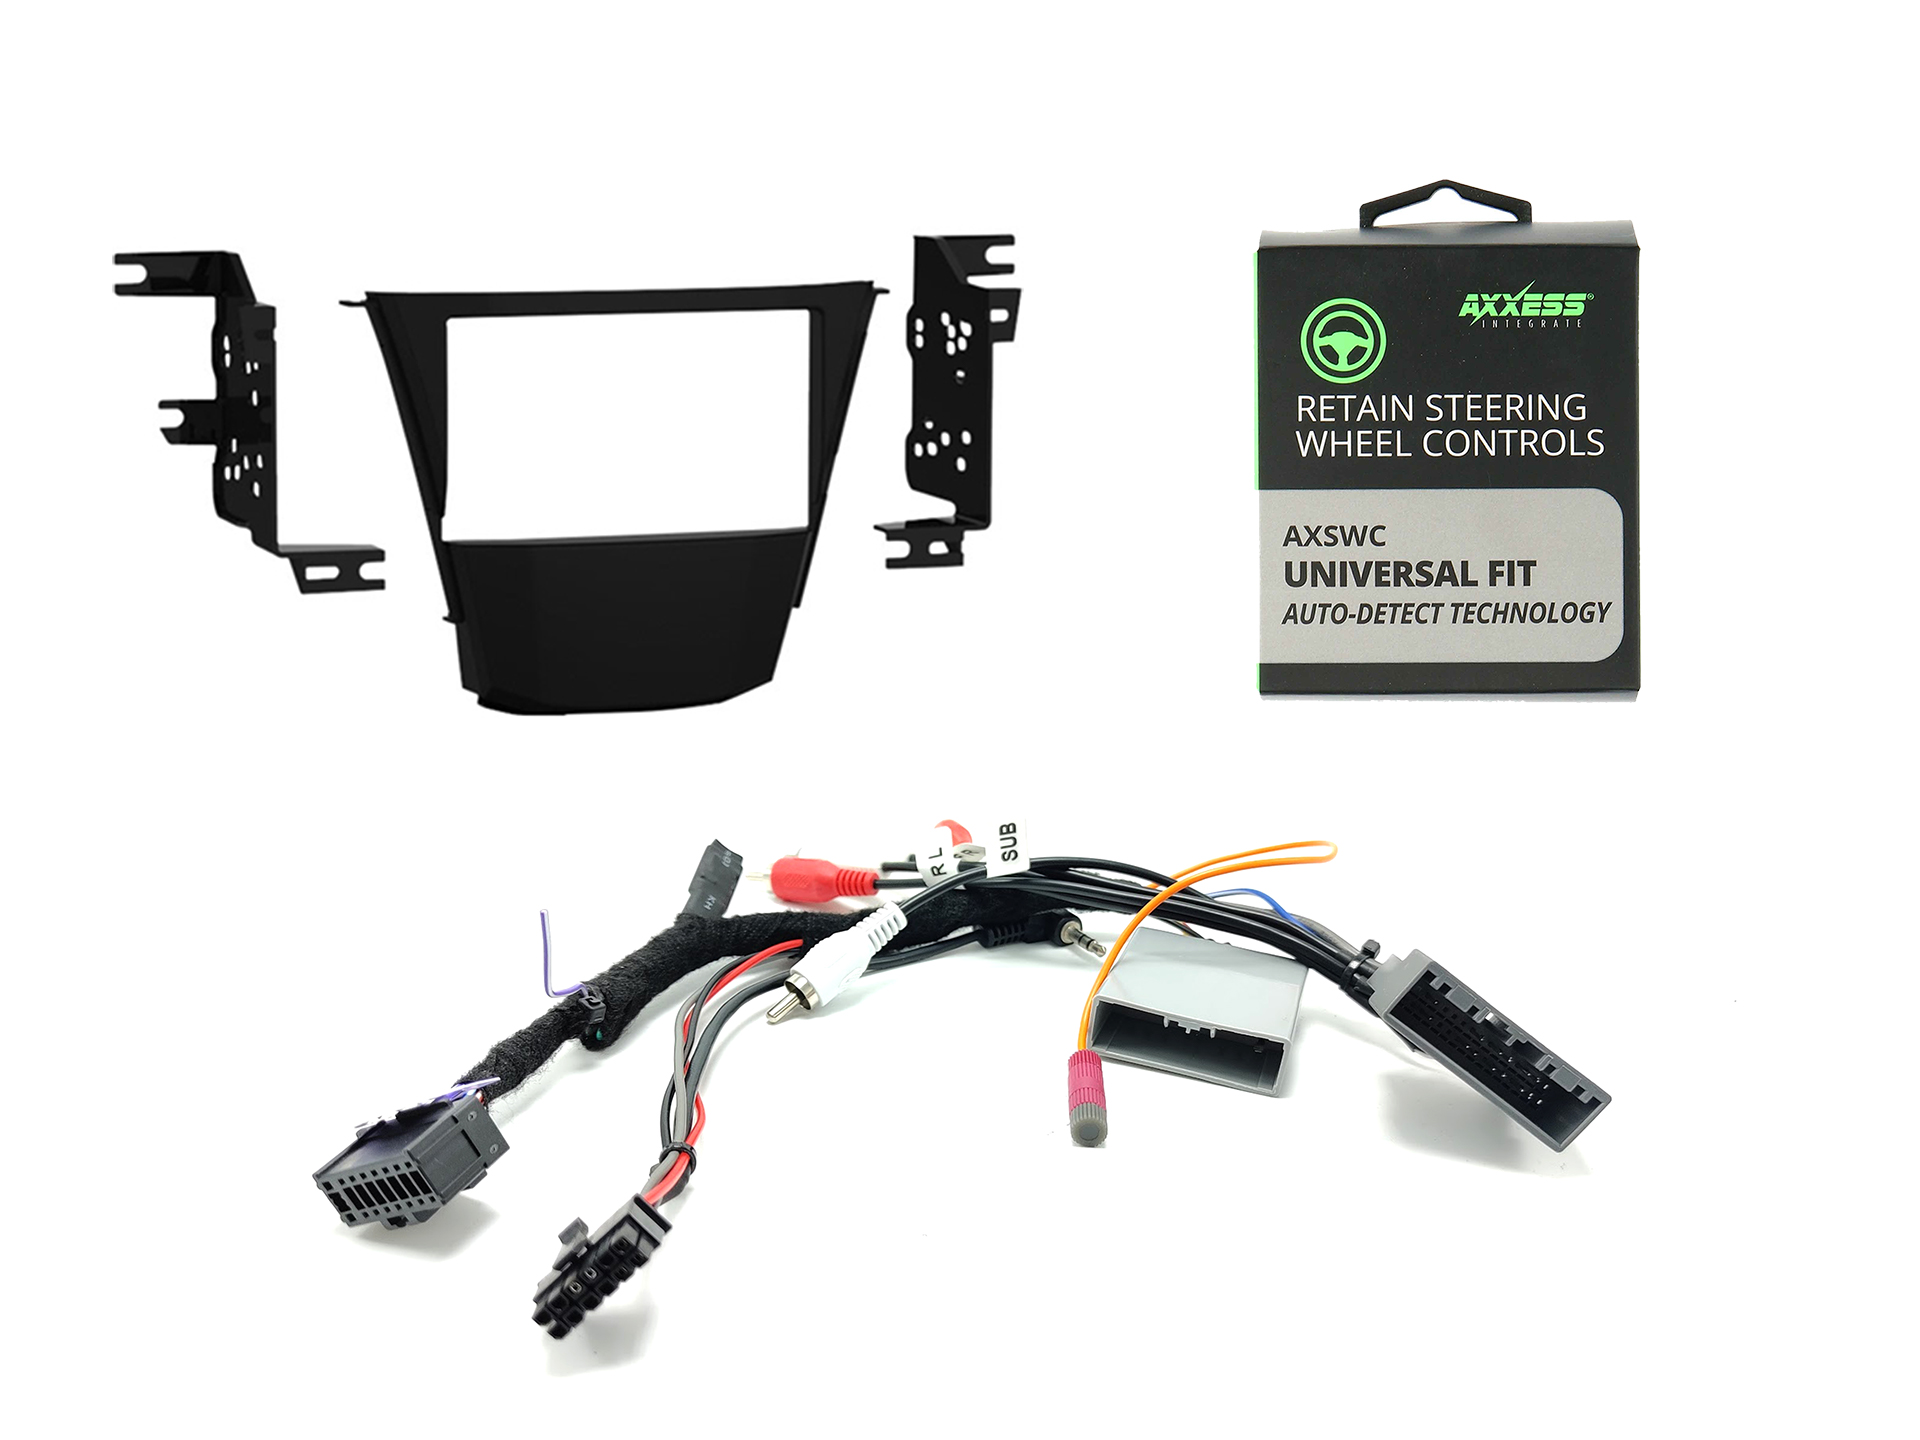
Simplify installing an aftermarket in dash stereo receiver in your 2nd generation Acura MDX covering years 2007 2008 2009 2010 2011 2012 and 2013 with our radio installation kit. Our aftermarket radio install kit is complete with everything you will need to install a new stereo in your Acura MDX. This kit does not include a radio. Our kit includes all the necessary components to install an aftermarket radio in your Acura. These components are a dash kit, a custom made wiring harness, the ELS Amplifier Retention and the AXSWC steering wheel control interface. Our custom harness allows you to have a plug and play installation with a supported compatible radio, the dash kit allows you to install a new radio in the factory location, the ELS amplifier interface allows you to keep the factory amplifier and the AXSWC allows you to control the aftermarket radio with your factory steering wheel controls.

A parking bypass is highly recommended with your order if your radio brand is Pioneer, Kenwood or Alpine. You can learn more about the bypass and add one to your cart using this link.

Your Acura MDX without navigation has a total of 6 speakers that are powered by the factory amplifier. When replacing the factory radio using our complete kit you are able to keep all of the speakers except the center channel. The front door speakers, tweeters, rear deck speakers and the factory subwoofer will all continue to work; the center dash speaker will not work. You will also lose the factory hands free functionality and the factory XM functionality. Our harness integrates with the factory amplifier to keep all your speakers working. If your factory amplifier does not work this kit will not work.

Your Acura MDX with navigation has a total of 8 speakers that are powered by factory amplifier. When replacing the factory radio using our complete kit you get to keep all the speakers including the factory subwoofer, door speakers, center speaker and tweeters. Our harness along with the amplifier interface allows you to keep the factory amplifier and keep all your speakers working. Your factory backup camera will continue to work but you will not be able to control the navigation. In the 2007-2009 MDX you will also need the factory navigation to not loose power to keep your camera working. In the 2010-2013 Acura MDX the backup camera is directly wired to the factory screen so it will continue to work. You will also lose the factory hands free functionality and the factory XM functionality. The rear entertainment will also no longer work.

When replacing the factory radio you will lose Sirius XM and the factory handsfree link functionality. The steering wheel controls including volume up, volume down, next, previous and mode will work. The call control buttons are not retained. The navigation control buttons are not retained. The components included in this complete install kit are:

  • Custom Made Wiring Harness
  • ABS Molded Dash Kit
  • AXSWC Steering Wheel Control Module
  • ELS Amplifier Interface for NAV models (instructions here)

In order for your aftermarket radio to be compatible with this harness it must have at least 5 RCA outputs including FL, FR, RL, RR, and SUB. Also the brand of the aftermarket radio must appear in the selection menu of this listing. If you are unsure if your radio qualifies please call us at 877-542-2872

In order to complete your order we may need your radios model number please include it in the billing checkout notes or if you forget please include a valid phone number where me may reach you in case of any questions.

Disclaimer: You will have to wiretap the illumination wire of your factory wiring for automatic radio dimming unless you purchase a radio which does not require an illumination trigger.

FAQ

  1. Can I add an amplifier and subwoofers with your harness?
    – Yes you can. You will just need run your RCAs to the back of the radio and wire tap the blue or blue/white wire of the harness.
  2. Can I add a backup camera with your harness?
    – Yes just follow the instructions provided in the radios owners manual or the cameras manual to complete the installation.
  3. Can I use a random radio I found on Amazon or eBay that has an unknown brand?
    – Most likely not. If the radio you purchased on Amazon is less than $100 it most likely won’t have all the features and ports needed for you to complete the installation.
  4. Do I get to keep all my speakers?
    – Yes all speakers are retained. On non nav models the center dash speaker is lost.
  5. Do I get to keep my steering wheel controls?
    – Yes but an additional part is required. The AXSWC in included in this kit. You will get to keep volume up, volume down, next, prev and mode. The call control buttons will not be retained.
  6. How do I get the radio to dim when I turn on the headlights?
    -You will need to wire tap the wire show in this picture and attach it to the orange or orange/white wire in your harness.

2007 2008 2009 2010 2011 2012 2013 Acura MDX Aftermarket Radio Installation DIY KIT (NON NAV)

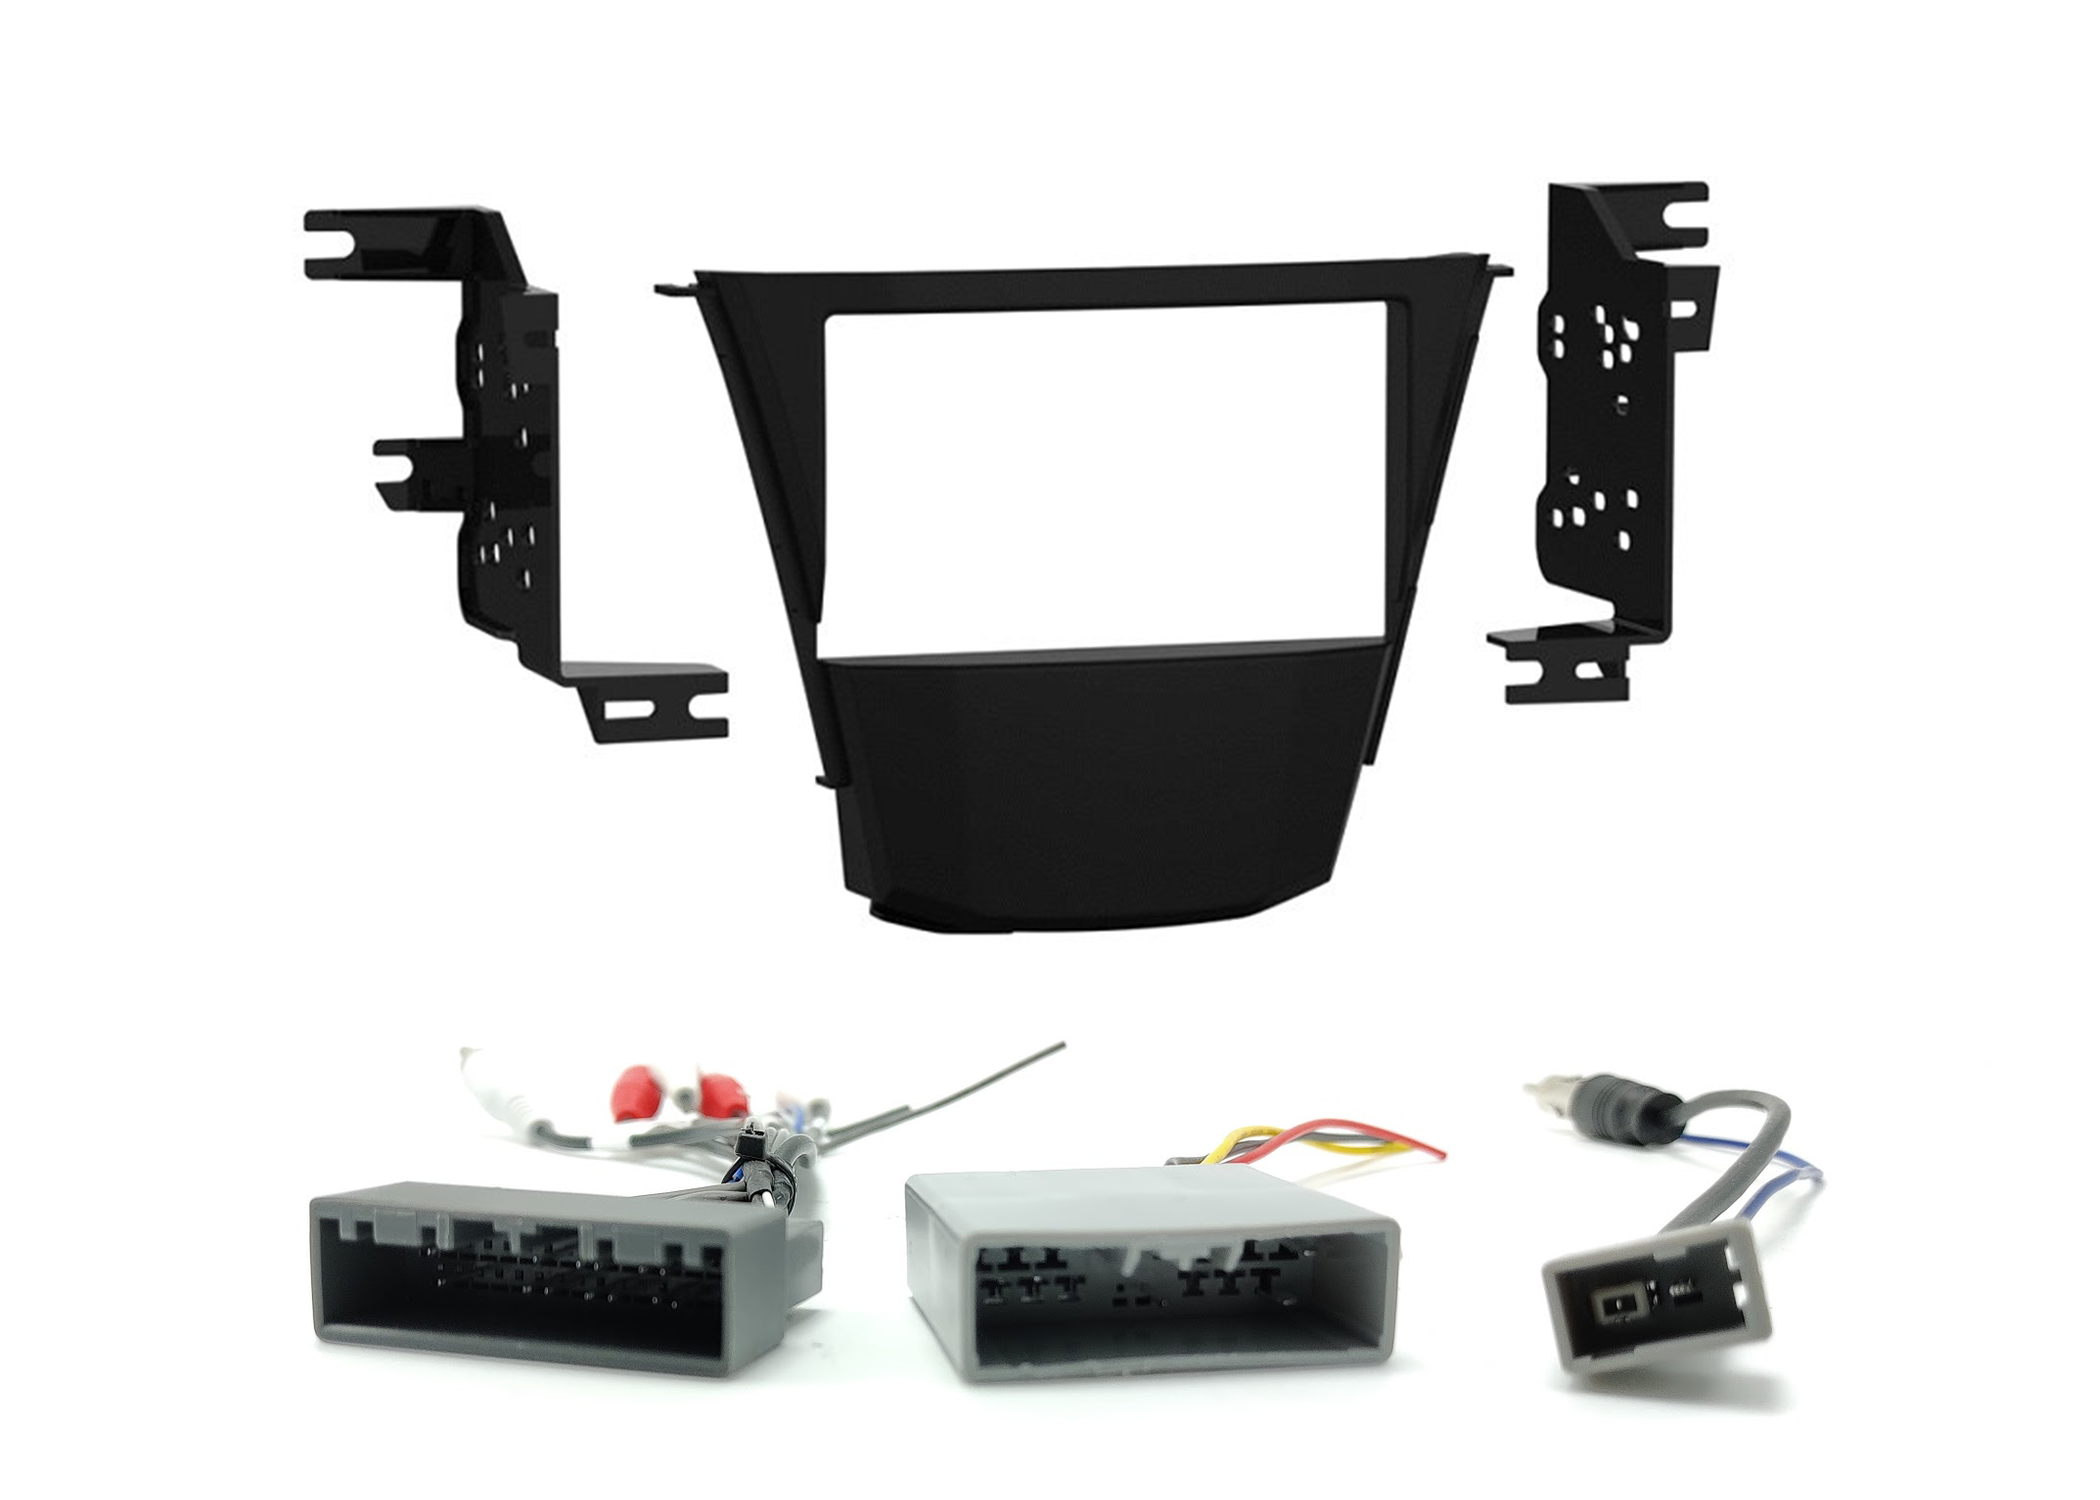
Are you looking to install an aftermarket radio in your 2007 2008 2009 2010 2011 2012 2013 Acura MDX without navigation? Our KIT Combo provides you with the necessary connectors and dash kit to plug into your factory connections and wire together with your aftermarket radio. The connectors in this kit are unterminated which means you will have to wire them together. The dash kit included can accommodate a single our double din sized radio. Instructions Here.

The DIY KIT comes with

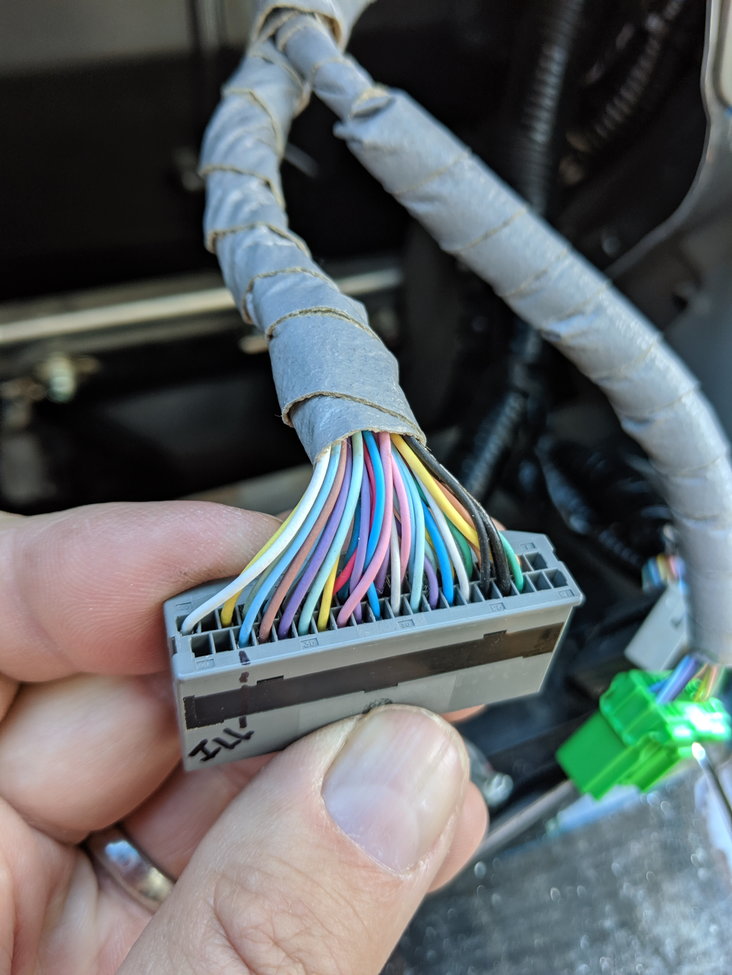
32 Pin Connector
18 Pin Connector
2 Pin Connector
ABS Dash Kit

These connectors allow you to retain your factory amplifier and sub woofer while installing an aftermarket radio. They also come connected with the leads necessary to install a steering wheel control module.

***Please note that if you have factory navigation this DIY KIT will not work for you***

** This harness combo does not included an illumination wire please plan accordingly with your radio installation **

2007 08 09 10 11 2012 Acura MDX Aftermarket Radio Installation Harnesses DIY Combo (Non Navigation)

Are you looking to install an aftermarket radio in your 2007 2008 2009 2010 2011 2012 Acura MDX? Our DIY Combo provides you with the necessary connectors to plug into your factory connections and wire together with your aftermarket radio. This means there is no need to splice or cut any factory wires. Instructions Here.

The DIY Combo comes with

32 Pin Connector
18 Pin Connector
2 Pin Connector

These connectors allow you to retain your factory amplifier and sub woofer while installing an aftermarket radio. They also come connected with the leads necessary to install a steering wheel control module.

***Please note that if you have factory navigation this DIY Combo will not work for you***

** This harness combo does not included an illumination wire please plan accordingly with your radio installation **

2007 08 09 10 11 2012 2013 Acura MDX Aftermarket PNP Radio Wiring Harness

If you are having trouble wiring a new aftermarket radio in your 2nd Generation Acura MDX spanning years 2007 to 2009, 2009 to 2011, or 2012 to 2013 then this custom made wiring harness will solve your issue. Our wiring harness to connects to your aftermarket radio and integrates with the factory amplifier in your Acura MDX to power all of your speakers. This harness is compatible with Acuras that have the premium sound system(base) or the ELS sound system(tech package with navigation).

In the base or premium sound system this harness uses the RCAs to send a low level signal to the factory amplifier. The harness is also wired with the lead to turn on the factory amplifier when you are playing audio. The harness eliminates the need for any wiring splicing or wire cutting. It makes you installation plug and play. If you do wish to keep the steering wheel controls you will need an additional part.

In the tech package with navigation and the ELS audio system our harness uses RCAs along with the ELS amplifier interface to keep your factory amplifier and power all of your speakers. The ELS audio system requires the ELS Amplifier Interface to manipulate the factory amplifier volume. If you do not use the ELS interface you will have power and audio but you will not be able to achieve full volume with your aftermarket radio. This harness makes your installation plug and play and requires no additional wiring.

*DISCLAIMER FOR ACURA TSX WITH NAVIGATION*
When you install an aftermarket radio in your Acura MDX you will lose the factory navigation functionality and the backup camera. If you want to retain the factory backup camera then you will also need to to purchase the camera retention harness. This harness will allow you to view the factory backup camera on your new aftermarket screen. When you keep the factory camera you will need to wiretap the reverse trigger. You will also need to install the ELS Amplifier volume knob in an accessible area to control the volume of your system. Please watch the clips below.
*END DISCLAIMER*

When you replace the factory radio in your Acura MDX you will lose some factory components. Those components include Sirius XM Radio, Factory Hands Free Calling and streaming, Factory Navigation Guidance, Acuralink, USB port, and the factory AUX Port. If you want Satellite radio you will need an extra tuner as you cannot use the factory one. Your new aftermarket radio will have Bluetooth streaming and calling along with USB and AUX.

After placing your order we will create a custom wiring harness for your exact radio installation. The custom harness will allow you to install a new aftermarket radio without the need for any wire splicing or wire tapping. This harness will allow you to have a plug and play installation for your Acura TSX with a supported compatible radio. A parking bypass is highly recommended with your order if your radio brand is Pioneer, Kenwood or Alpine. You can learn more about the bypass and add one to your cart using this link.

Our plug and play harness integrates with the factory amplifier to retain your center speaker (tech only), front door speakers and tweeters, the rear door and rear deck speakers and the factory subwoofer. Included in our harness are the necessary three connectors for your Acura MDX and the radio specific connector that will plug into the back of your radio. Our harness uses RCAs to feed a low level signal from the aftermarket radio to the factory amplifier. We also add the connector for the AXSWC steering wheel control interface so you can retain your factory steering wheel controls if desired. The AXSWC is an additional purchase it is not included. The wiring for the AXSWC is completed so if you do purchase it you can just plug it in. You can find the AXSWC here. The ASXWC allows you to retain volume up, volume down, next, previous and mode on your steering wheel but not the call control buttons with your aftermarket radio.

In order for your aftermarket radio to be compatible with our harness it must have at least 5 RCA outputs including FL, FR, RL, RR, and SUB. Also the brand of the aftermarket radio must appear in the selection menu of this listing. If you are unsure if your radio qualifies please call us at 877-542-2872.

In order to complete your order we may need your radios model number please include it in the billing checkout notes or if you forget please include a valid phone number where me may reach you in case of any questions.

In order to complete your order we may need your radios model number please include it in the billing checkout notes or if you forget please include a valid phone number where me may reach you in case of any questions.

FAQ.

  1. Will your harness allow me to keep the factory subwoofer working?
    – Yes this harness integrates with the factory amplifier to keep your factory subwoofer working.
  2. Can I add an amplifier and subwoofers with your harness?
    – Yes you can. You will just need run your RCAs to the back of the radio and wire tap the blue or blue/white wire of the harness.
  3. Can I add a backup camera with your harness?
    – Yes just follow the instructions provided in the radios owners manual or the cameras manual to complete the installation.
  4. Can I use a random radio I found on Amazon or eBay that has an unknown brand?
    – Most likely not. If the radio you purchased on Amazon is less than $100 it most likely won’t have all the features and ports needed for you to complete the installation.
  5. Do I get to keep all my speakers?
    – Yes all speakers are retained, except for the center dash speaker.
  6. Do I get to keep my steering wheel controls?
    -Yes but an additional part is required. The AXSWC you can find it here. You will get to keep volume up, volume down, next, prev and mode. The call control buttons will not be retained.
  7. How do I get the radio to dim when I turn on the headlights?
    -You will need to wire tap the wire show in this picture and attach it to the orange or orange/white wire in your harness.

*When replacing the factory radio in your Acura you will loose the factory Sirius XM, HFL and AUX Port. If you want automatic dimming when you turn on your headlights you will have to wiretap the illumination wire of your factory wiring unless you purchase a radio which does not require an illumination trigger.*

Acura Rear Deck or Rear Door Speaker Upgrade — JBL SQ 6.5″ Speakers Factory-Fit Wiring and Adapters for ELS & 2Ω Systems

What is the Acura rear door or deck speaker upgrade kit?

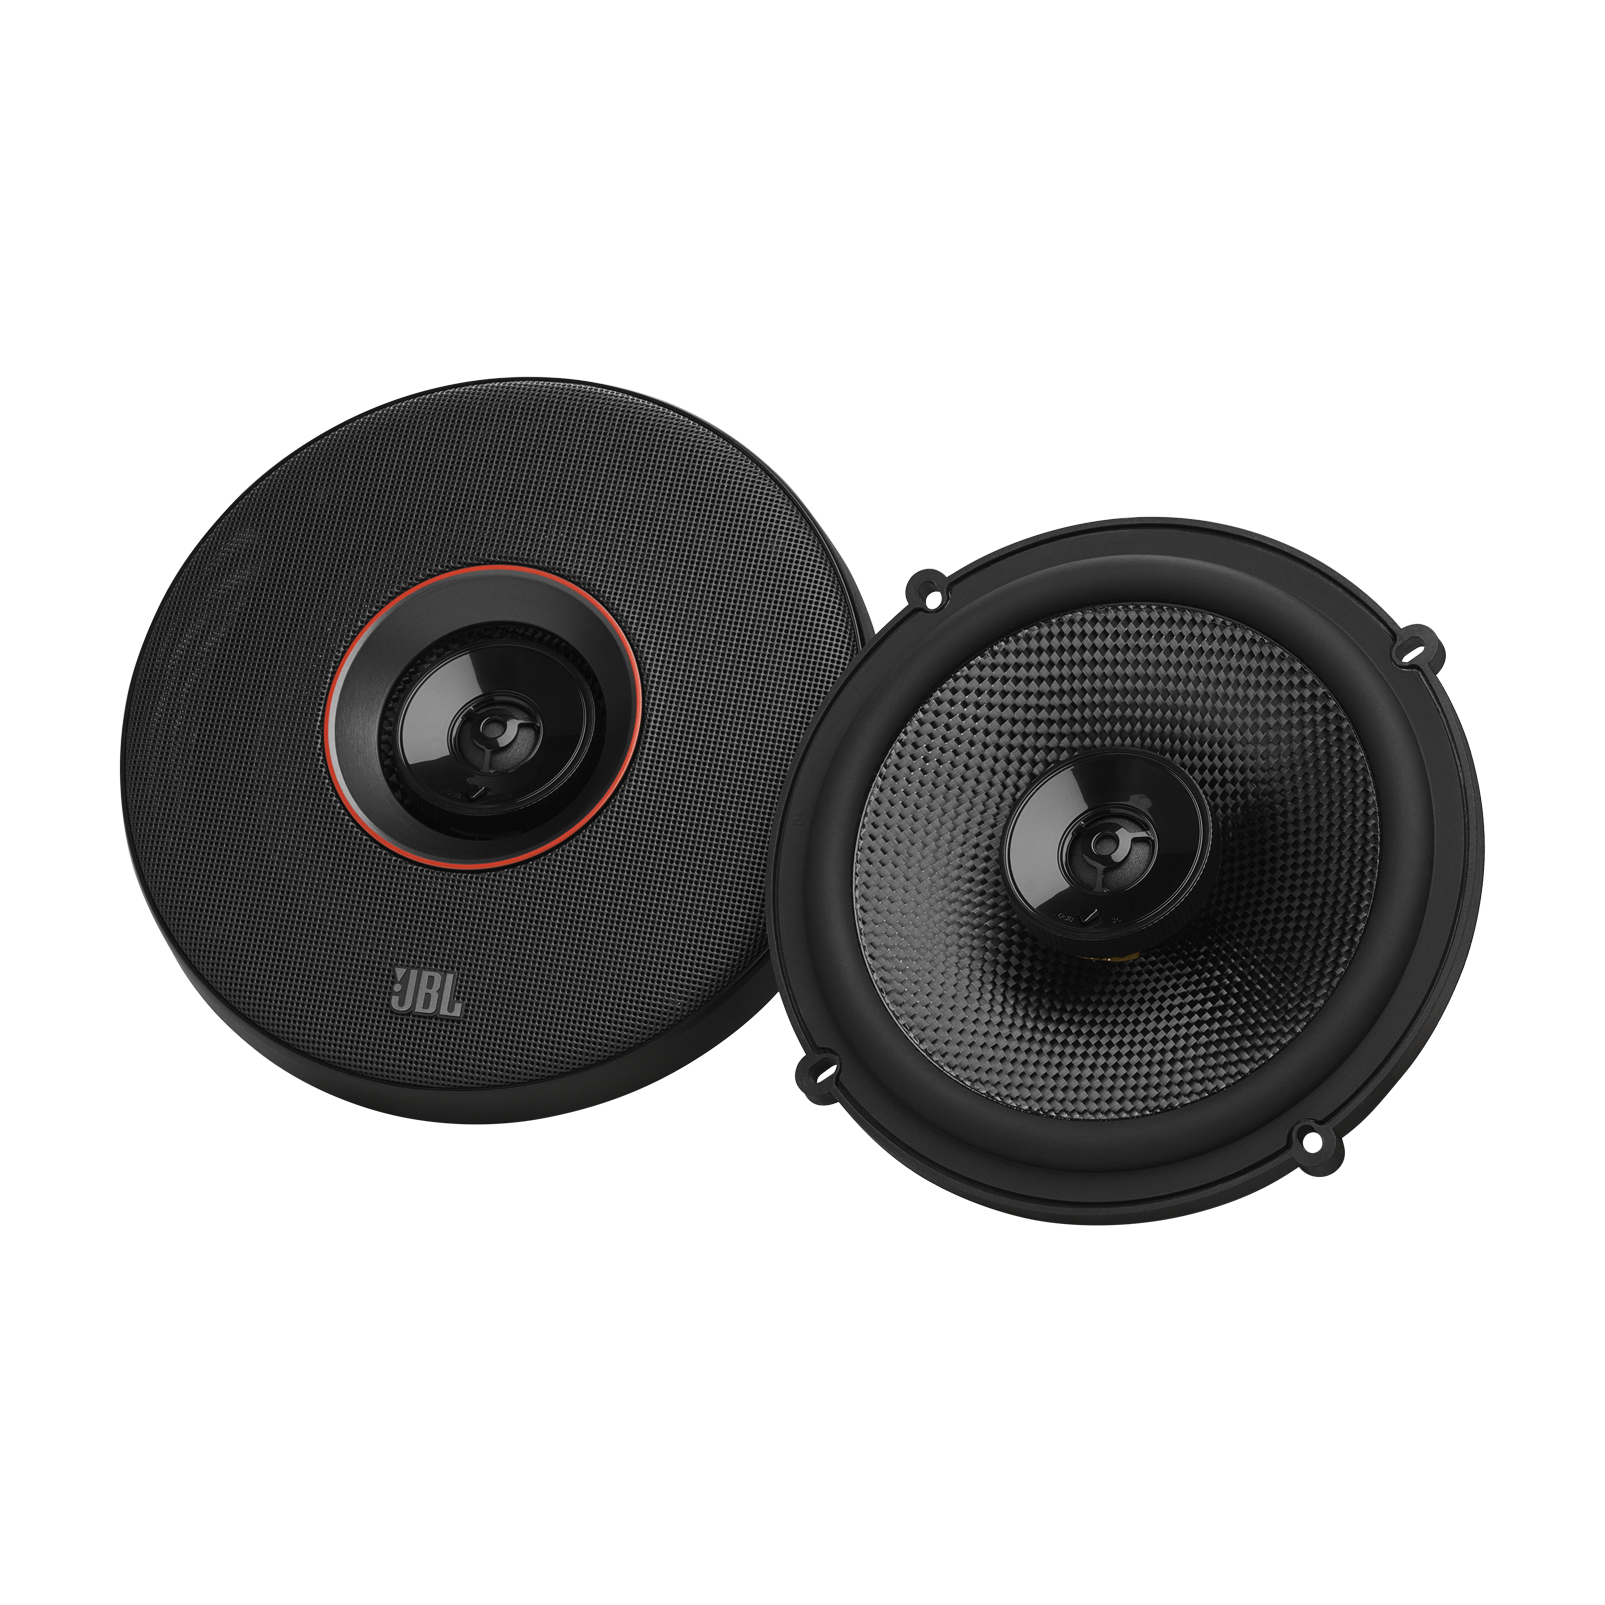
The rear door/deck upgrade kit is a pair of coaxial speakers paired with all the accessories needed to make your install fully plug and play. It requires no wire splicing and no metal cutting. The mounting adapters and grommets are our own designs. The harnesses are built to our spec for your car’s factory connectors. The adapters are precisely measured to match your factory mounting points, so no cutting or bending is necessary.

That’s what makes this kit truly plug and play. Your factory speaker connector plugs into our harness. Our harness plugs into the JBL speakers. The adapter bolts to the same holes the factory speaker used. Nothing gets cut, drilled, spliced, or bent.


Will this speaker kit fit my Acura?

Select your vehicle from the drop-down above. If your year and model are listed, this kit is built for it — the adapters and harnesses are cut for your exact factory mounting points and connectors. The hardware in this kit changes depending on the year and model, so make sure to select your car from the dropdown.

Vehicle Speaker location
2004-2008 Acura TL — Base without Navigation Rear deck
2004-2008 Acura TL — Tech with Navigation Rear deck
2007-2008 Acura TL Type S Rear deck
2007-2013 Acura MDX — Tech Package with Navigation Rear door
2007-2012 Acura RDX — Tech Package with Navigation Rear door
2009-2014 Acura TSX — Tech Package with Navigation Rear door or rear deck
2009-2014 Acura TL — Tech Package with Navigation Rear deck
2013-2022 Acura ILX — Tech Package with Navigation Rear door or rear deck
2013-2019 Acura RDX — Tech Package with Navigation Rear door
2013-2020 Acura RLX — Tech Package with Navigation Rear door
2014-2020 Acura MDX — Tech Package with Navigation Rear door
2015-2020 Acura TLX — Tech Package with Navigation Rear deck

If your car isn’t listed it’s possible these speakers will work — call us at 877-542-2872 and we’ll verify. If your car is in these year ranges but is not the Tech package with ELS, there may be other speakers that are a better fit.

If your Acura is 2021 or newer, the rear deck most likely has a separate tweeter in addition to the main speaker. These are coaxial — the tweeter is built into the woofer — so they won’t fill that separate tweeter location. Call us before ordering.


Will these sound better than my factory Acura speakers?

Yes. The factory speakers in your Acura were mass produced with cost in mind, not built for the best possible output. JBL didn’t set out to build a replacement speaker for your Acura, but they built something that works well in one. These have a low impedance suited to your factory system, a stronger magnet, and better cone material — a set that works with your factory amplifier or an aftermarket one and sounds great.

Will these fit in the factory speaker location?

Yes, and that’s the whole point of the kit. Our adapter puts a full 6.5-inch woofer in the factory mounting holes with no cutting and no drilling, in either the rear doors or the rear deck depending on your model.

More cone area means the speaker moves less to hit the same volume, and less movement means less distortion. You hear that as bass lines staying separated instead of blurring together when you turn it up.

The factory speakers also have one thing working against them that these don’t: runtime. Thousands of hours of playtime plus age means cones tear and surrounds crumble. It’s not unusual for someone to pull a factory speaker during this install and find the cone barely attached to the frame at all. Rear deck speakers get the worst of it — years of direct sun through the back glass cooks the surrounds.

Better isn’t the same as louder

Customers consistently report these playing louder than factory after the install, and our own testing measured a 1-2dB increase on certain tracks. That comes from the speaker itself, not from adding power — more cone area and a stronger motor doing more with the watts your amplifier is already sending.

What a new speaker set doesn’t change is the amplifier. Same amp, same power, same ceiling. Some people report a much bigger jump than a couple of dB, but that’s usually because the speaker they pulled out was already damaged. If real volume is what you’re after, these want a high-power amplifier behind them.


How hard is the install, and what does it cost?

Installing it yourself

Rear doors: plan on about 3 hours for the pair with basic hand tools — trim tools, socket set, screwdriver. The hardest part is the door panel, and most of your time goes into the first one.

Rear deck: clear your day. Depending on the model you’ll be pulling the rear seat bottom, the seat back, and the trim covers before you can even see the speakers. Figure 4-6 hours.

Either way, there’s no soldering, no crimping, and no wire stripping. The work is all disassembly.

Having a shop install it

Rear doors: typically 1.5-2 hours of labor, which runs about $150-$250 depending on your area.

Rear deck: $300-400 is realistic, and that’s if the shop quotes it correctly.

Get the quote in writing. Some shops price the rear deck like a door and then come back for more money once they’re three hours in and staring at a seat frame. Ask up front what happens if it takes longer than they estimated.

Shops aren’t fabricating brackets or splicing your harness with this kit, so there’s less to go wrong — some will quote lower once they see it’s plug and play.

What to expect when you call a shop

This part is worth knowing in advance, because it catches people off guard.

Most shops will be skeptical. Some will turn you away outright — plenty of them won’t install equipment they didn’t sell, and that’s their policy, not a judgment about the kit. What works: send them the install video and the product link before you book. Smaller independent shops will usually watch it, see there’s no fabrication and no splicing involved, and take the job.

If a shop tells you the kit won’t work or that your car needs something cut, have them call us. That conversation takes five minutes and we’ve had it many times.


Do I need an amp? What will these speakers work with?

This kit is built to run on your factory system exactly as-is. No amplifier required, no head unit change, nothing else to buy.

It works with:

  • Your factory amp — no modifications needed
  • Our plug-and-play amplifiers — the easy path to more power. Vehicle-specific harnesses, no wire running, no cutting, no splicing. Same install philosophy as this kit.
  • Aftermarket amplifiers — standard speaker-level or line-level connections, nothing unusual about these. If you’re going this route and want real output, look for something 2-ohm stable, which matters with low-impedance speakers. Be aware it’s a full install: power wire from the battery, a mounting location, and signal routing.
  • Aftermarket head units — works with any standard head unit output

Nothing about this kit locks you into one path. Start on the factory amp today, add an amplifier later, and the speakers and hardware carry over.


Will these speakers damage my Acura’s factory amp?

No. We’ve metered both the factory driver and these side by side, and they present your amplifier with effectively the same load it’s been driving since the car was new. Nothing about this swap asks your factory amp to work harder than it already was.

If your factory amp is already failing

This is worth knowing before you start, and it has nothing to do with the speakers.

If your system already has symptoms — only the tweeters playing, only the rear speakers working, channels cutting in and out, sound that comes and goes — your factory amplifier is already failing. An amp in that condition can finish failing during any work done in the system, speaker swap or not, and you can end up with limited or no sound afterward.

The new speakers don’t cause that. A failing amp gets disturbed by the work and completes a failure that was already underway. We see it most on the 2004-2008 TL, but it happens on other Acuras too.

If your system is doing any of that right now, call us before you order and we’ll talk through it.


What’s included in the rear speaker kit?

This kit covers both rear locations — driver and passenger side.

What you’ll install

  • 2 JBL 6.5″ coaxial speakers — tweeter built into the woofer, no separate tweeter to mount
  • 2 speaker harnesses — built to our spec, factory connector to speaker terminals
  • 2 ABS mounting adapters — our design, factory location, no modification
  • 2 foam gaskets — seal the adapter to the door or deck, cutting rattle and tightening midbass
  • Mounting hardware — nylon inserts, adapter screws, speaker screws

What you won’t need — and that’s normal

The speakers ship as a universal set, so the box includes parts meant for a generic install. In your Acura, the factory mounting hardware and grilles in that box aren’t used — ours matches the factory location.

Leftover parts in the box means the install went right, not wrong. Keep them or don’t.


Specifications

Model JBL Club 64SQ
Configuration 2-way coaxial
Woofer size 6.5″ (160 mm)
Power handling (RMS) 75W
Power handling (peak) 225W
Sensitivity (@2.83V) 93 dB
Frequency response 48 Hz – 21 kHz
Nominal impedance 2.7 ohms
Cone Carbon fiber, Plus One geometry
Magnet Y40 ferrite
Tweeter Edge-driven silk dome
Tweeter level control 0 dB / +3 dB switch
Mounting depth 2-1/16″

Thiele-Small parameters

BL (Tm) 3.748
DCR 2.12 ohms
Mms 12.273 g
Sd 132.73 cm²
Cms 530 µm/N
Vas 13.2 l
Fs 62.4 Hz
Qes 0.726
Qms 8.64
Qts 0.670

What if I am not happy with the sound?

If you’re unhappy with the way these speakers sound, it’s usually tuning. The most common feedback we get about any speakers we sell is that the tweeters are bright or the mid-bass isn’t as punchy as before.

Mid-bass

The punch you’re missing is the kick drum or that specific bass note. Your old speakers had a big hump right there. That wasn’t good engineering — it was a cheap speaker resonating in a location that flattered it. It couldn’t play any lower, so everything piled up at that one frequency and got loud. Made kick drums slam. Also made them slam on tracks where the engineer never put much kick, because the speaker added that kick to everything and you got used to it.

These don’t do that. They reproduce the music the way it was recorded. So the kick hits hard on songs recorded with a hard kick, and it doesn’t on songs that weren’t. That’s the difference you’re hearing — you’re getting the real thing instead of an exaggerated copy of it.

What to do: if you have the factory radio, adjust the EQ bass control up +2 or +3. Not more. Past that you’re making distortion at volume, not bass. Don’t reach for the subwoofer level — the factory sub is stuck behind a low-pass filter that cuts off well below where the punch you’re missing lives, so turning it up rattles the rear deck instead of putting the kick back.

If you have an aftermarket radio, put a 2-3dB bump between 60Hz and 80Hz.

If you still want more low end, the factory subwoofer is the weak link. A proper sub setup takes a full-range signal from the door and sub channels together, which gets you past the factory low-pass and lets you cross over where you want it instead of where Acura decided. That’s what our sub and amplifier packages are built to do.

Bright tweeters

Start with the treble control on your radio. Most brightness complaints come down to a treble setting that was compensating for tired factory speakers, and pulling it back a notch or two costs nothing.

Unlike our front kit, these don’t have an external crossover — the tweeter is mounted on the woofer. There’s an output level switch on the speaker itself, marked 0 dB and +3 dB. If yours is set to +3, moving it to 0 will take the edge off.

Worth knowing: rear speakers set louder than they need to be will pull the whole soundstage behind you. If the car sounds bright and like the music is coming from the back seat, try fading forward before you touch anything else.

If none of that gets you where you want, call us. We’ve tuned these in a lot of cars and we can usually tell you what else to try. Reach us at 877-542-2872, Monday through Friday, 10AM to 6PM Eastern.


Returns and warranty

Returns

Unused kits can be returned within 30 days of delivery. Unused means the kit has not been installed in the vehicle in any way — not mounted, not wired, not connected to the car — and comes back in the original packaging with all hardware and accessories included. Once a kit has been connected to your vehicle, it’s considered installed and is no longer eligible for return.

Return shipping is the customer’s responsibility. If the item is defective, we cover return shipping and take care of it from there. There’s no restocking fee — we don’t accept used product back, so there’s nothing to restock.

Full details are in our return policy.

Warranty

All components in this kit are warranted for one year from the date of purchase against defects in materials and workmanship. If a covered part fails within that period, we will repair or replace it at our discretion. Replacement is the sole remedy under this warranty.

Please handle all warranty claims through us rather than contacting the speaker manufacturer. We’ll take care of the claim from start to finish.

This warranty covers parts only. It does not cover shop labor, installation time, or the cost of removing and reinstalling components. It also does not cover damage from improper installation, physical damage, or speakers driven beyond their rated power.


Who do I call for help?

You can reach us Monday through Friday, 10AM to 6PM Eastern, by text or call at 877-542-2872. If you prefer email, you can reach us at sales@mobilemaxcaraudio.com.


Already own the speakers? Get the install hardware only

Get just the hardware — adapters, harnesses, gaskets, and mounting hardware for your car.

Acura Front Door Speaker Upgrade — JBL SQ 6.5″ Speakers, Tweeters & Factory-Fit Wiring and Adapters for ELS & 2Ω Systems

What is the Acura Front Door Speaker Upgrade kit?

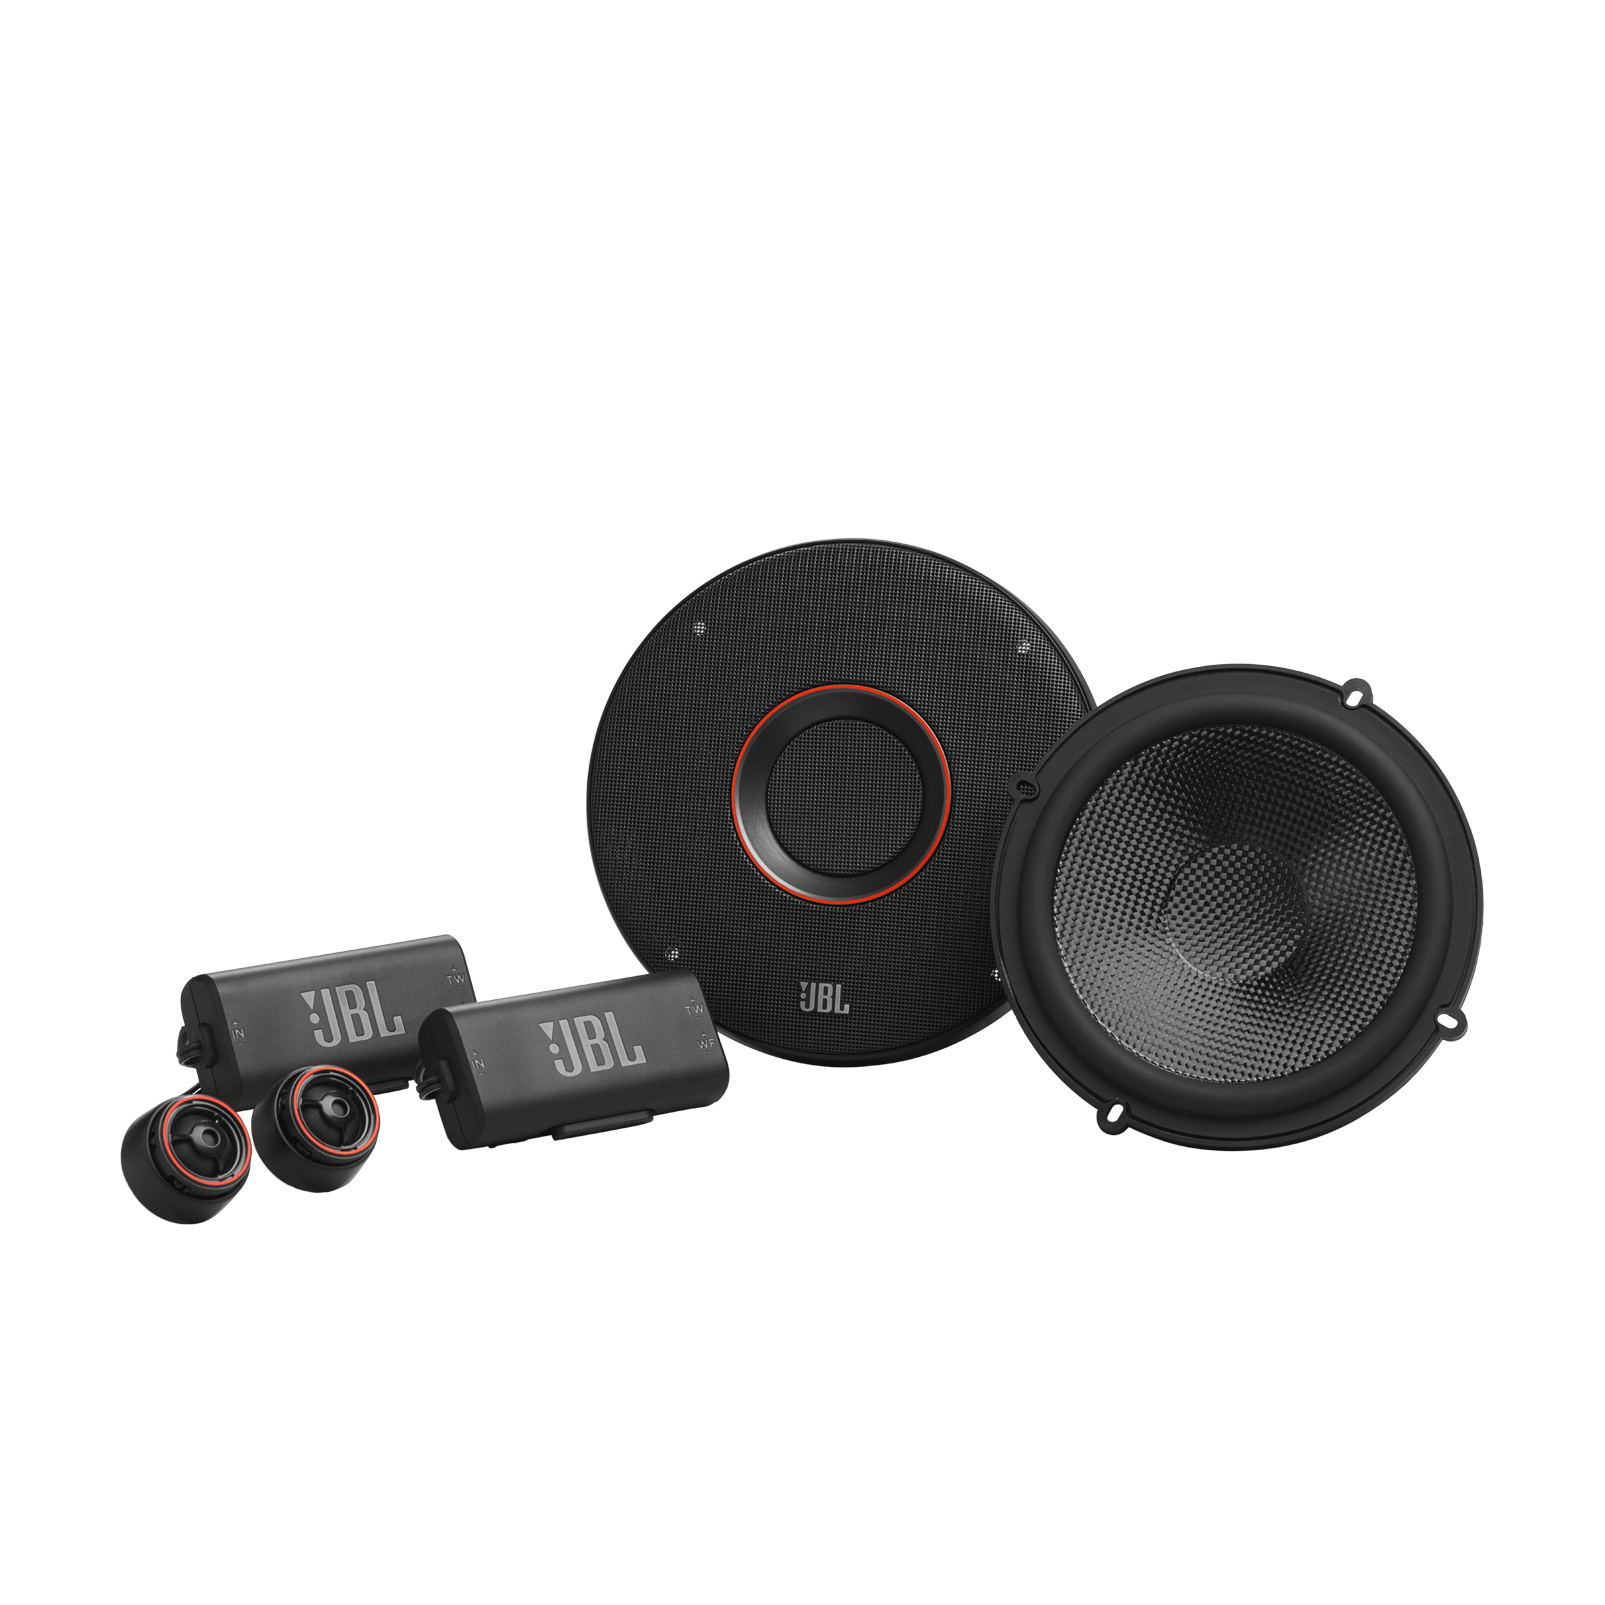
The front door upgrade kit is a component set of speakers paired with all the accessories needed to make your install fully plug and play. It requires no wire splicing or metal cutting to install this new set of speakers. The hardware included which are the mounting adapters, tweeter cups, and grommets are all our own designs. The harnesses are built to our spec for your car’s factory connectors. The adapters are all precisely measured to ensure they match your factory mounting points and no metal cutting or bending is necessary.

That’s what makes this kit truly plug and play. Your factory speaker connector plugs into our harness. Our harness plugs into the JBL speakers and tweeters. The adapter bolts to the same holes the factory speaker used. The tweeter cup clips into your factory tweeter housing. Nothing gets cut, drilled, spliced, or bent.


Will this speaker kit fit my Acura?

Select your vehicle from the drop-down above. If your year and model are listed, this kit is built for it — the adapters, harnesses, and tweeter cups are cut for your exact factory mounting points and connectors. The hardware in this kit can change depending on the year and model selection so make sure to select your car from the dropdown. Here is a quick summary of the cars supported.

2004-2008 Acura TL – Base without Navigation
2004-2008 Acura TL – Tech with Navigation
2007-2008 Acura TL Type S
2007-2013 Acura MDX – Tech Package with Navigation
2007-2012 Acura RDX – Tech Package with Navigation
2009-2014 Acura TSX – Tech Package with Navigation
2009-2014 Acura TL – Tech Package with Navigation
2013-2022 Acura ILX – Tech Package with Navigation
2015-2020 Acura TLX – Tech Package with Navigation
2013-2020 Acura RLX – Tech Package with Navigation
2014-2020 Acura MDX – Tech Package with Navigation

If your car isn’t listed is possible these speakers will work and you can call us at 877-542-2872 so we can verify. If your car is in these year ranges but is not the tech package with ELS you might be able to use other speakers that are a better fit. If your Acura is made after 2021 it most likely has a three way system for the front speakers and these will not be a direct replacement.


Will these sound better than my factory Acura speakers?

Yes. The factory speakers in your Acura were built for mass production and cost savings, not for the best possible output. JBL didn’t set out to build a replacement speaker for your Acura, but they built something that works well in one. The JBL speakers have a low impedance suited to your factory system, a better motor design, and better materials that make for a set that works with your factory amplifier or an aftermarket one and sound great.

Will these fit in the factory speaker location?

Ask five people what size speaker is in your Acura’s front doors and you’ll get answers between 5.25 and 6 inches. It’s argued about constantly, and it’s the reason a lot of owners end up shopping for a 5.25 they don’t need. Our adapter settles it: a full 6.5-inch woofer mounts in the factory holes, no cutting, no drilling. More cone area on a stronger motor means a cone that holds its shape when the music gets loud. You hear it as clarity that stays intact at higher volumes and bass lines stay separated instead of blurring together.

The factory speakers also have one thing working against them that the JBLs don’t: runtime. Thousands of hours of playtime plus age means cones tear and surrounds crumble. It’s not unusual for someone to pull a factory speaker during this install and find the cone barely attached to the frame at all.

Better isn’t the same as louder

Customers consistently report the JBLs playing louder than factory after the install, and our own testing measured a 1-2dB increase on certain tracks. That comes from the speaker itself, not from adding power — more cone area, a stronger motor, and a considerably more sensitive tweeter doing more with the watts your amplifier is already sending.

What a new speaker set doesn’t change is the amplifier. Same amp, same power, same ceiling. Some people report a much bigger jump than a couple of dB, but that’s usually because the speaker they pulled out was already damaged. If real volume is what you’re after, these want a high-power amplifier behind them.


How hard is the install, and what does it cost?

Installing it yourself

Plan on about 3 hours for both front doors with basic hand tools — trim tools, socket set, screwdriver. No soldering, no crimping, no wire stripping. The hardest part is the door panel, and most of your time goes into the first one. Installation instructions and door panel removal videos are available here.

Having a shop install it

Typically 1.5-2 hours of labor, which runs about $150-$250 in labor charges depending on your area. Shops aren’t fabricating brackets or splicing your harness with this kit, so there’s less to go wrong — some will quote lower once they see it’s plug and play.

What to expect when you call a shop

This part is worth knowing in advance, because it catches people off guard.

Most shops will be skeptical. Some will turn you away outright — plenty of them won’t install equipment they didn’t sell, and that’s their policy, not a judgment about the kit. What works: send them the install video and the product link before you book. Smaller independent shops will usually watch it, see there’s no fabrication and no splicing involved, and take the job.

If a shop tells you the kit won’t work or that your car needs something cut, have them call us. That conversation takes five minutes and we’ve had it many times.


Do I need an amp? What will these speakers work with?

This kit is built to run on your factory system exactly as-is. No amplifier required, no head unit change, nothing else to buy.

It works with:

  • Your factory amp — no modifications needed
  • Our plug-and-play amplifiers — the easy path to more power. Vehicle-specific harnesses, no wire running, no cutting, no splicing. Same install philosophy as this kit.
  • Aftermarket amplifiers — standard speaker-level or line-level connections, nothing unusual about these. If you’re going this route and want real output, the JBL Club A758 is a strong match — eight channels and 2-ohm stable, which matters with low-impedance speakers. Be aware it’s a full install: power wire from the battery, a mounting location, and signal routing.
  • Aftermarket head units — works with any standard head unit output

Nothing about this kit locks you into one path. Start on the factory amp today, add an amplifier later, and the speakers and hardware carry over.


Will these speakers damage my Acura’s factory amp?

No. We’ve metered both the factory driver and these side by side, and they present your amplifier with effectively the same load it’s been driving since the car was new. Nothing about this swap asks your factory amp to work harder than it already was.

If your factory amp is already failing

This is worth knowing before you start, and it has nothing to do with the speakers.

If your system already has symptoms — only the tweeters playing, only the rear speakers working, channels cutting in and out, sound that comes and goes — your factory amplifier is already failing. An amp in that condition can finish failing during any work done in the system, speaker swap or not, and you can end up with limited or no sound afterward.

The new speakers don’t cause that. A failing amp gets disturbed by the work and completes a failure that was already underway. We see it most on the 2004-2008 TL, but it happens on other Acuras too.

If your system is doing any of that right now, call us before you order and we’ll talk through it.


What’s included in the front door speaker kit?

This kit covers both front doors — driver and passenger.

What you’ll install

  • 2 JBL 6.5″ woofers — one per front door
  • 2 JBL tweeters — one per side
  • 2 speaker harnesses — our design, factory connector to speaker terminals
  • 2 ABS mounting adapters — ours, factory location, no modification
  • 2 foam gaskets — seal the adapter to the door, cutting rattle and tightening midbass
  • 2 tweeter cups — ours, clip into the factory tweeter housing and hold the JBL tweeter
  • 2 tweeter harnesses — our design, factory tweeter connector to JBL tweeter, with an inline bass-blocking capacitor that keeps low frequencies off the tweeter
  • Mounting hardware — nylon inserts, adapter screws, speaker screws

What you won’t need — and that’s normal

The speakers ship as a universal component set, so JBL’s box includes parts meant for a generic install. In your Acura, several of them aren’t used:

  • JBL’s crossovers — optional, and worth keeping. Your tweeter is already protected by the bass-blocking capacitor in our harness, and the crossover’s woofer output is a straight pass-through with no filtering on it, so running the woofer through it does nothing electrically. But the crossover is your tuning option if the highs come out brighter than you like — see the section above.
  • JBL’s tweeter mounts and cups — not used. Ours clip into your factory tweeter housing instead.
  • JBL’s mounting hardware and grilles — not used. Ours matches the factory location.

Leftover parts in the box means the install went right, not wrong. Keep them or don’t.


Specifications

Speakers

Model JBL Club 64CSQ
Configuration 2-way component set
Woofer size 6.5″ (160 mm)
Power handling (RMS) 95W
Power handling (peak) 285W
Sensitivity (@2.83V) 93 dB
Frequency response 48 Hz – 21 kHz
Cone Carbon fiber, Plus One geometry
Magnet Y40
Tweeter Edge-driven silk dome
Crossover External network, 5 kHz

Thiele-Small parameters

BL (Tm) 3.776
DCR 2.09 ohms
Mms 13.238 g
Sd 132.73 cm²
Cms 0.536 µm/N
Vas 13.3648 l
Fs 59.7 Hz
Qes 0.728
Qms 8.315
Qts 0.670

What if I am not happy with the sound?

If you are unhappy with the ways these speakers sound its usually always tuning. The most common feedback we receive about any speakers we sell is that the tweeters are bright or the mid-bass is not as punchy as before.

Let’s start with the mid-bass, the punch you’re missing is the kick drum or that specific bass note. Your old door speakers had a big hump right there. That wasn’t good engineering, it was a cheap speaker resonating to try and trick you. It couldn’t play any lower, so everything piled up at that one frequency and got loud. Made kick drums slam. Also made them slam on tracks where the engineer never put much kick, because the speaker added that kick to everything and you got used to it.

The JBLs don’t do that. They reproduce the music that was recorded as intended. So the kick hits hard on songs recorded with a hard kick, and it doesn’t on songs that weren’t. That’s the difference you’re hearing — you’re getting the real thing instead of an exaggerated copy of it. The old door woofer used to try to do it all and play notes mostly dedicated for your subwoofer.

What to do:
If you have the factory radio adjust the EQ bass control, +2 or +3 there too. Not more. Past that you’re making distortion at volume, not bass. Don’t mistake it for the subwoofer level that is different and won’t help you with the speakers. If you have an aftermarket radio you can add that boost back by adjust the EQ from 60Hz-80Hz with a 2dB or 3dB bump. If you still want more, the factory sub is the weak link and replacing it is the fix. You can add a dedicated sub in the trunk or upgrade the subwoofer and add another amplifier to feed it more power and really feel the bass in the car.

Now for the one with the easy fix, if your tweeter is too bright the first step is to start with your factory radio or aftermarket radios EQ.
Most brightness complaints come down to a treble setting that was compensating for tired factory speakers. Pulling treble back a notch or two costs nothing and fixes it most of the time. Call us and we’ll walk you through where those settings live in your car if you can’t find them.

Then there’s JBL’s crossover — this is what it’s actually for. Our tweeter harness uses an inline bass-blocking capacitor. It protects the tweeter, keeps the install simple, and runs the tweeter at full level. JBL’s external crossover is a complete filter network instead: it attenuates the tweeter to level-match the woofer, and it rolls off the low end of the tweeter’s range more steeply than a capacitor can. That second part matters more than people expect, because harshness usually lives in the lower treble rather than the very top.

So if the highs are hotter than you want them, wiring in the crossover that came in the JBL box is the fix. It’s more work — the crossover has to be mounted and wired in the door — but it’s a real change in how the tweeter behaves, not just a volume trim.

Either way, call us first. We’ve tuned these in a lot of cars and we can usually tell you which of the two you need in a few minutes.
Reach us at 877-542-2872, Monday through Friday, 10AM to 6PM Eastern.


Returns and warranty

Returns

Unused kits can be returned within 30 days of delivery. Unused means the kit has not been installed in the vehicle in any way — not mounted, not wired, not connected to the car — and comes back in the original packaging with all hardware and accessories included. Once a kit has been connected to your vehicle, it’s considered installed and is no longer eligible for return.

Return shipping is the customer’s responsibility. If the item is defective, we cover return shipping and take care of it from there. There’s no restocking fee — we don’t accept used product back, so there’s nothing to restock.

Full details are in our return policy.

Warranty

All components in this kit are warranted for one year from the date of purchase against defects in materials and workmanship. If a covered part fails within that period, we will repair or replace it at our discretion. Replacement is the sole remedy under this warranty.

Handle all warranty claims through us. Don’t contact JBL — contact us and we’ll take care of the claim from start to finish.

This warranty covers parts only. It does not cover shop labor, installation time, or the cost of removing and reinstalling components. It also does not cover damage from improper installation, physical damage, or speakers driven beyond their rated power.


Who do I call for help?

You can reach us Monday through Friday, 10AM to 6PM Eastern, by text or call at 877-542-2872. If you prefer email, you can reach us at sales@mobilemaxcaraudio.com.


Already own the speakers? Get the install hardware only

Get just the hardware — adapters, harnesses, tweeter cups, gaskets, and mounting hardware for your car.
Plug-and-Play Bass Upgrade – Monoblock Subwoofer Amplifier for Acura & Honda Sedans (Excludes SUVs & Wagons)

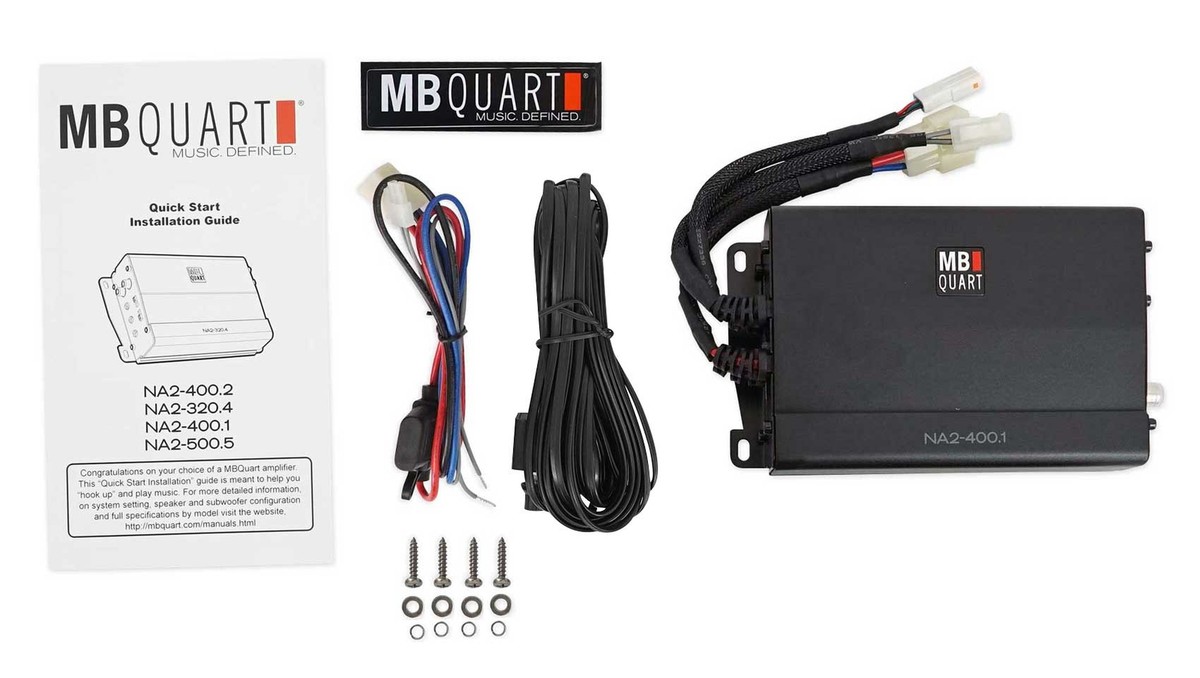
If you own an Acura or Honda with a premium sound system that includes a factory subwoofer, the bass may seem lacking. This monoblock amplifier will increase the bass output to either your factory subwoofer or an aftermarket subwoofer with 300 watts of RMS power. This amplifier is about the size of an iPhone and installs in the trunk near the factory subwoofer.

To install the amplifier, there is no wire cutting or splicing required — simply plug in the necessary connections to your subwoofer and fuse box. This amplifier does require a ground connection, which means you will need to drill a small hole inside the trunk to secure the grounding terminal. Some vehicles may also require a direct connection to the battery instead of the fuse box.

The factory subwoofer in your Acura or Honda typically expects around 60 watts of RMS power, so installing this amplifier could potentially damage the factory subwoofer. It is recommended to upgrade the subwoofer before installation. If you prefer not to replace the subwoofer in the factory location, you can pair this amplifier with a 2-ohm or 4-ohm subwoofer in an enclosure to achieve stronger bass output in your vehicle.

This amplifier is very simple and features a bass knob to control the bass level on demand. If you want advanced features such as bass restoration, time alignment, or dynamic bass boost, we recommend using a different amplifier. This product is ideal for someone who wants a bit more kick without spending the time on a complex installation. This product does not work on vehicles with powered subwoofer enclosures, such as the 2007–2013 Acura MDX with the ELS system. In order for this product to work, you must be able to access the connections at your subwoofer.

The installation process consists of six steps:

  1. Find a mounting location for the amplifier. We recommend the bracing below the rear deck. You will need a drill or another power tool to create screw holes and mount the amplifier.

  2. Disconnect the connector from the factory subwoofer and connect it to the amplifier input.

  3. Connect the amplifier output connector to the factory subwoofer.

  4. Find a grounding location within 3 feet of the amplifier mounting point. Suitable locations include rear deck bracing or near the trunk liner.

  5. Route the power and remote wires from the trunk to the passenger-side or driver-side fuse box. Connect the thicker power wire to a fuse box terminal and use a fuse tap to connect the remote wire to an accessory fuse.

  6. Final adjustments (optional). If your system is completely factory, no adjustments are needed because the amplifier is pre-tuned. If you have aftermarket components, you may need to adjust the gain level and low-pass filter.

If you need assistance with installation, you can contact our support team by phone or text.

Honda Acura XM AUX Audio RCA Harness

If you want to send audio to your factory radio in your Acura or Honda you can inject audio into the XM audio feed with this harness. This harness will disable the XM radio functionality and instead play your audio source through the XM port. The information shown on the screen will still be from the XM radio so it will either say a radio station or show the subscribe messages but you will hear the audio from your source instead.

This harness is used with the 9″ android screens that are available online in the Acura TL, TSX and MDX currently but you could use it for other stereos. This harness will only work if your car has the factory XM unit.

Acura Honda Door Speaker Spacer Adapters w/ Speaker Harnesses

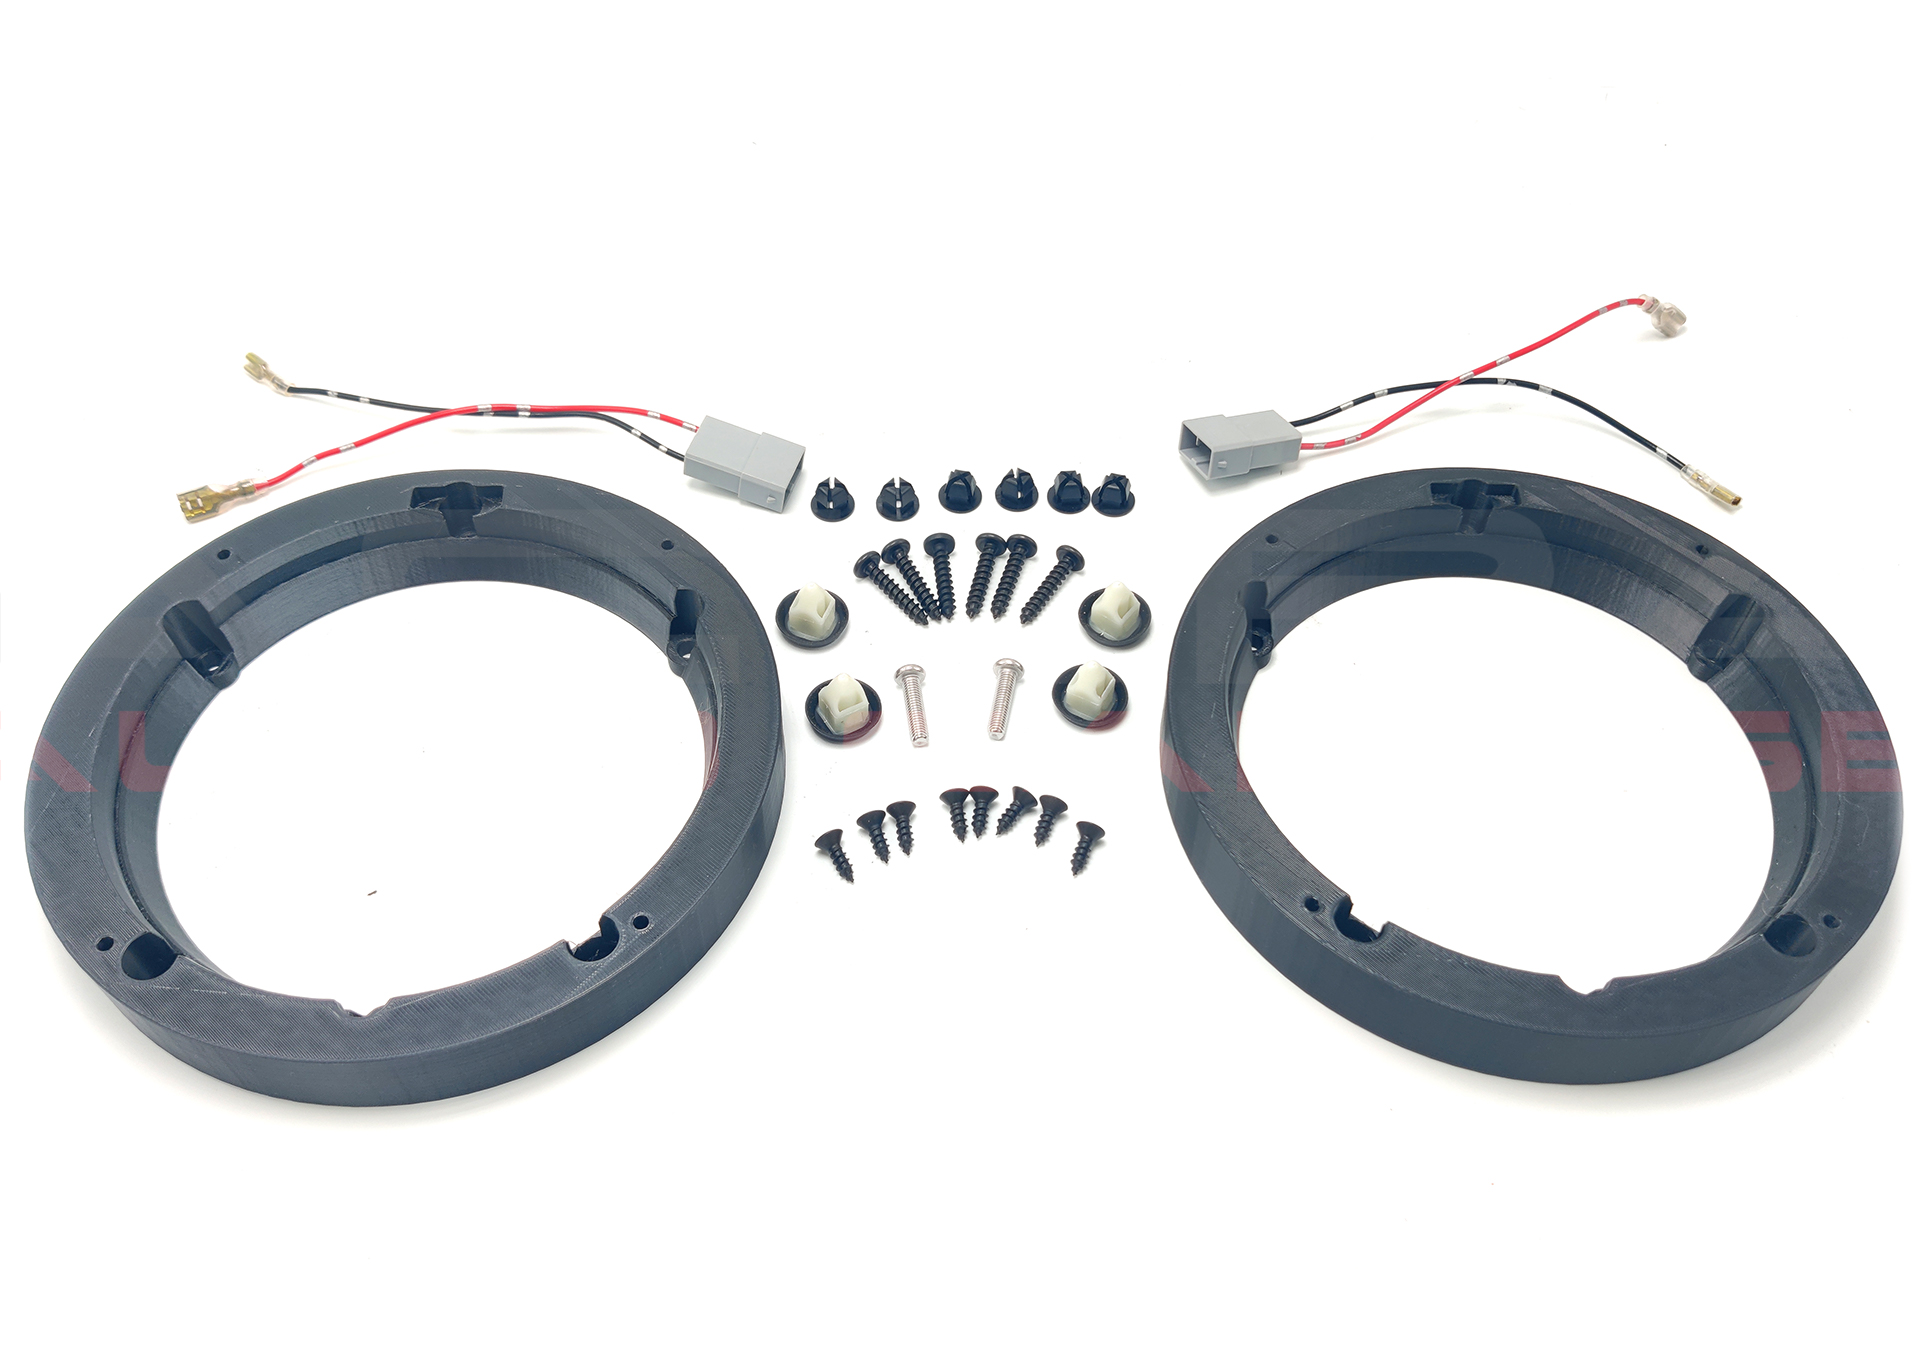
When replacing the door speakers in your Acura/Honda most speakers require the need to create new holes or to cut the metal of the door. The factory speakers in your Acura are often between 5.25 and 6 inches making installing new speakers complicated.

Our speaker spacer adapters come with the necessary hardware to install onto the factory mounting locations removing the need to cut or drill any metal. Our design utilizes the factory mounting holes to secure the spacer to the door and provide you with new mounting holes for your 6.5 aftermarket speakers. There is no need to cut or modify the door in any way. Our spacer adapter and speaker harness simplifies the install making the speaker installation plug and play. If you are looking to also replace your tweeters we have the tweeter harness necessary to do so.

These spacers are designed to fit traditional full range 6.5 speakers from major brands like Kicker, JBL, Pioneer, Kenwood, JVC, Alpine, Infinity, Sony, Rockford Fosgate, Focal, Audison, Hertz and others. Loudspeakers with large magnets will not fit into these spacers or into the cavity of your door. Often brands likes DS18, PRV, Massive, Timpano, Skar, CT Sounds, Deaf Bonce and others make speakers with oversized magnets these are not recommend for your Honda/Acura because of the fitment issues.

These spacers are for

Acura
1999-2003 Acura CL Front Doors Only
2001-2006 Acura MDX Rear Doors Only
2014-2022 Acura ILX All Doors
2023-2025 Acura Integra Front Doors Only
2014-2020 Acura TLX All Doors
2021-2025 Acura TLX All Doors
2009-2013 Acura TL All Doors
2004-2008 Acura TL Front Doors Only
1999-2003 Acura TL All Doors
2004-2013 Acura TSX All Doors
2006-2013 Acura RL Front Doors Only
2007-2020 Acura RDX All Doors
2014-2020 Acura RLX All Doors
2002-2006 Acura RSX Front Doors Only

Honda
2003-2007 Honda Accord Front Doors Only
2008-2022 Honda Accord All Doors
2001-2020 Honda Civic All Doors
2002-2020 Honda CRV All Doors
2014-2020 Honda HRV All Doors
2007-2020 Honda Insight All Doors
2011-2020 Honda Odyssey All Doors
2018-2020 Honda Passport All Doors
2001-2020 Honda Pilot All Doors
2006-2020 Honda Ridgeline All Doors


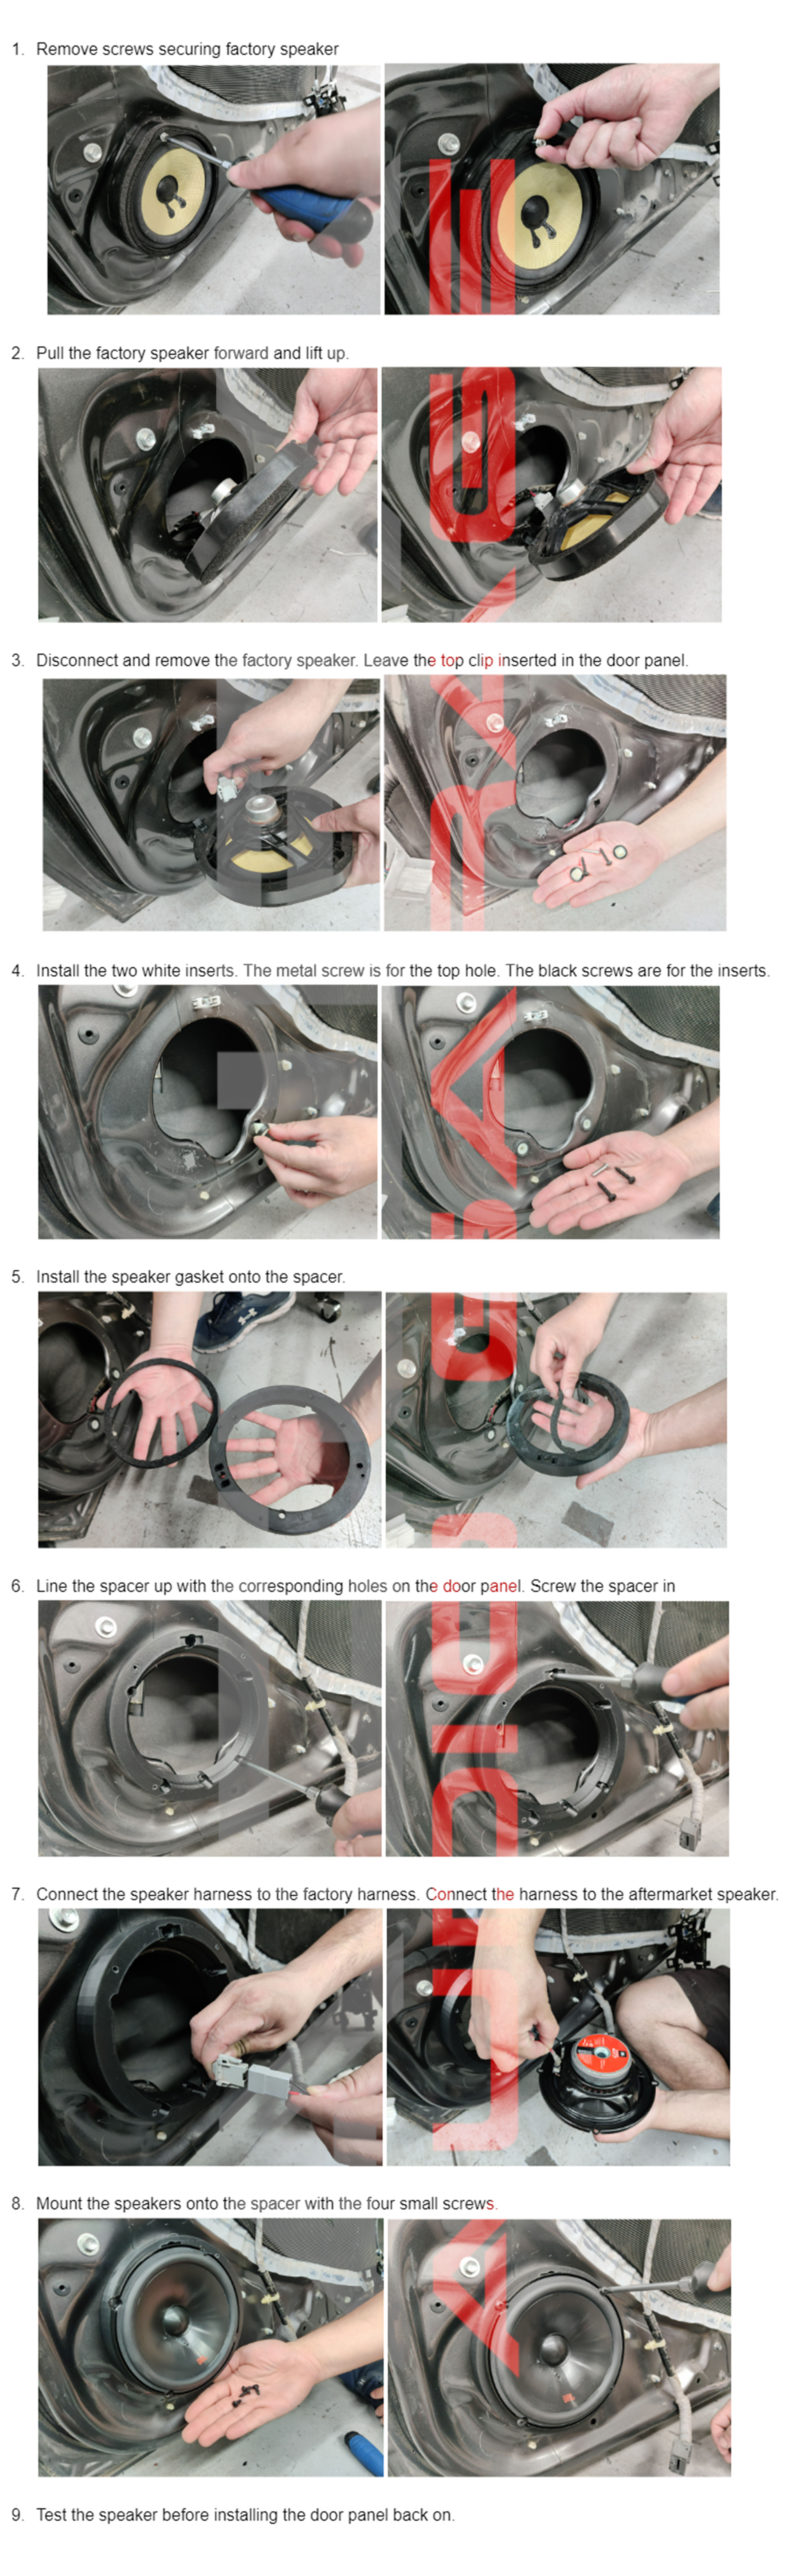
How to Install Spacers