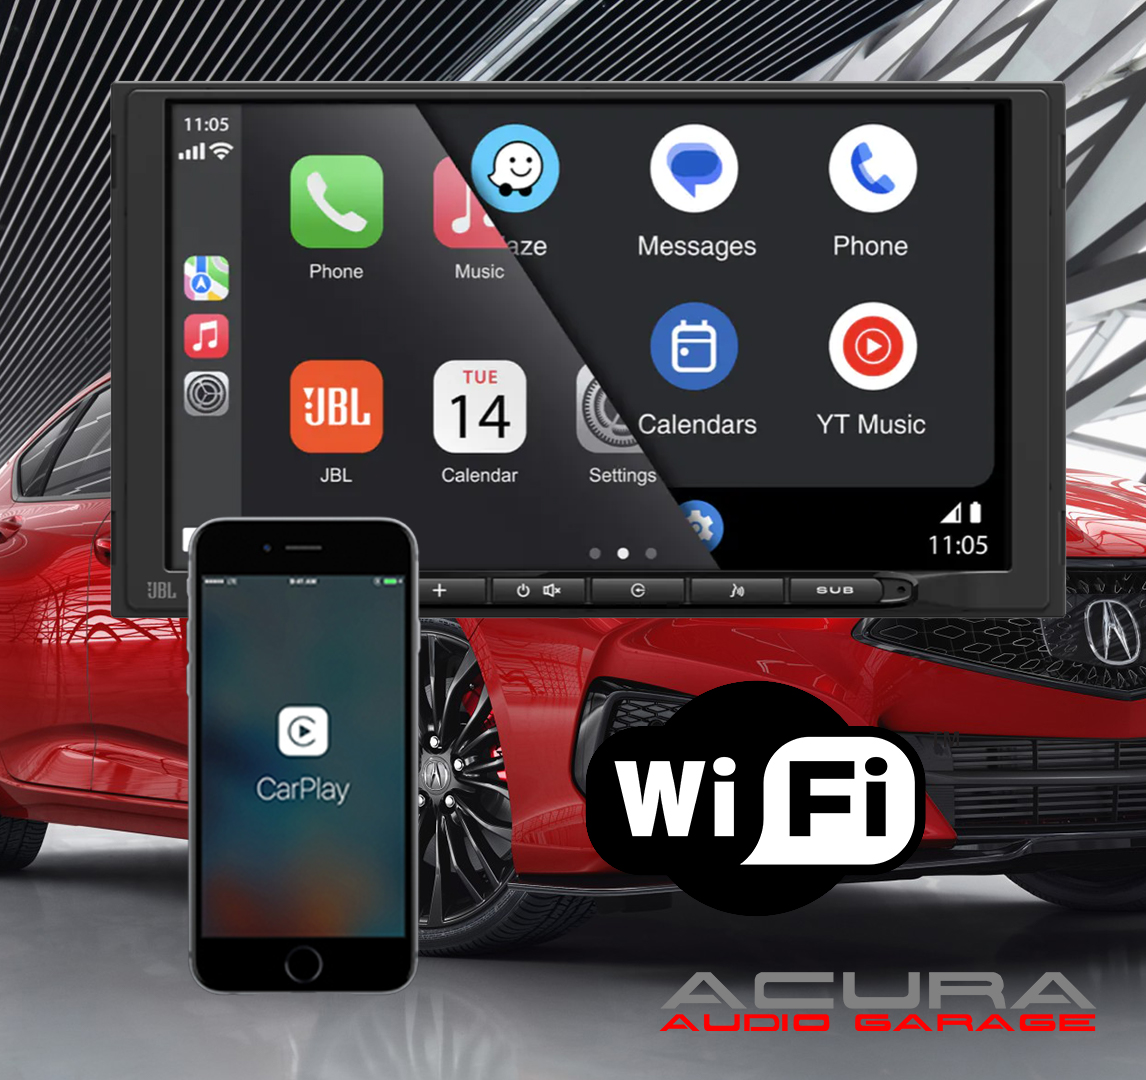
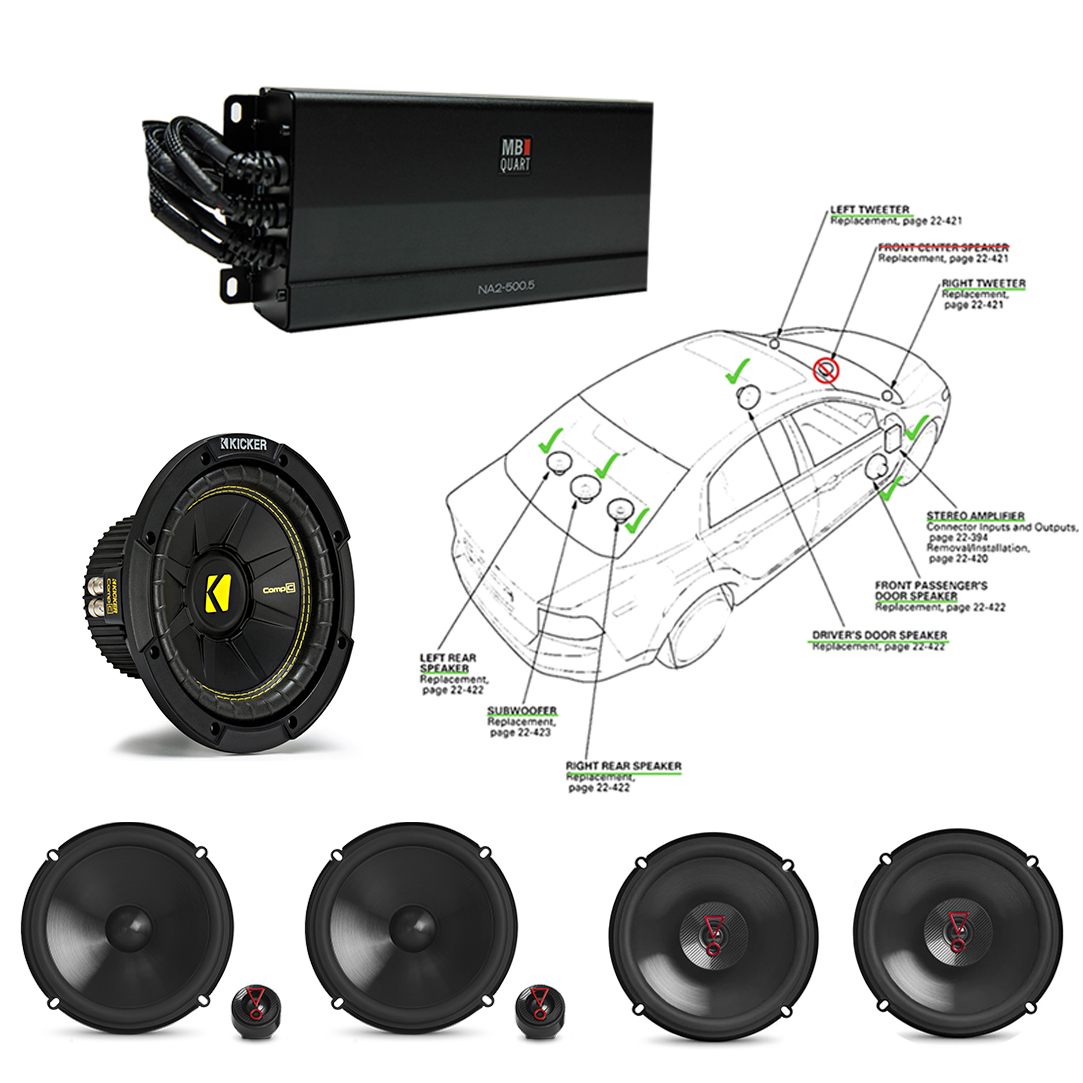
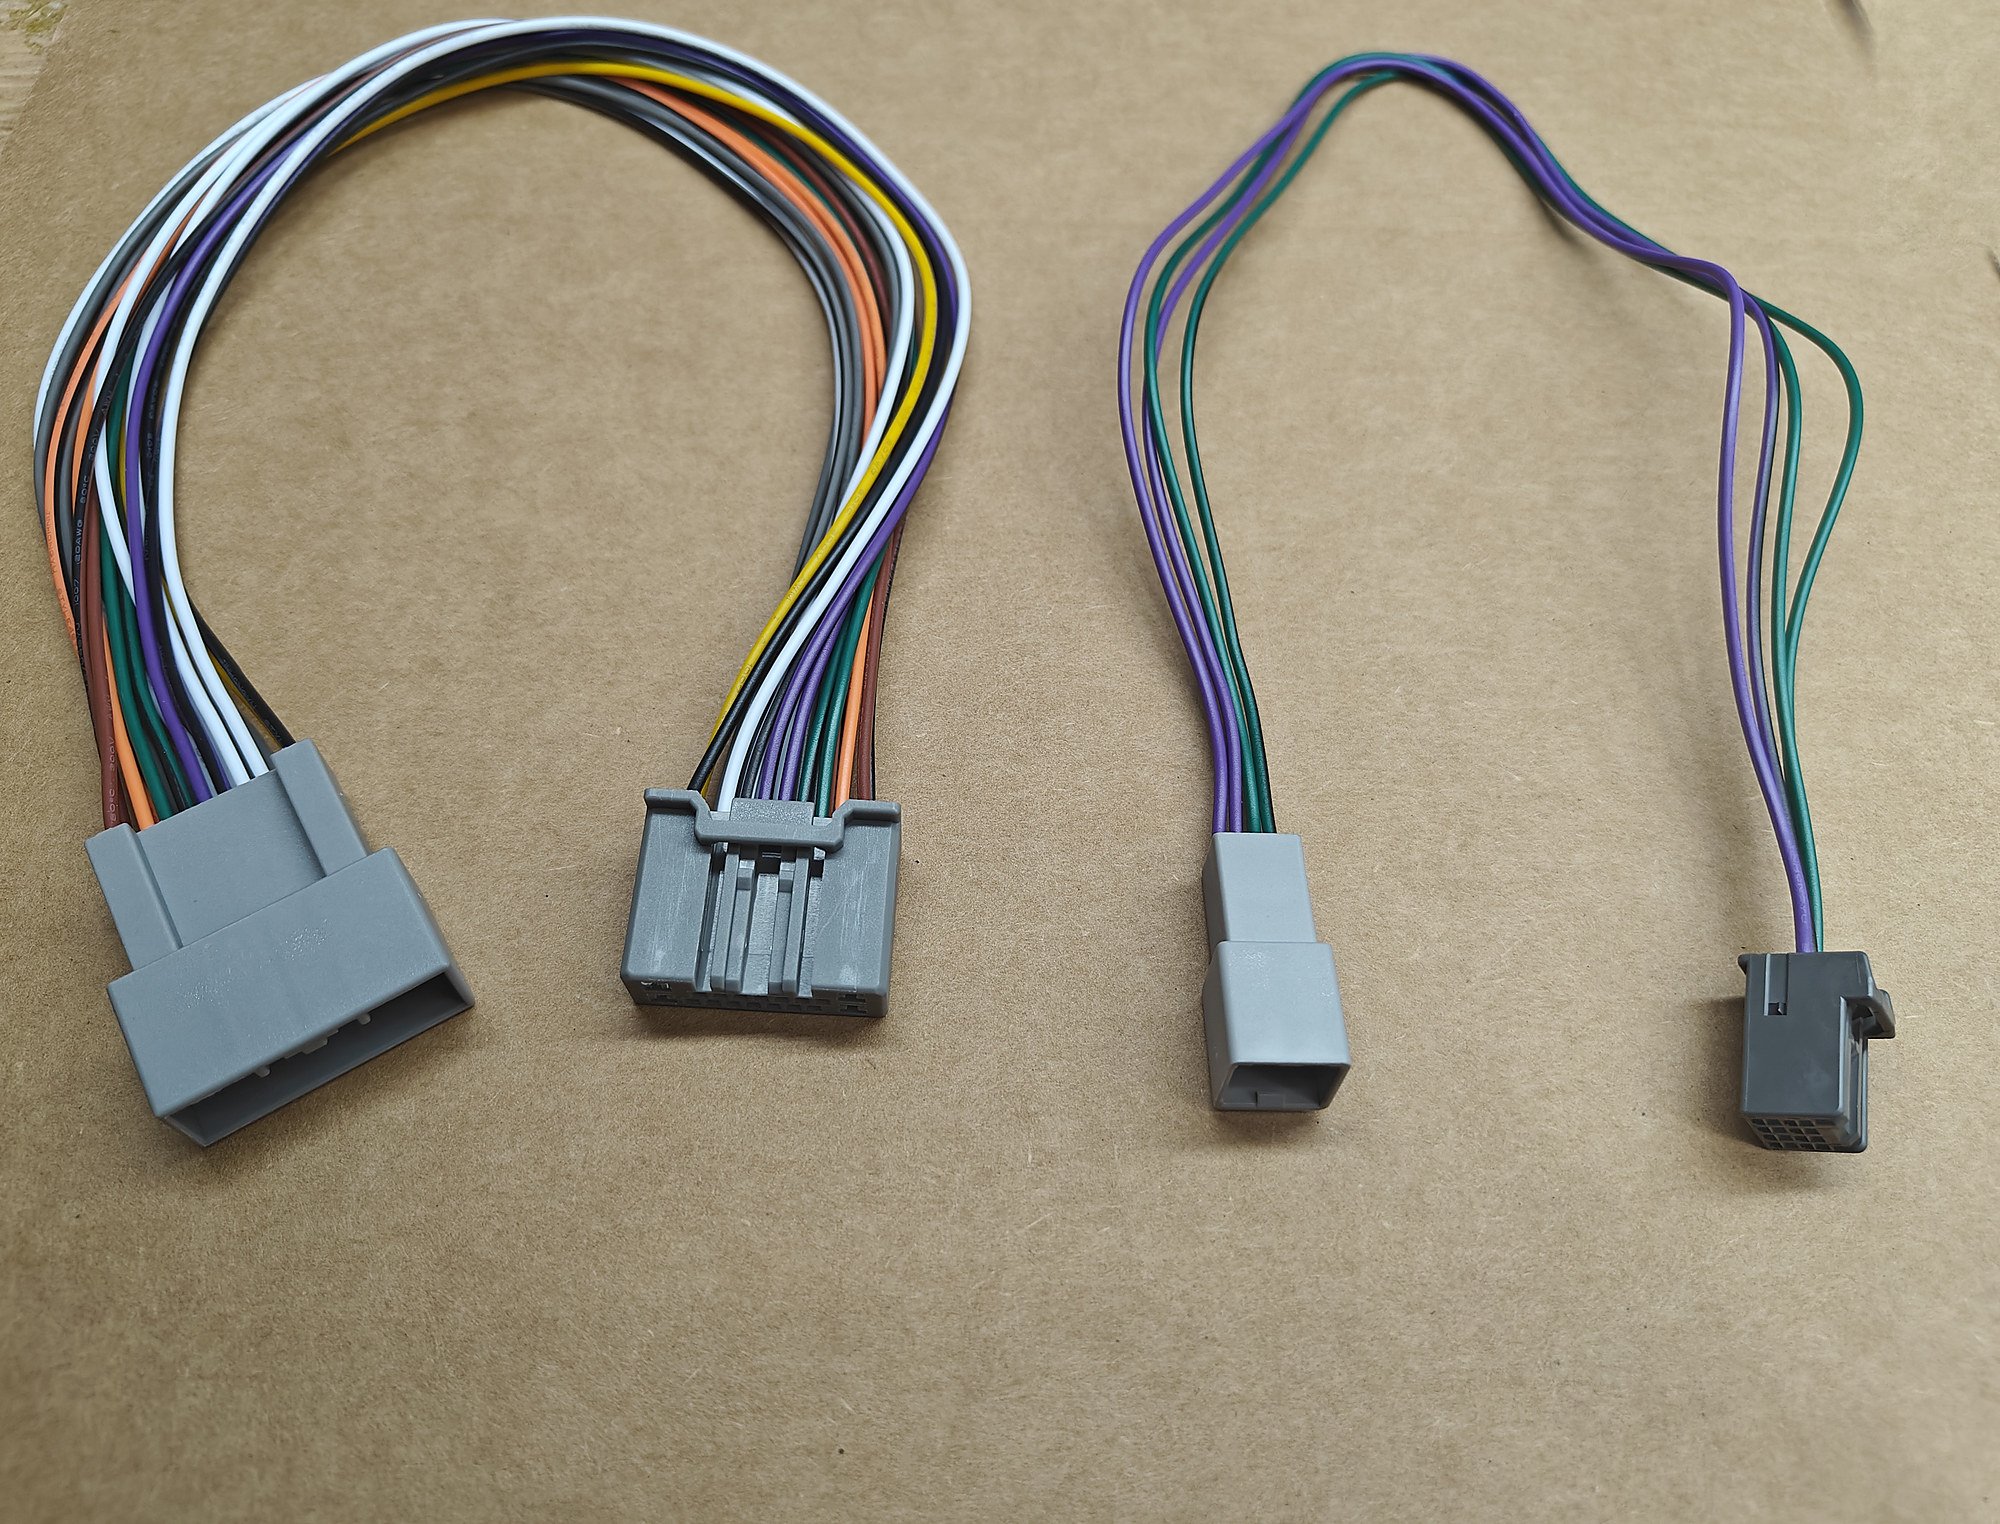
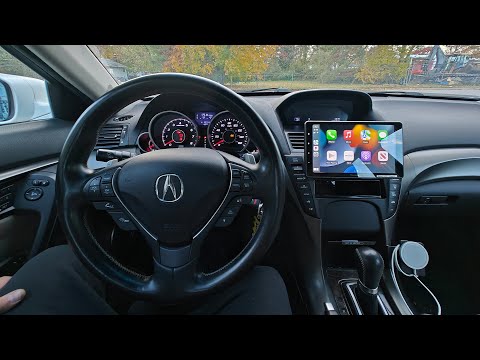
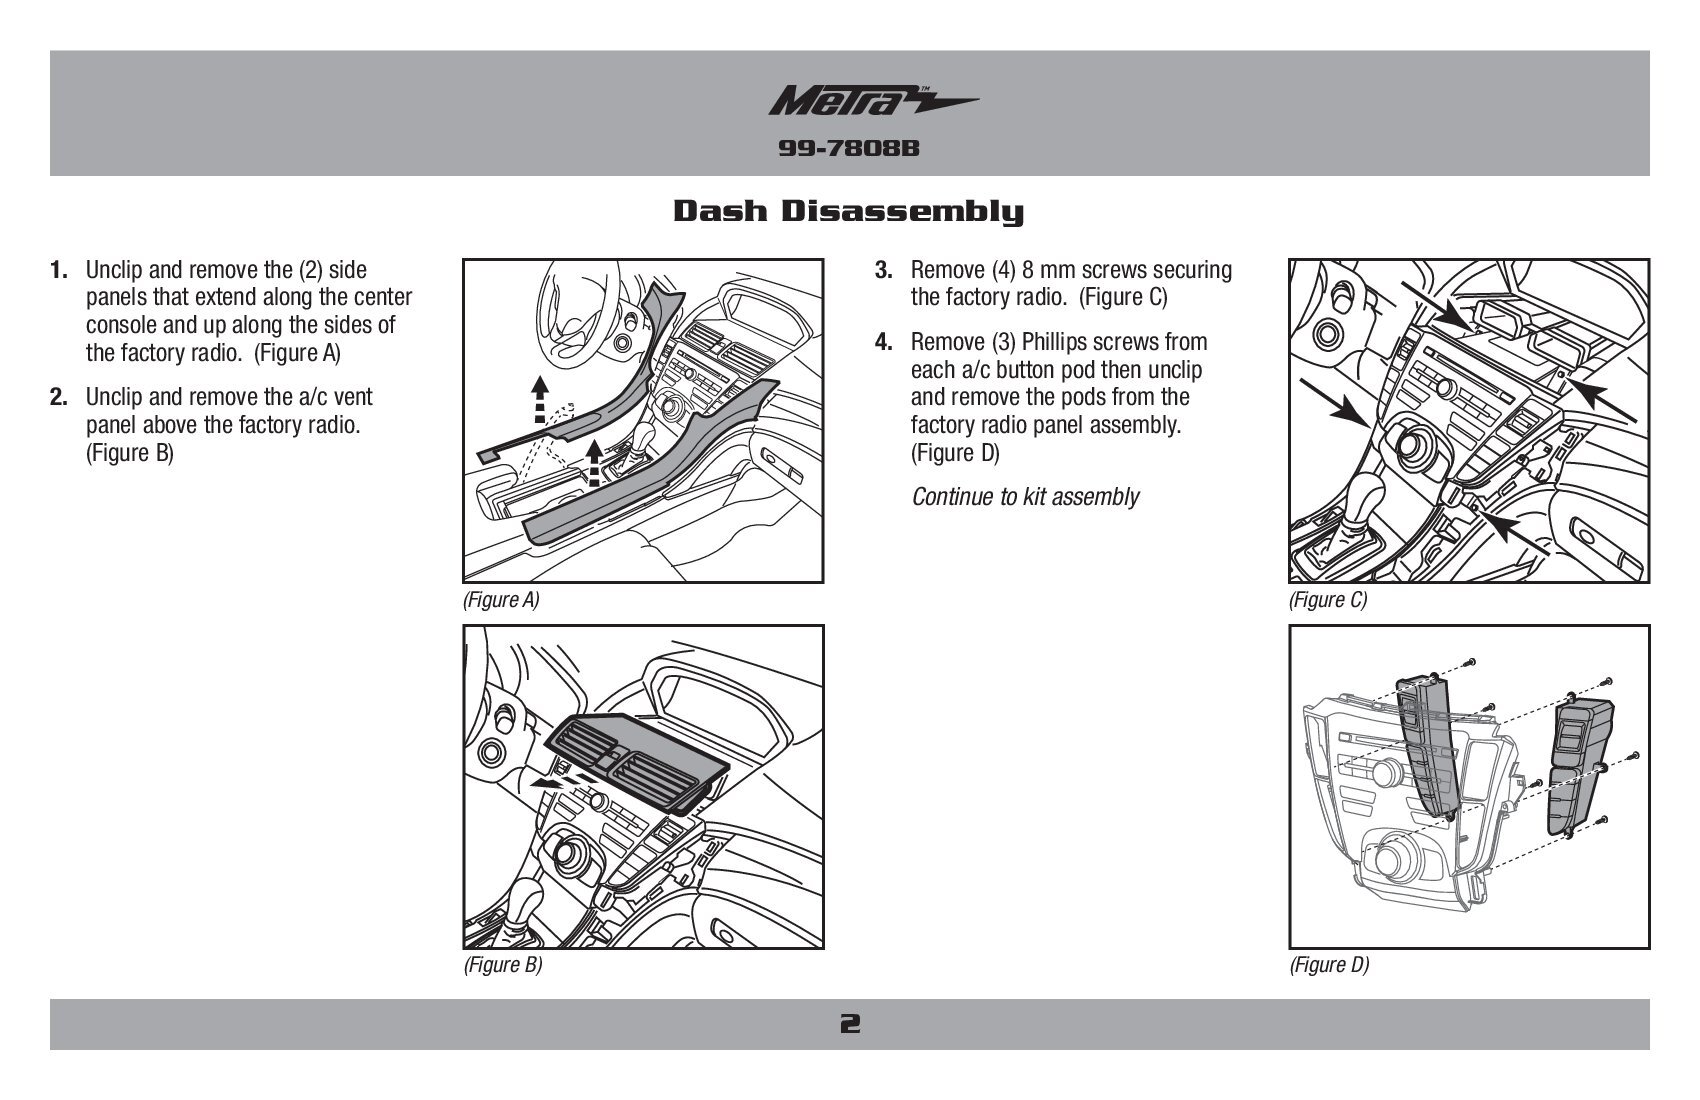
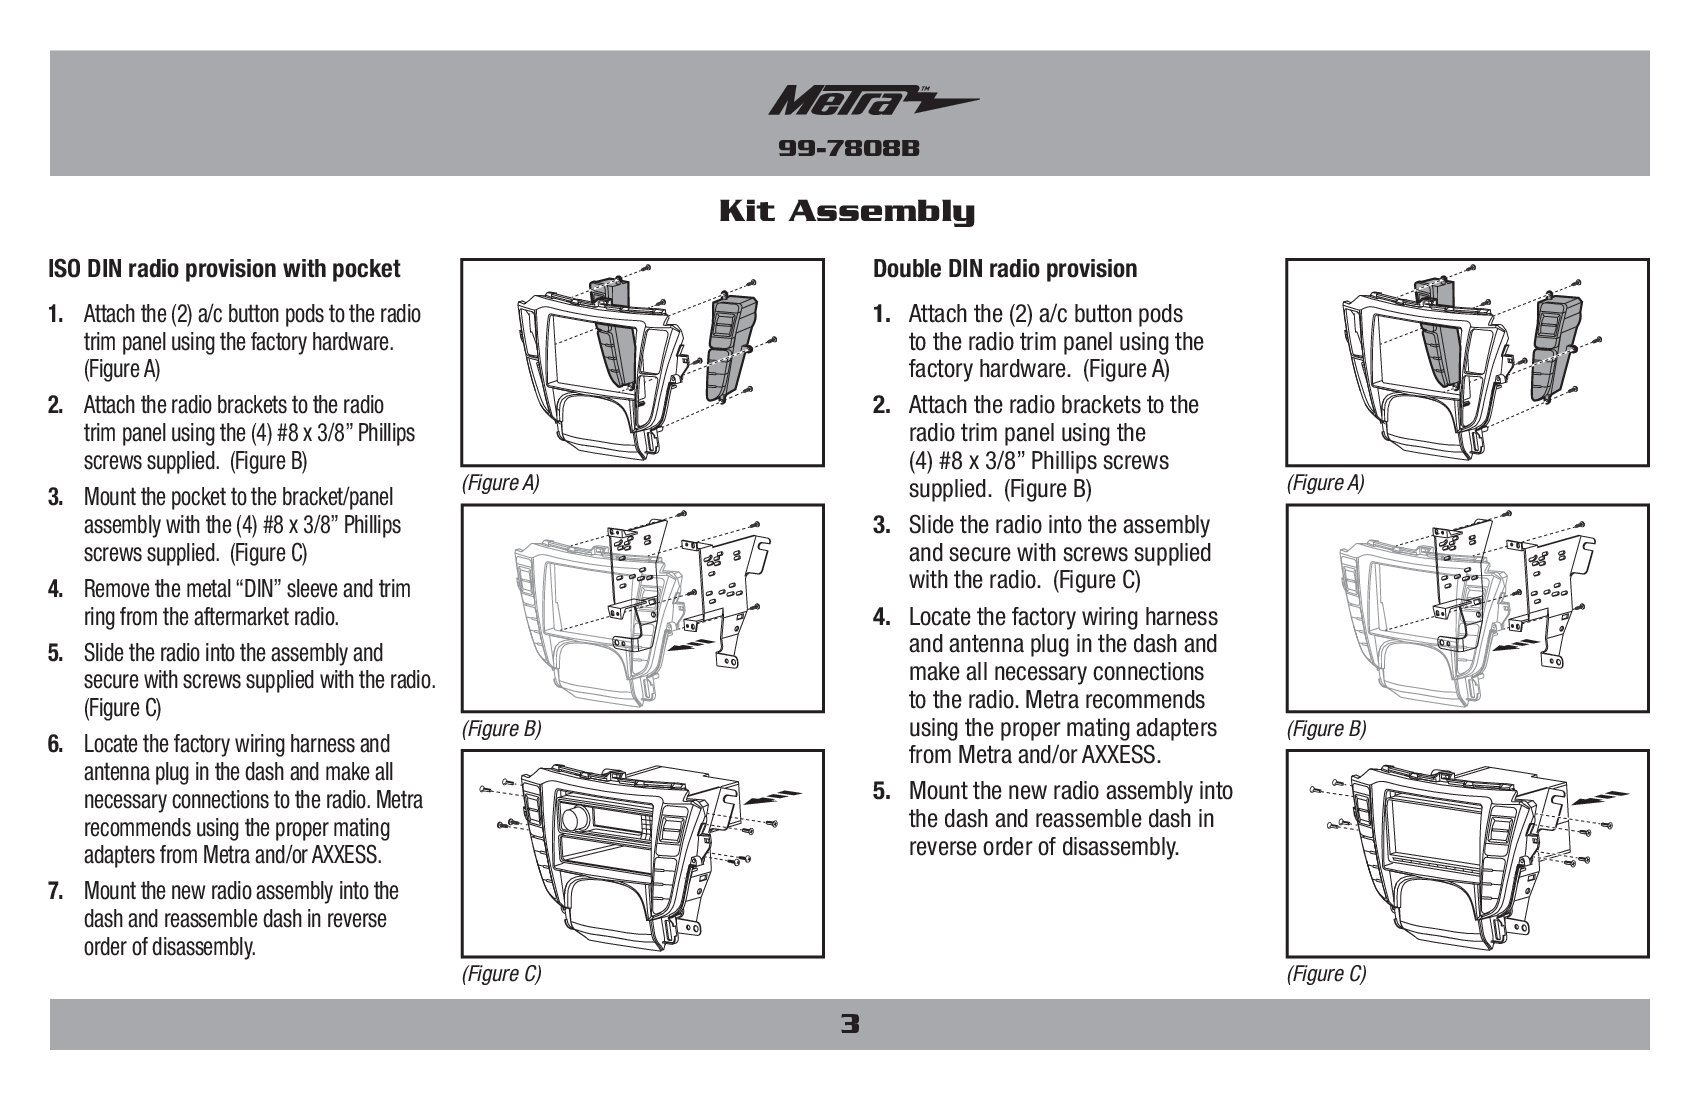
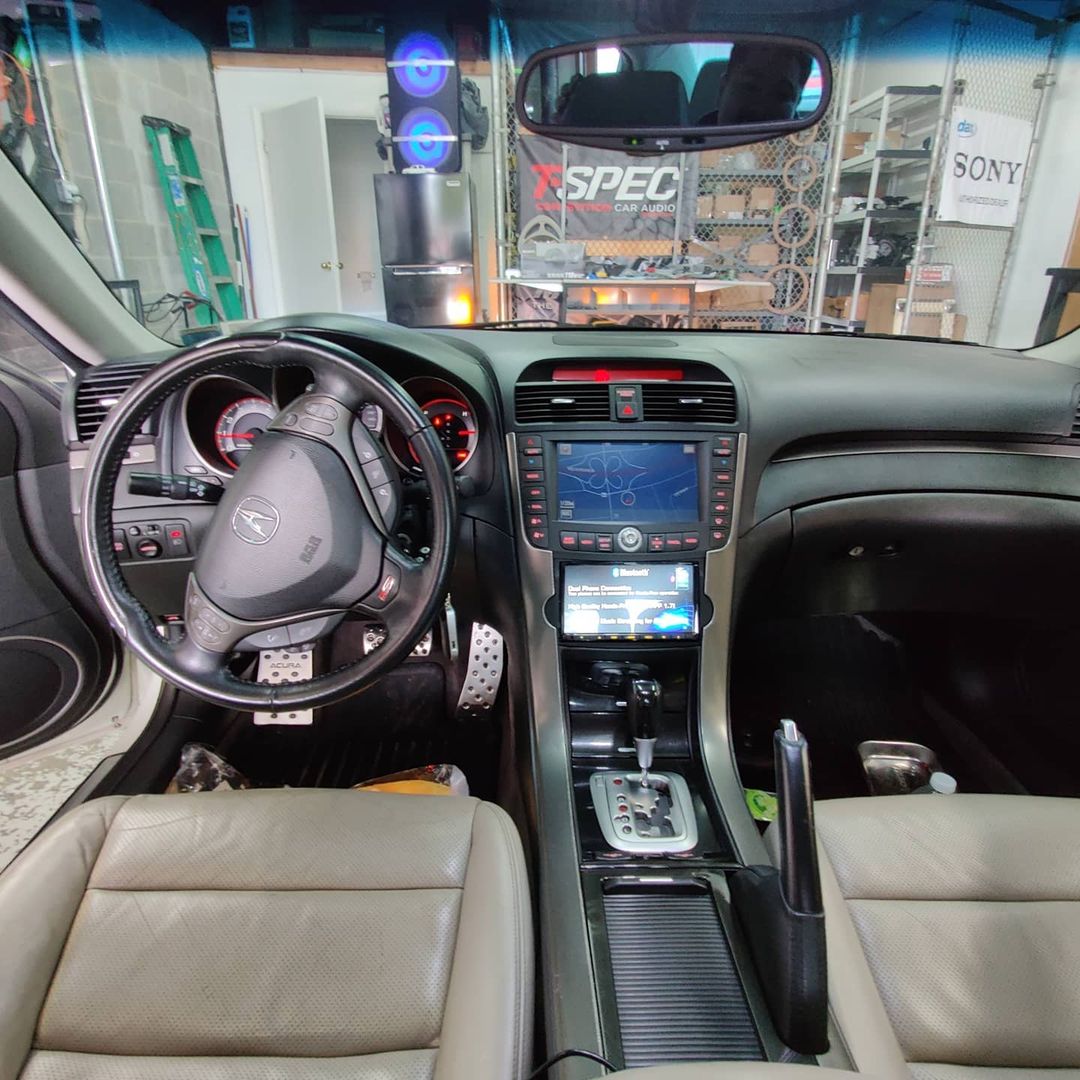
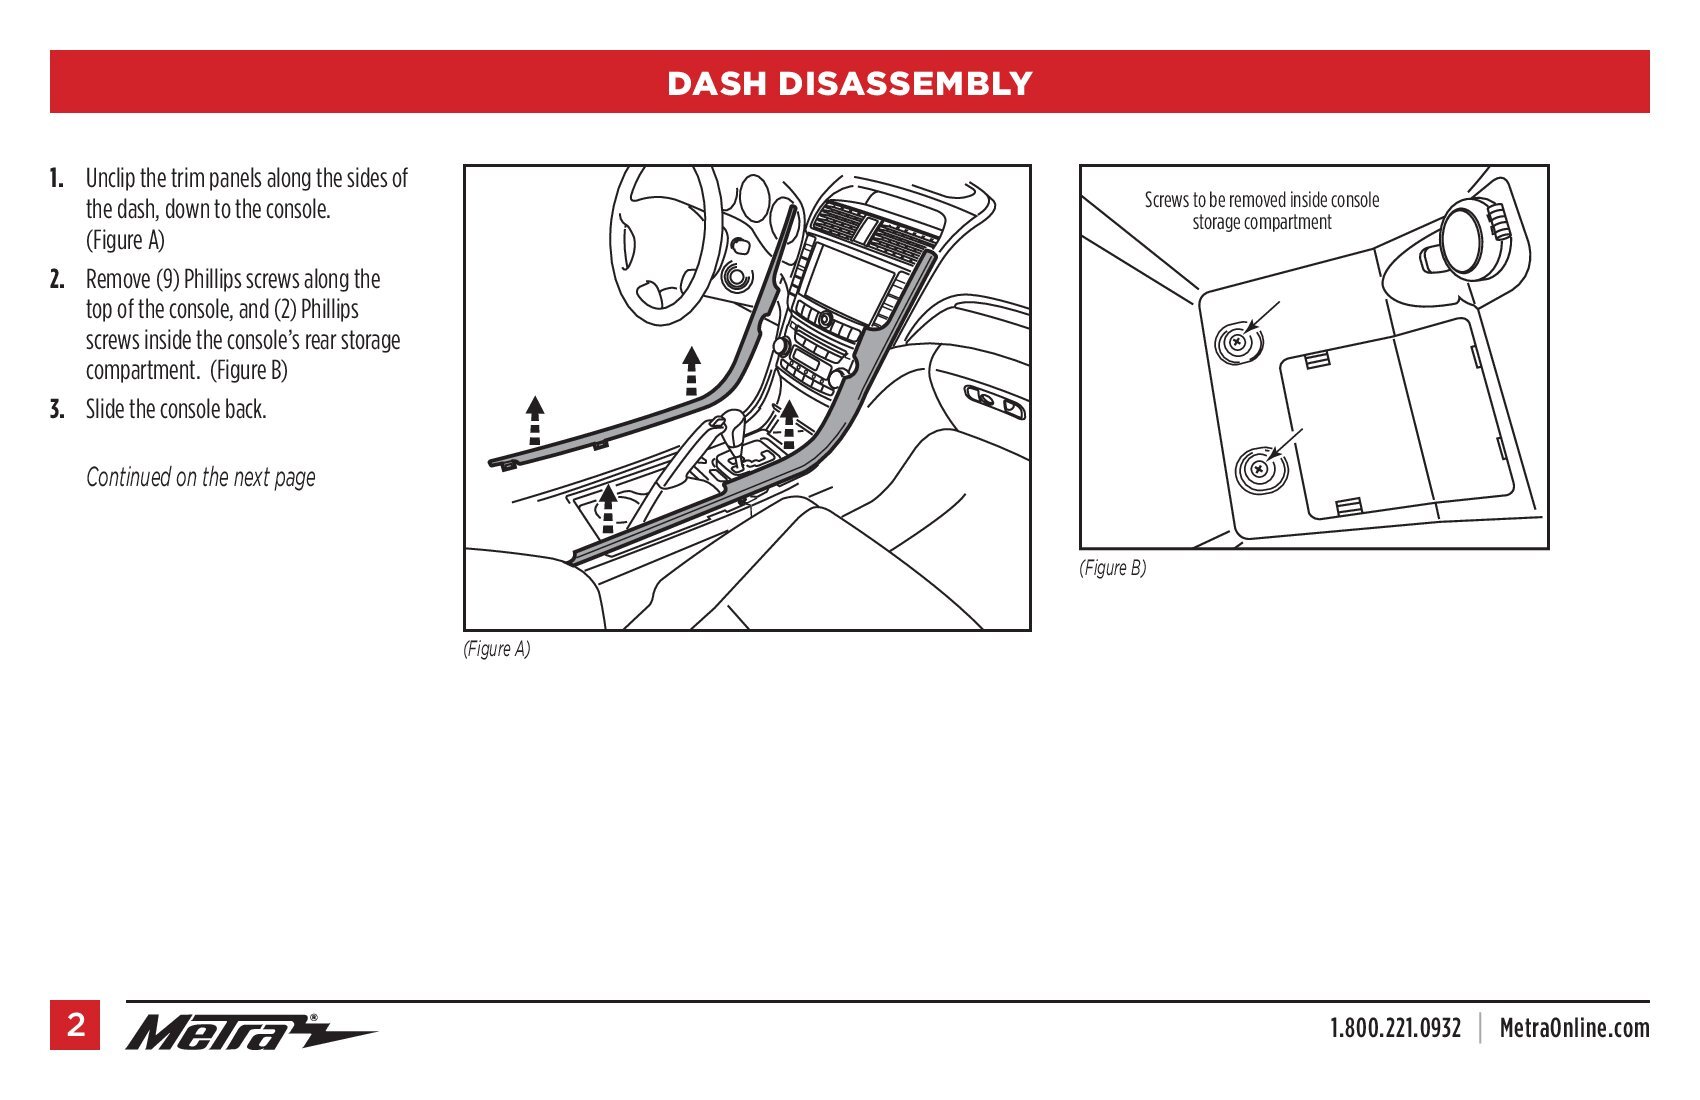
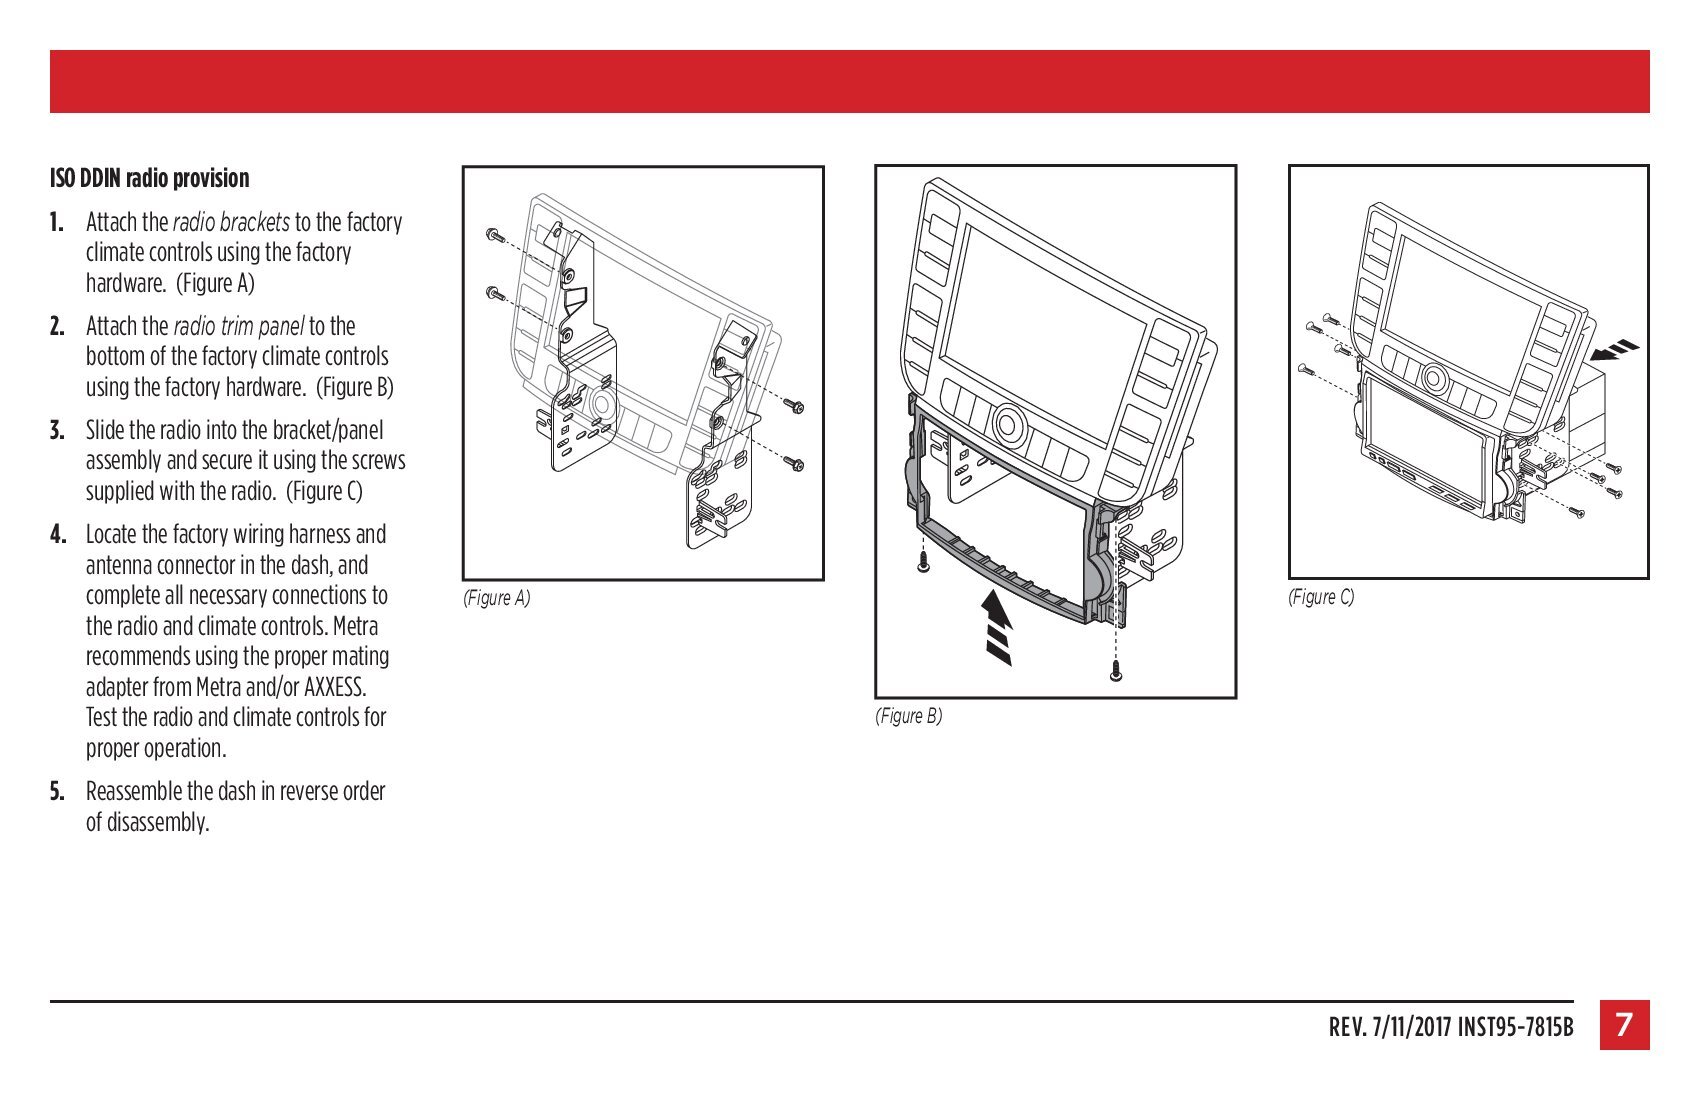
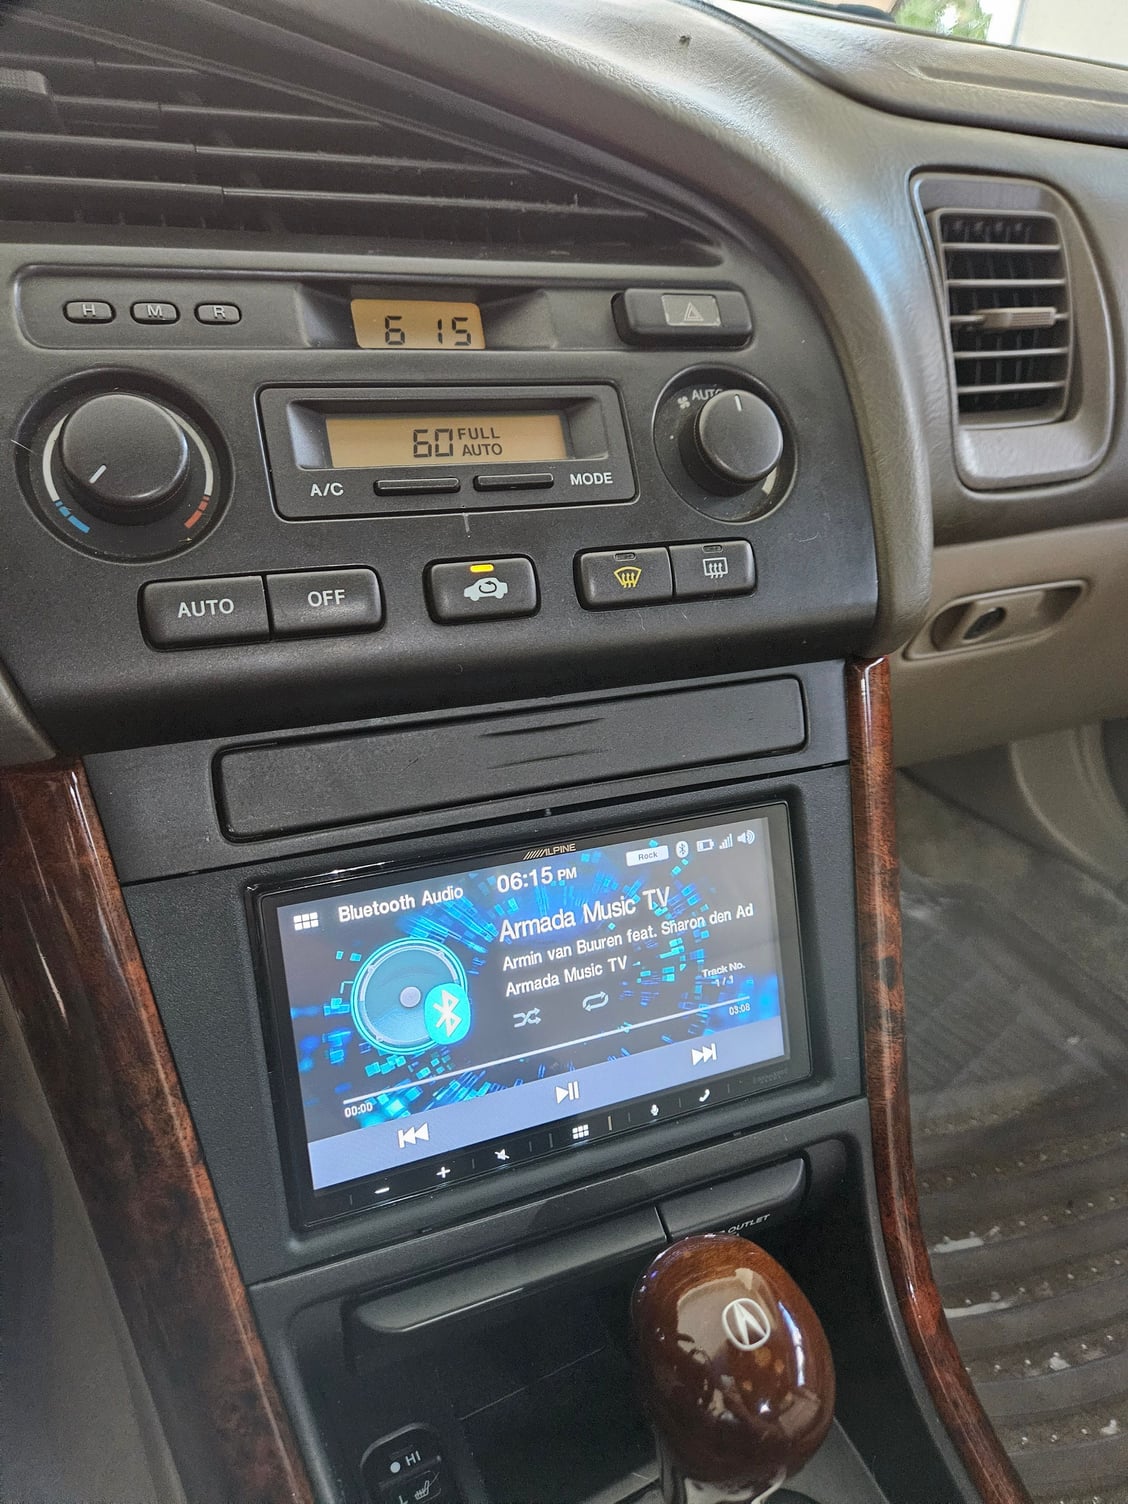
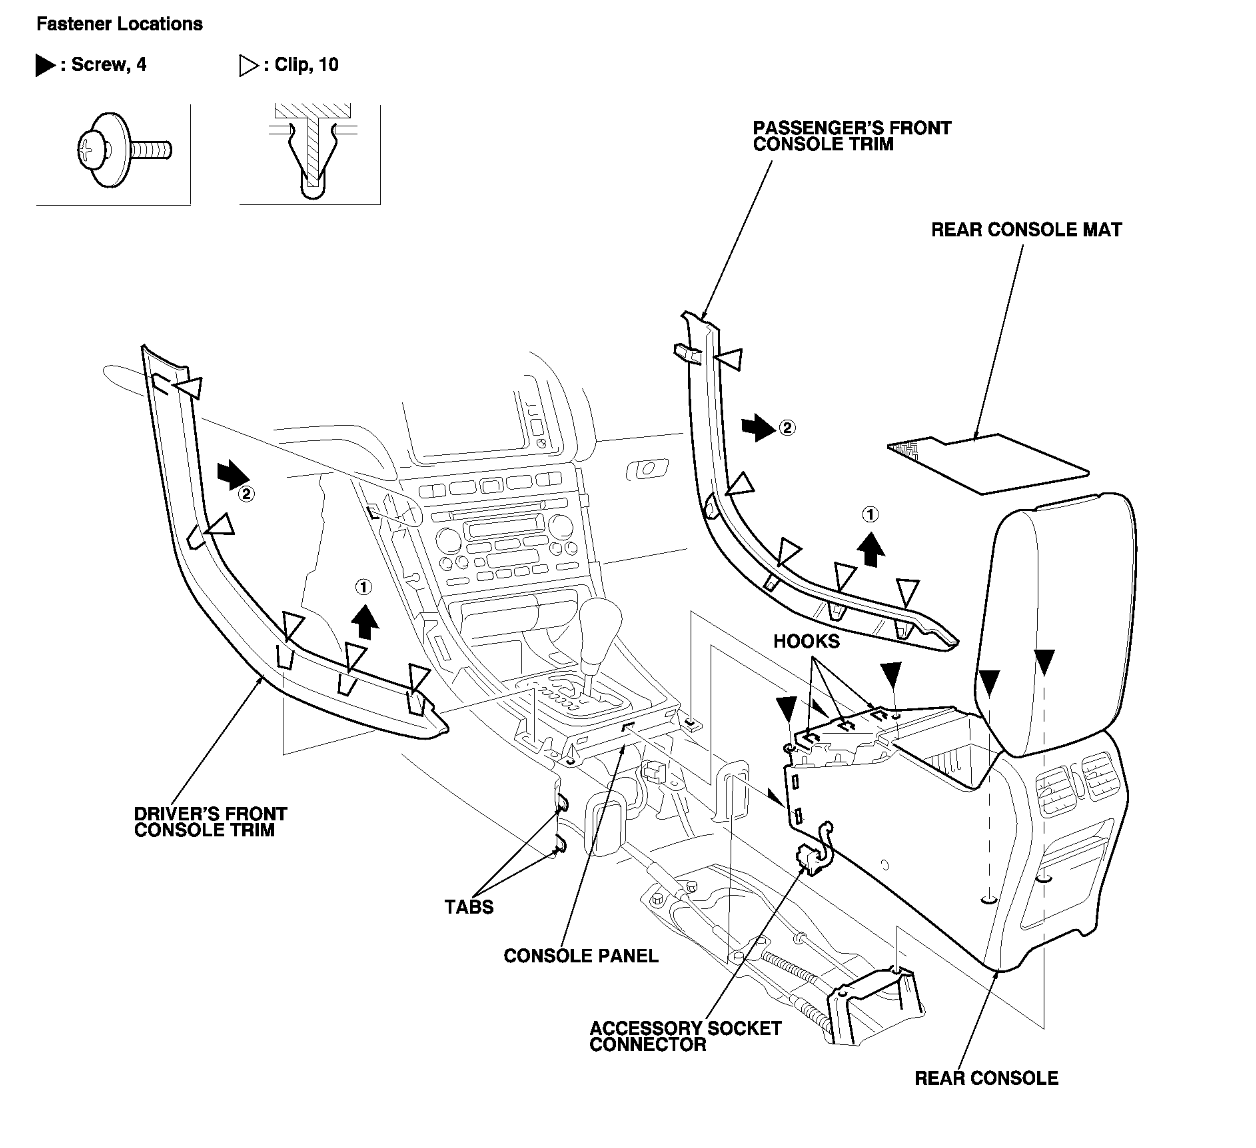
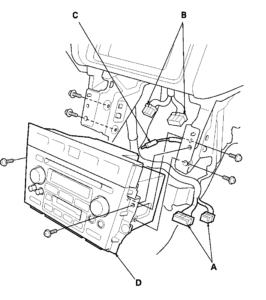
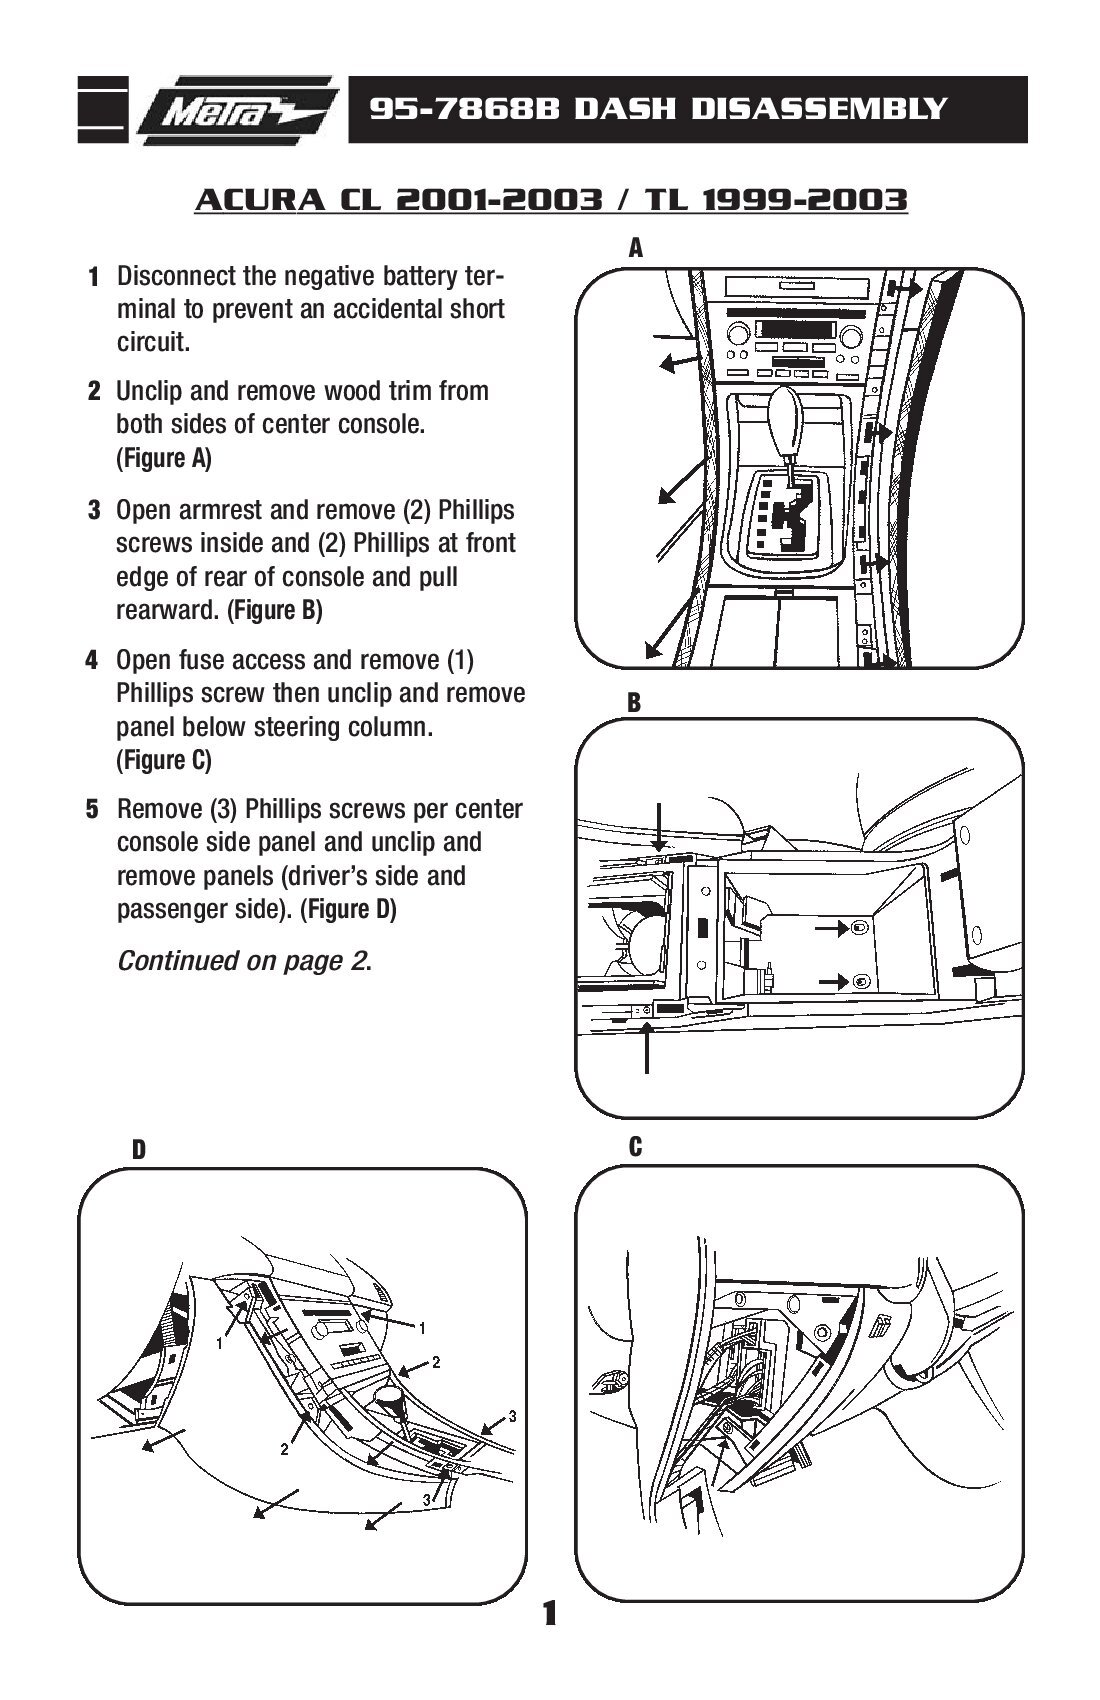
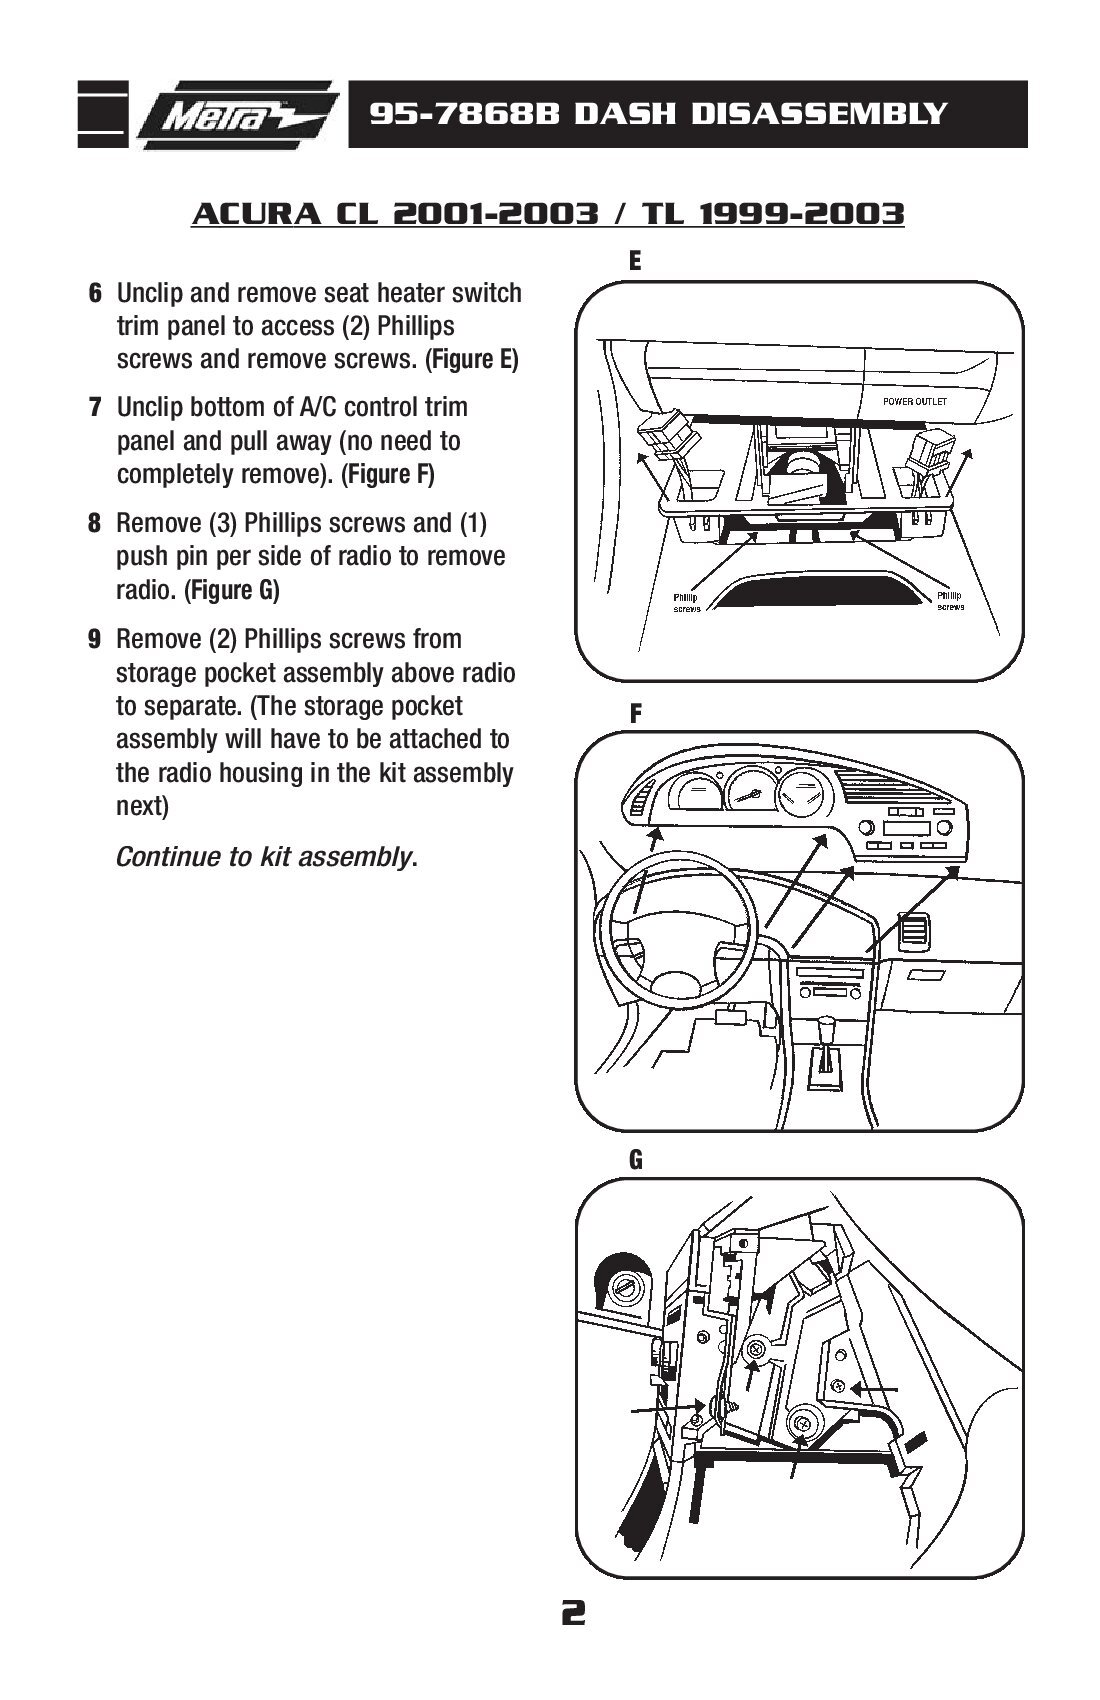
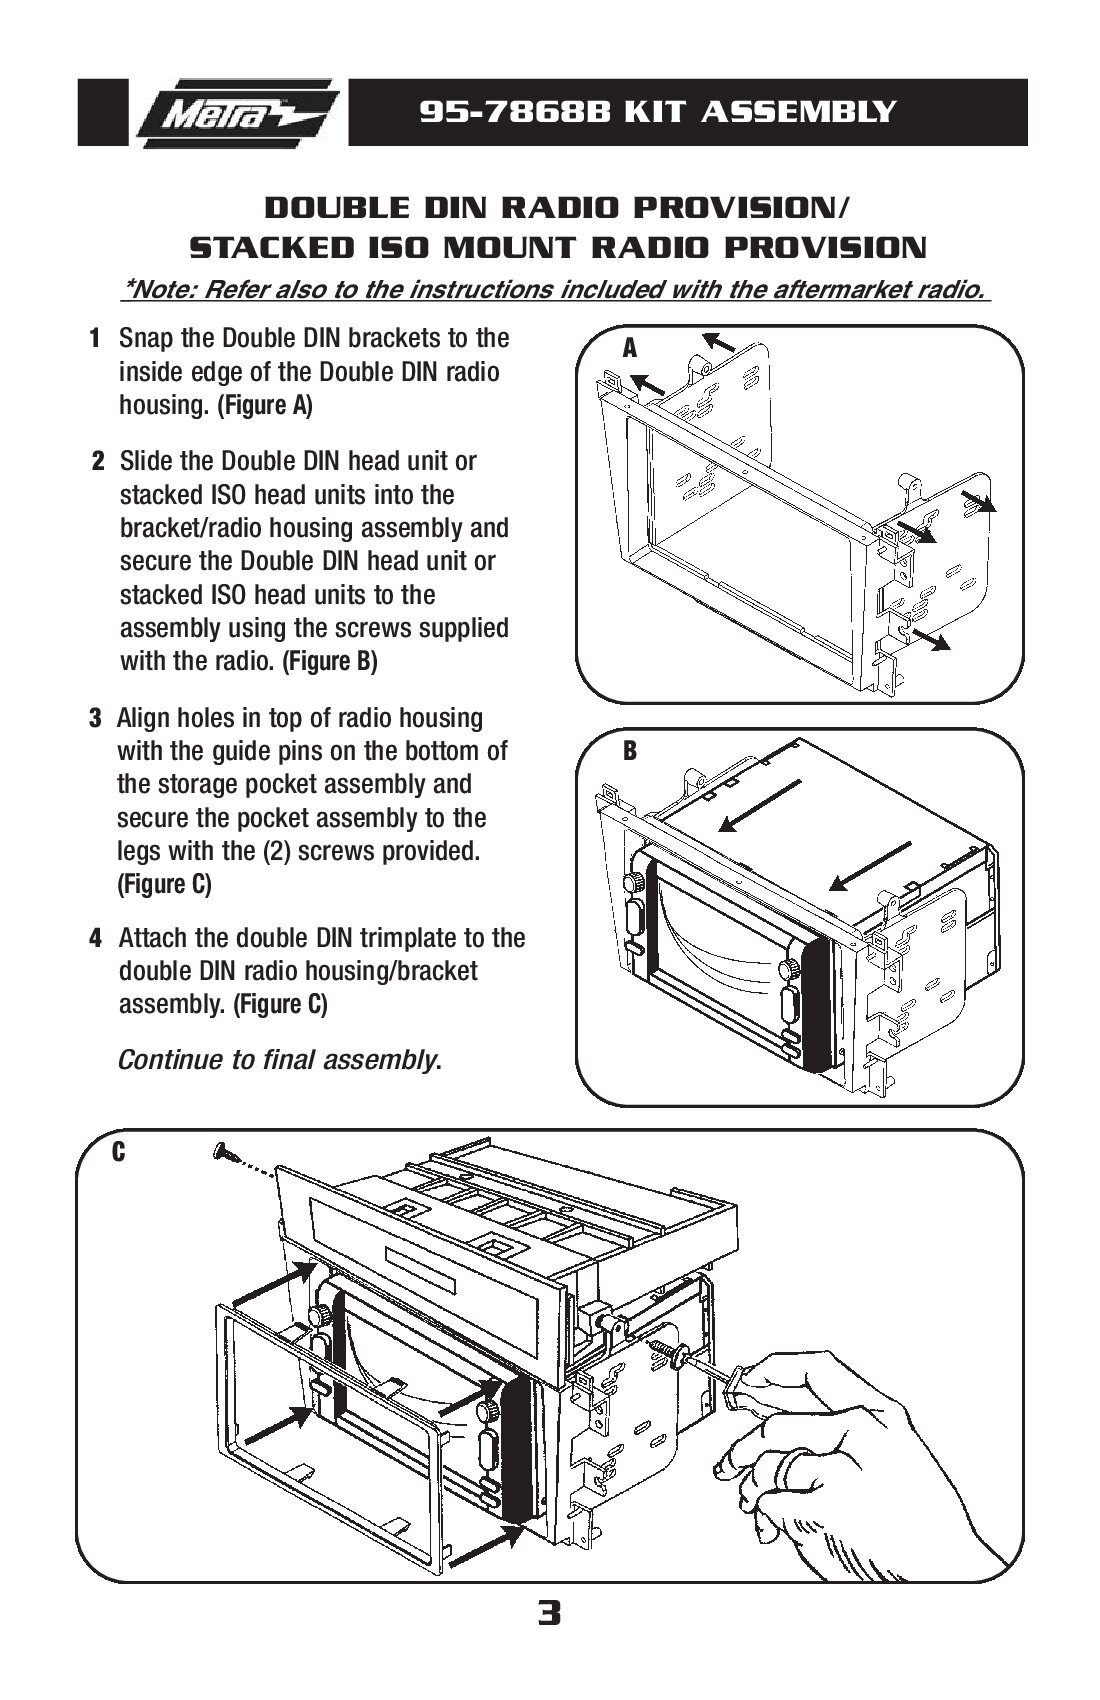
All of of radio kits include, the radio shown in the picture, the dash kit for your exact Acura, a wired plug and play harness and the steering wheel control interface. This is one package that includes everything you will need to complete your upgrade. The information below is a summary of the radio features and some of its highlights. If you are looking for specific information regarding your Acura please visit the following pages. Also please read the message that is generated below the selection menus.
Vehicle Specific Information
1999-2003 Acura TL
2004-2008 Acura TL
2004-2008 Acura TSX
2009-2013 Acura TSX
2001-2006 Acura MDX
2007-2013 Acura MDX
2013-2022 Acura ILX Single Screen
NOTICE: Please select your year and model for installation specific information and what factory features will continue working.
Radio Summary:
If you are looking to add , Wireless Apple CarPlay and Wireless Android Auto to your Acura this JBL radio is a budget friendly option. It offers a mix of great value, simplicity and features. The capacitive touchscreen is great for controlling your apps on the go including Apple Music, Waze, Spotify and YouTube Music. Along with Bluetooth, Apple CarPlay, Android Auto this radio also has USB Media Playback and a auxiliary input. It also has the option to add a backup camera or an aftermarket amplifier for subwoofers. What this radio doesn’t have is a CD/DVD player, Sirius XM Compatibility, or built in GPS Guidance. The USB port is on the back of the radio so you will need to run the included USB extension into the glovebox or flush mount a USB adapter somewhere on your dash. Our plug and play radio kit removes the need for any wiring so all you have to do is plug everything in. Our radio kit also allows you keep your factory steering wheel controls, amplifier and all your speakers speakers in most Acura’s.
Who should buy this radio:
This radio is a great choice for a first time buyer of aftermarket car audio receivers. The electronics inside this head unit provide a solid audio foundation for integrating with the factory system in your Acura or powering an aftermarket system. This radio has a very simple interface that makes it easy to navigate. It also has a clean audio output and dedicated settings for any of your audio sound goals. JBL uses there own dedicated operating system that is similar to Sony in simplicity. This radio has tactile buttons all along the bottom so you can easily see and tell which button you are pressing. It has a dedicated subwoofer button to get you to the subwoofer settings whenever you want and a dedicated voice activation button for CarPlay or android auto. The 7″ inch touchscreen display is bright and has great viewing angles regardless or how low or how high you have to mount it in your Acura.
Who should look for something else:
If you are looking for built in GPS Guidance that doesn’t require a phone connection or for the ability to play CD/DVDS this is radio is not a good choice. This radio also isn’t recommended for those who want to run a complex aftermarket audio system that are going to use multiple amplifiers. This radio works great with the factory audio system in the Acura TL, MDX, ILX and TSX but with multiple aftermarket amplifiers there are better options than this radio. Installing a subwoofer amplifier is no problem but if you are planning to run a two or three amplifier system then we recommend a higher tier Kenwood or Pioneer with all the audio settings necessary and with 4v-5V Preamp outputs instead.
About the JBL Brand:
JBL is one of the largest speaker manufacturers in the world. They make car speakers, house speakers, portable speakers, arena speakers and a ton of other speakers. But what do they know about making radios? The truth is this is one of the first radios they have made in the recent years and while JBL has a great track records with speakers we don’t know much about what to expect from there radios. What we can say is this radio has a one year warranty and JBL is a partner who does backup there products.
This package consists of our best selling JBL speakers plus the kicker 8 inch subwoofer and our best selling five channel amplifier. This package packs plenty of punch and bass for those looking for a quality affordable upgrade. If you have questions about each individual component, please checkout there specific product pages.
This is the harness you need if you have the 9″ inch android screen for the Acura TL or the Tesla Screen for the Acura TL and you want to add the climate sub display from navigation model TL. The base model TL has a clock above the vents, this harness lets you replace the clock with the display that shows the climate information instead.
The part number for the new display you will need is 39710-SEP-A610. This harness does not come with a display it is only the harness. This harness will need to connect to ground. If you have the 9″ screen the ground is easily available is you have the tesla screen you will need to wiretap or secure the ground yourself.
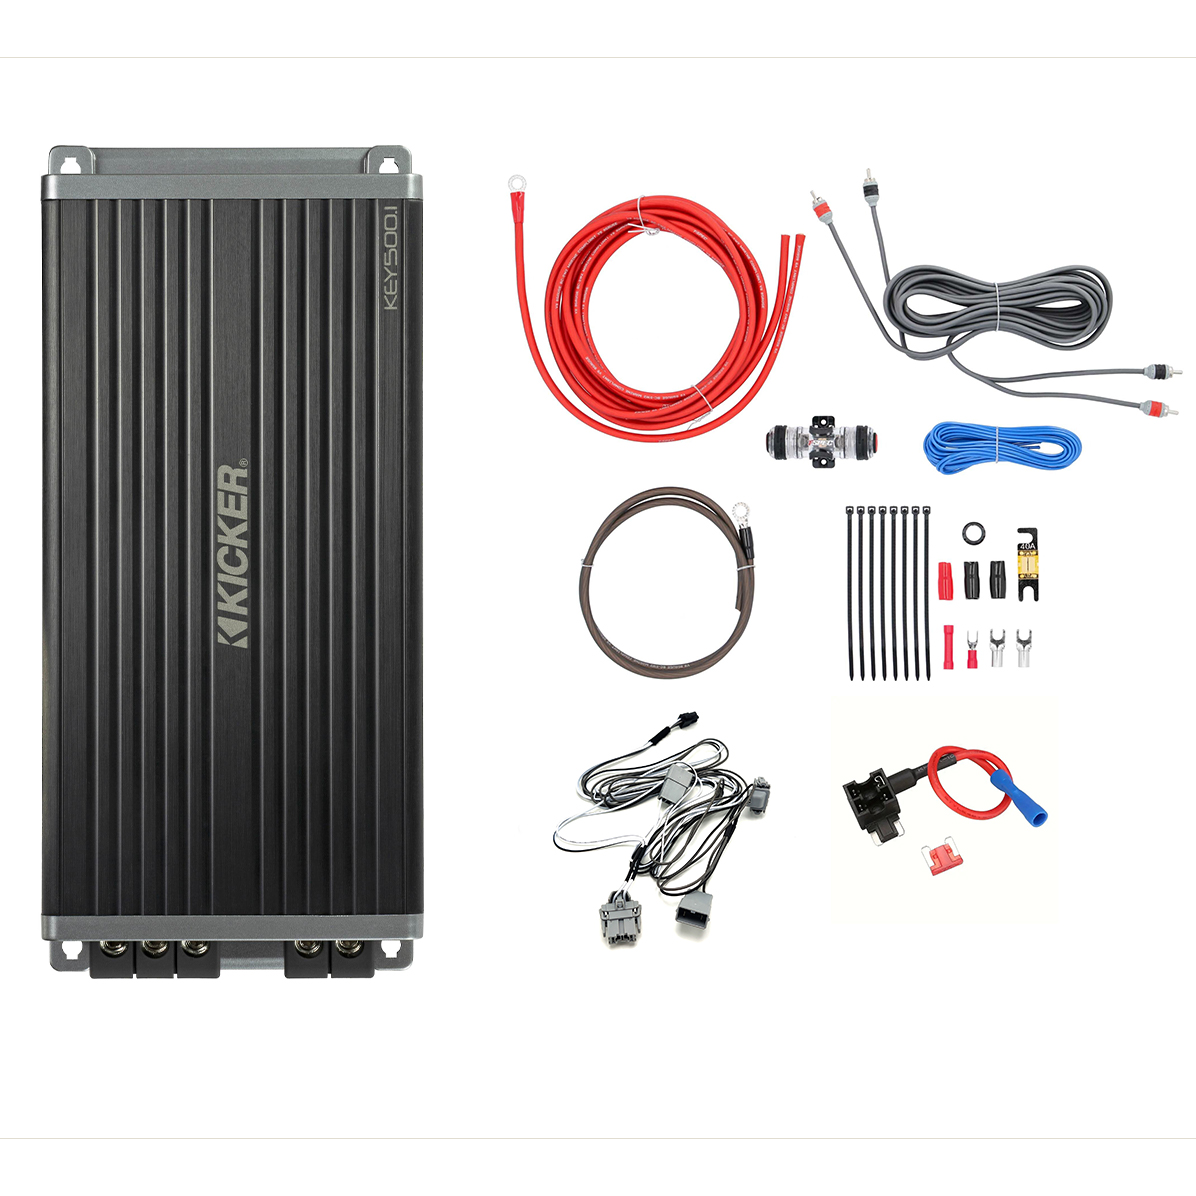
Upgrade to louder deeper bass with our plug and play kicker key amplifier upgrade kit. If you own an Acura sedan from the years 2004 to 2020 it might be possible you are not satisfied with the factory subwoofer output. This plug and play amplifier captures the output of the factory subwoofer and amplifies it with seven times the power resulting in bass that is three times as loud.
This PNP amplifier upgrade relies on the output of the factory amplifier to be in working condition. If the factory subwoofer of your Acura does not work it may be possible that this amplifier will result in no audio. Please make sure your factory subwoofer and amplifier are working before buying.
When installing this amplifier a new power line from the amplifier to the battery is required. Another power line from the fusebox to the amplifier is required. You will also need to secure and ground the amplifier in the trunk(see image for best location). The speaker connections are plug and play. You will not need to wire tap or wire splice and of the factory wiring. The installation is simple, first run the wires to the necessary locations then disconnect the factory subwoofer connection and connect it to the amplifiers t-harness. Then connect the other side of the t harness back to the subwoofer and your upgrade is complete.
When installing this amplifier on the factory radio the amplifier is tuned accordingly and will begin working to its full potential right away. If you are using an aftermarket radio with this amplifier tuning will be required. Also if your aftermarket radio was installed improperly you may need to run a set of RCAs from the amplifier to the back of your aftermarket radio (RCAs are included). This amplifier supports an external bass knob but it does require an additional purchase. On your factory radio the factory subwoofer settings will still control the bass output as normal. On your aftermarket radio the control of the subwoofer will vary by your installation.
This kit is comprised of the kicker key 500.1 amplifier, an 8 gauge ofc wiring kit, a micro fuse tap and our t-harness. This kit is partially assembled please watch the video instructions below to understand how to install this product in your Acura. The power output of this amplifier can easily blow the factory subwoofer if you are not careful therefore it is recommend to upgrade the factory subwoofer and the apply sound treatment material to the rear deck when installing this amplifier. This amplifier is rated for 300 watts @ 2ohms and 500 watts @ 1 ohm. The factory subwoofer and the plug and play subwoofer options we offer are two ohms.
SUMMARY
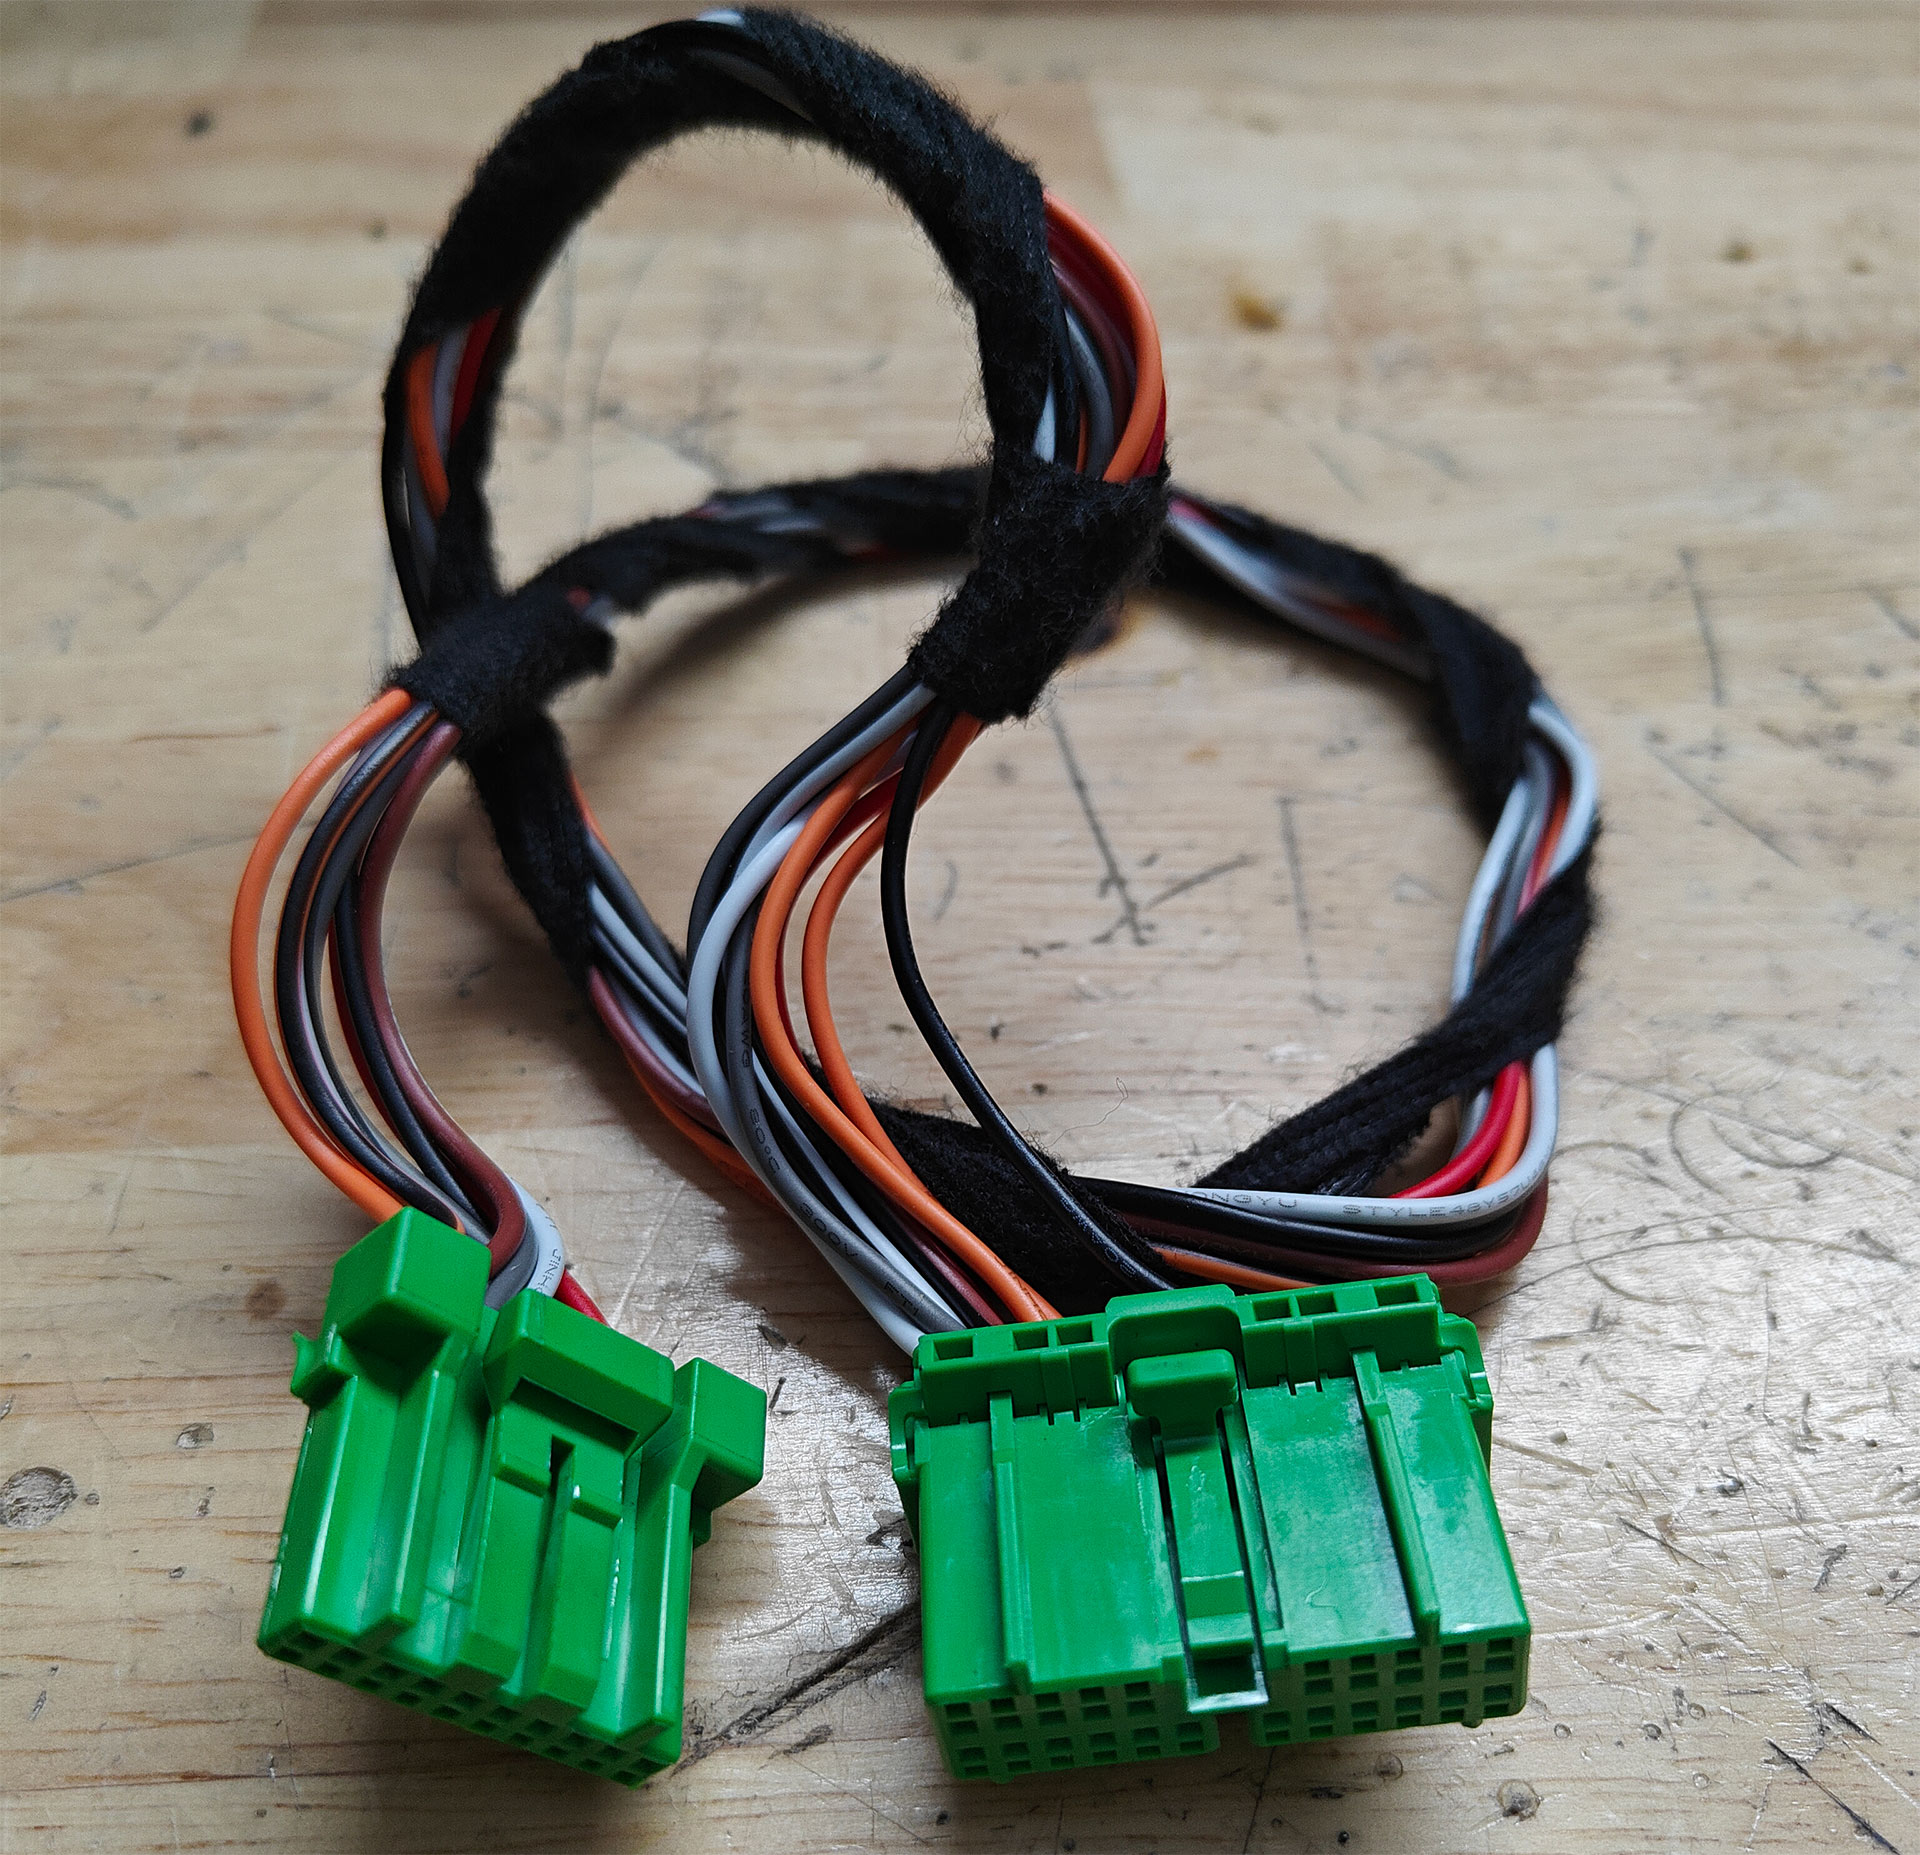
This harness allows you to capture the output of the factory amplifier without cutting or tapping any factory wires. The wires are color coded so you can cut the wires on our harness and send the signal to your line out converter or DSP. When the wires are cut one side of the wires will connect to your DSP or line out converter. The other side will need to be extended and connected to the output of your aftermarket amplifier. It is recommend that you use a line out converter or DSP for the best result but some amplifiers also can take a high level signal directly from another source. The line out converter, DSP or amplifiers installed with this harness will still be controlled by the factory radio. This product does not include a line out converter it only includes the harness. This harness set gives you all the speaker signals, constant power, and ground but it does not provide a remote turn on. We recommend using a fuse tap on the fuse box or you can tap the 28 Pin OEM Connector but the wire is extremely thin. In order for this harness to work as expected your factory amplifier must be working with no issues.
Installation TLX
In your TLX the most important part to consider about the installation is how you are going to deal with the factory front speakers. The factory speakers have a different set of wires for the tweeter and the door woofer. The factory amplifier amplifies the tweeters and woofers separately to make sure those speakers aren’t damaged. If you want to make your system louder you could just amplify the door woofer and not the tweeter or you could amplify both but it will require a four channel amp. The other option is to sum the tweeter and woofer together with an advanced line out converter or DSP. If you only want to add an amplifier to power aftermarket subwoofers we have a better product you can use here. This product is designed to help amplify your entire system or at least a majority part of it.
The most common setup we see on the TLX with the ELS system is to amplify the front door speakers and rear deck speakers along with the subwoofer. The center and rear doors stay on the factory amplifier. This allows you to use a 5 channel amp without a problem.
On the TLXs without the ELS most people also install a five channel system and all the speakers are powered by an aftermarket amplifier and nothing is left on the factory amplifier. In the base model TLX this only requires one harness.
Installation MDX
In your Acura MDX there are several factors to consider when installing an aftermarket system because of all the different speaker combinations available for the MDX. You will need to first identify which audio system and how many speakers you have. Once you have determined which system is installed you can decide to use one or both harnesses in this product. If you want to add only a subwoofer amplifier you will need to use both harnesses. The factory subwoofer has two voice coils which are powered from the factory amplifier with wires in the two plugs. The wires for the subwoofer are always brown and you can tap or cut the four wires to connect to your line out converter. If you only want to amplify your door speakers then you will only use one of the harnesses.
There is no common setup yet for the MDX because the customer base is so small. Once we are able to help more people we can update the description with what the most common system design is. The factory front speakers have a different set of wires for the tweeter and the door woofer. The factory amplifier amplifies the tweeters and woofers separately. If you want to make your system louder you could just amplify the door woofer and not the tweeter. If you want to amplify both you can but it will require a four channel amp. The other option is to sum the tweeter and woofer together with an advanced line out converter or DSP and install aftermarket speakers in place with a passive crossover.
Below are videos regarding how this harness has been used.
Your Acura TL has a total of 6 speakers that are powered by the factory amplifier. When replacing the factory radio using our radio kit you are able to keep all of the speakers except the center channel. The front door speakers, tweeters, rear deck speakers and the factory subwoofer will all continue to work; the center dash speaker will not work. Our harness integrates with the factory amplifier to keep all your speakers working. You will also get to keep your steering wheel controls including volume up, volume down, next, prev and mode. The call control buttons will not work. The climate control display will continue to work and show the climate information but won’t show any audio information. The factory XM, HFL and AUX features will no longer work. If you want to retain XM or AUX you will need your new aftermarket radio to have these features.
Your Acura TL with navigation has a total of 10 speakers that are powered by the factory amplifier. When replacing the factory radio using our radio kit you are able to keep all of the speakers. The ELS Amplifier Interface allows you to install the aftermarket radio and keep the factory amplifier. The front door speakers, tweeters, rear door speakers, rear pillar speakers and the factory subwoofer will all continue to work. Our harness integrates with the factory amplifier to keep all your speakers working. You will lose Sirius XM, USB, AUX, OEM Navigation(screen will be black), and the factory backup camera. The factory backup camera can be rerouted to show up on the aftermarket radio(requires additional purchase). The steering wheel controls including volume up, volume down, next, previous and mode will work. The call control buttons are not retained. The factory hands free Bluetooth is disabled and you will need to use the aftermarket radios Bluetooth features. The call control buttons are not retained. The navigation control buttons are not retained.
FAQ.
- In my premium audio system, will the display above the radio continue to show climate control information.
– Yes your climate control will continue to function as normal. - In my tech package, will I lose the climate control information?
– Yes the climate information will be lost unless you convert your navigation screen to the audio HVAC display with our harness. - In my tech package, will I lose the factory backup camera?
– Yes the factory backup camera is lost. You can use our camera retention harness to keep it on your aftermarket radio. - Can I use this complete kit on a TL with navigation?
– Yes. But you will need additional parts to convert the climate control display and to keep the factory backup camera. - Can I add an amplifier and subwoofers with your harness?
– Yes you can. You will just need run your RCAs to the back of the radio and wire tap the blue or blue/white wire of the harness. - Can I add a backup camera with your harness?
– Yes just follow the instructions provided in the radios owners manual or the cameras manual to complete the installation. - Can I use a random radio I found on Amazon or eBay that has an unknown brand?
– Most likely not. If the radio you purchased on Amazon is less than $100 it most likely won’t have all the features and ports needed for you to complete the installation. - Do I get to keep all my speakers?
– Yes all speakers are retained on the navigation equipped Acuras, on the base you lose the center dash speaker. - Do I get to keep my steering wheel controls?
– Yes but an additional part is required. The AXSWC in included in this kit. You will get to keep volume up, volume down, next, prev and mode. The call control buttons will not be retained. The navigation control buttons are not retained.
If you are looking to make your Acura TSX or Acura TL loud but don’t want to break your head with all the wiring our plug and play amplifier may be the solution. This amplifier requires new power and ground lines. You can find ground underneath the seat or on mounting bracket nearby. For power you will have to run the four gauge power wire up your battery. This amp isn’t recommend for first time DIY installers.
This amplifier can be used with the factory radio or an aftermarket radio. This amplifier can be used with the factory speakers in your Acura or new aftermarket speakers. We recommend upgrading your speakers when installing this amplifier. This amplifier is best used to power all of your speakers as full range speakers but can be configured to power a subwoofer and center channel like the factory amplifier. If you have any current sound issues this amplifier may or may not fix them please call us at 877-542-2872 so we can verify the cause of your audio issues and if this amplifier will fix them.
When installing this amplifier you will not need to run any new speaker wires to each speaker. Instead you will run the provided wire harness to the correct locations. This will include an audio input and audio output harness. Both harnesses will run to the same location but will plug into their respective connectors only. The primary power wire will be have to be ran to the battery and the ground wire will be secured to a location nearby. The remote wire for the amplifier will be combined with the audio input section of the amplifier. The amplifier will also come with a mounting bracket and mounting hardware for metal and carpet. If you are installing the amplifier below a seat use the carpet hardware if you are installing the amplifier against metal use the metal hardware.
In your 2004 to 2008 Acura TSX this amplifier installs below the passenger seat and you run your wire up the center console to the factory amplifier locations.
In your 2004 to 2008 Acura TL this amplifier installs below the passenger seat and you run the wire below the passenger side trim to the passenger kick panel where the factory amplifier is.
In your 2009 to 2014 Acura TSX without factory navigation this amplifier installs in place of the factory amplifier in the trunk on the passenger side behind the trunk liner.
In your 2009 to 2014 Acura TL without factory navigation this amplifier installs in place of the factory amplifier in the trunk on the passenger side behind the trunk liner.
In your 2007 to 2013 Acura MDX without factory navigation this amplifier installs below the passenger seat and the wire runs underneath the passenger trim to the factory amplifier connections behind the glovebox.
In your 2009 to 2014 Acura TSX and Acura TL with factory navigation this amplifier integrates into the factory amplifier in the trunk on the passenger side behind the trunk liner. You will mount this amplifier along side the factory amplifier.
This amplifier is rated for 140W x 4 @ 2ohms + 185 x 2 @ 2ohms. So you want to pair JBL or Audison speakers for the best performance. At 4 ohms the amplifier is rated for 85w x 6. This amplifier is extremely efficient so while it gets loud it will not put a strain on your factory electrical system only drawing 54 amps at max musical performance.
The amplifier comes tuned based on your conversation with our technicians. Please make sure to use a good contact number for your order so that our team may reach out and tune your amplifier correctly for your radio and speaker combination. If you are looking for all the technical details of this amplifier please check out this link.
FAQs
- Can I use this amplifier with the factory speakers?
– yes but this amplifier is powerful enough to easily blow the factory speakers so be-careful. - Can I use this amplifier if I have an aftermarket radio installed?
– yes you can use this amplifier with the factory radio or aftermarket radio - Can I use this amplifier with aftermarket speakers?
-yes you can use this amplifier with 4ohm, 2ohm or 8 ohm speakers. - How is it plug and play if I have to run wires?
– The amplifier is labeled plug and play because you don’t have to figure out any of the wiring. You just have to run wires to the correct locations. All the wires are terminated and labeled so it takes the guess work out of the installation. - Why doesn’t it work for newer Acuras?
– The amplifier may work on newer Acuras and vehicles with navigation but it has not been tested and we don’t have first hand experience with that exact vehicle. When we do we will update the description of the amplifier. - How much louder is this amp than factory?
– Your factory amplifier has an output of roughly 20-30Watts per channel. This amplifier outputs 125 watts per channel at two ohms. That means this amp is possibly up to 4-6 times more powerful than the factory amplifier and nearly three time as loud. - Who makes this amplifier?
– This amplifier is made by Audison they are a high end audio company. This amplifier is the SR6.600 and comes with a two year warranty. - Why would I buy it from you when I could just buy it direct?
– If you are an advanced DIYer then you can easily buy this amplifier direct and configure all the settings. You will also need to do all the wiring which can be a bit time consuming. If you aren’t an advanced DIYer all the settings on the amplifier and the wiring can get overwhelming and confusing. Our amplifier comes pre-tuned and wired so you can just plug everything in and start enjoying.