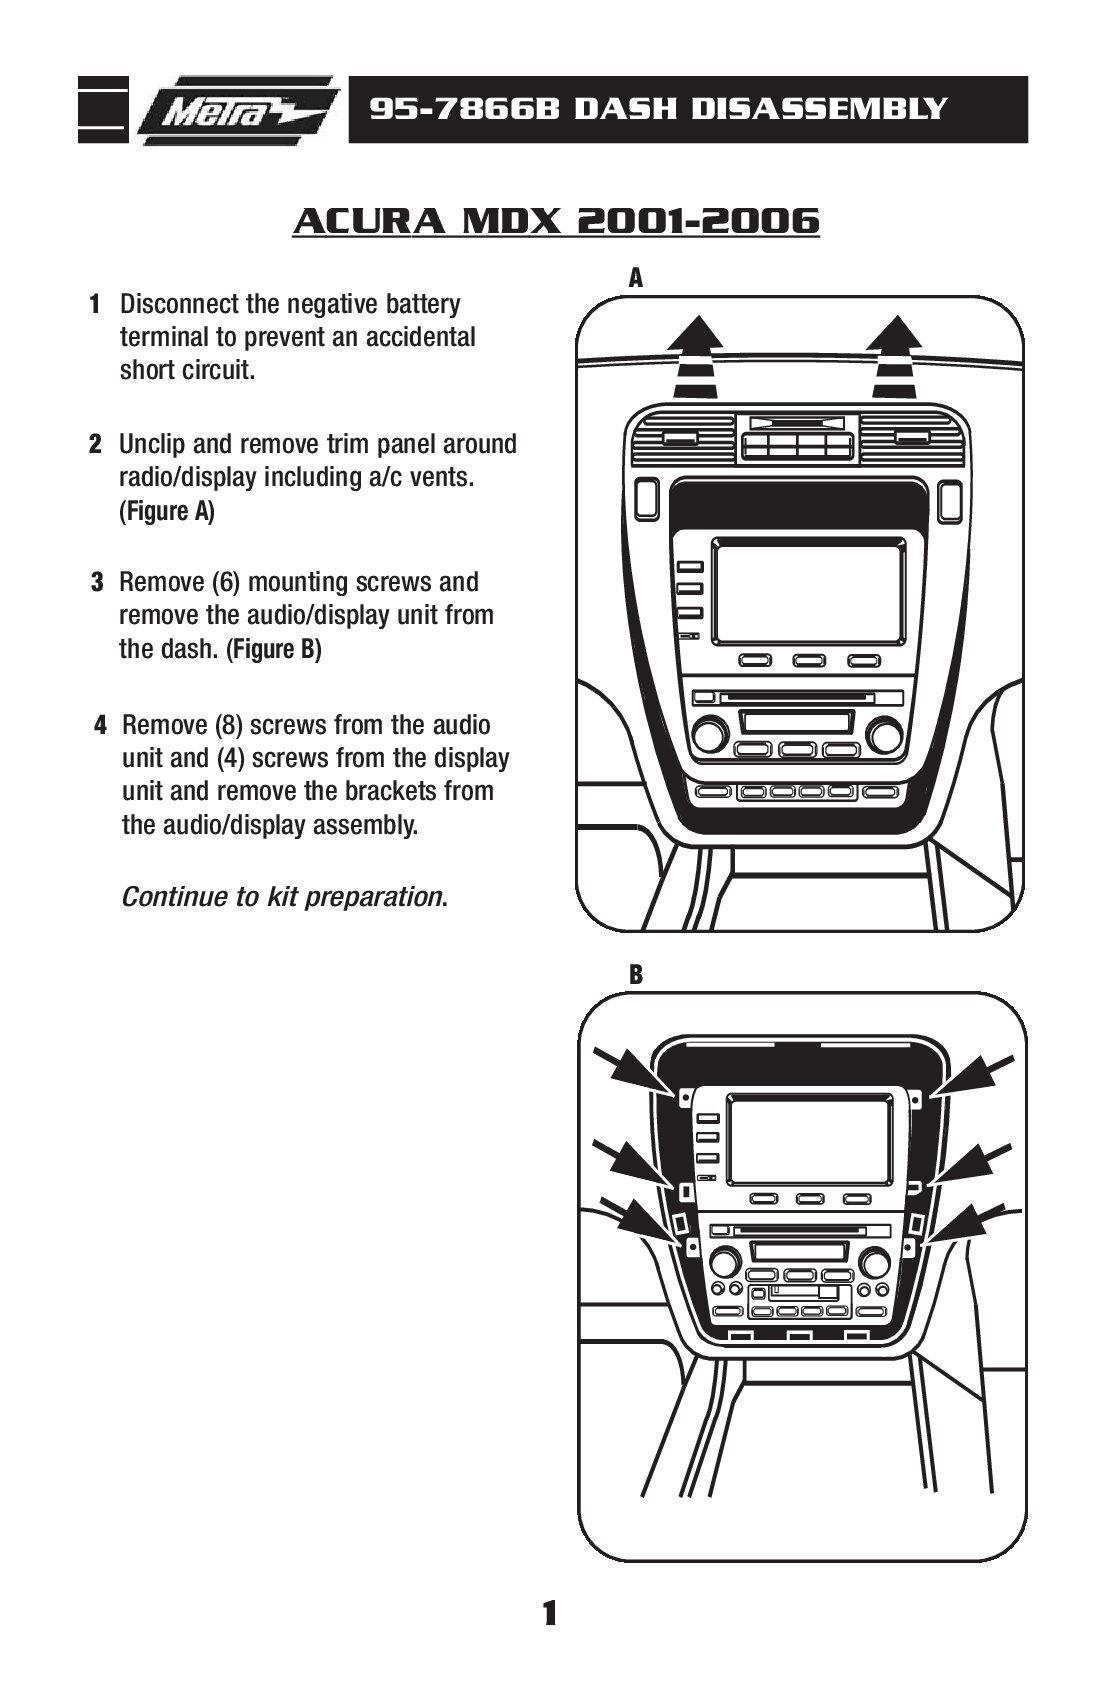
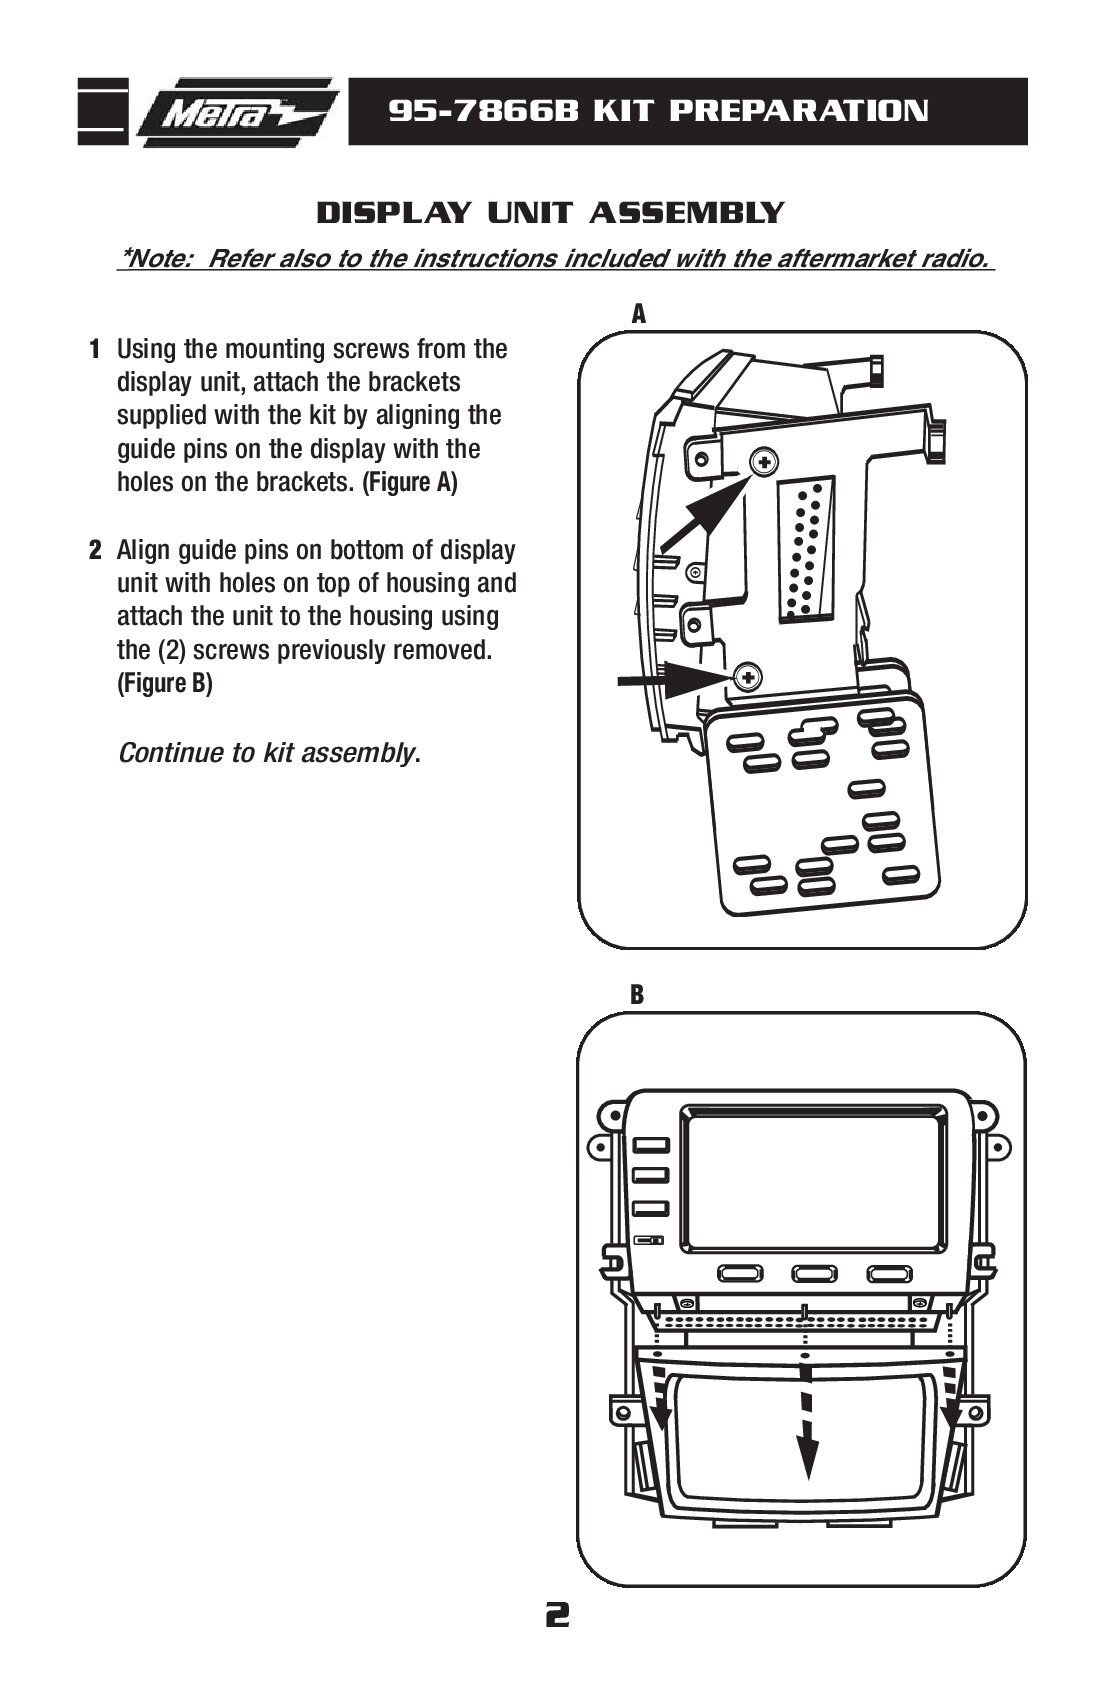
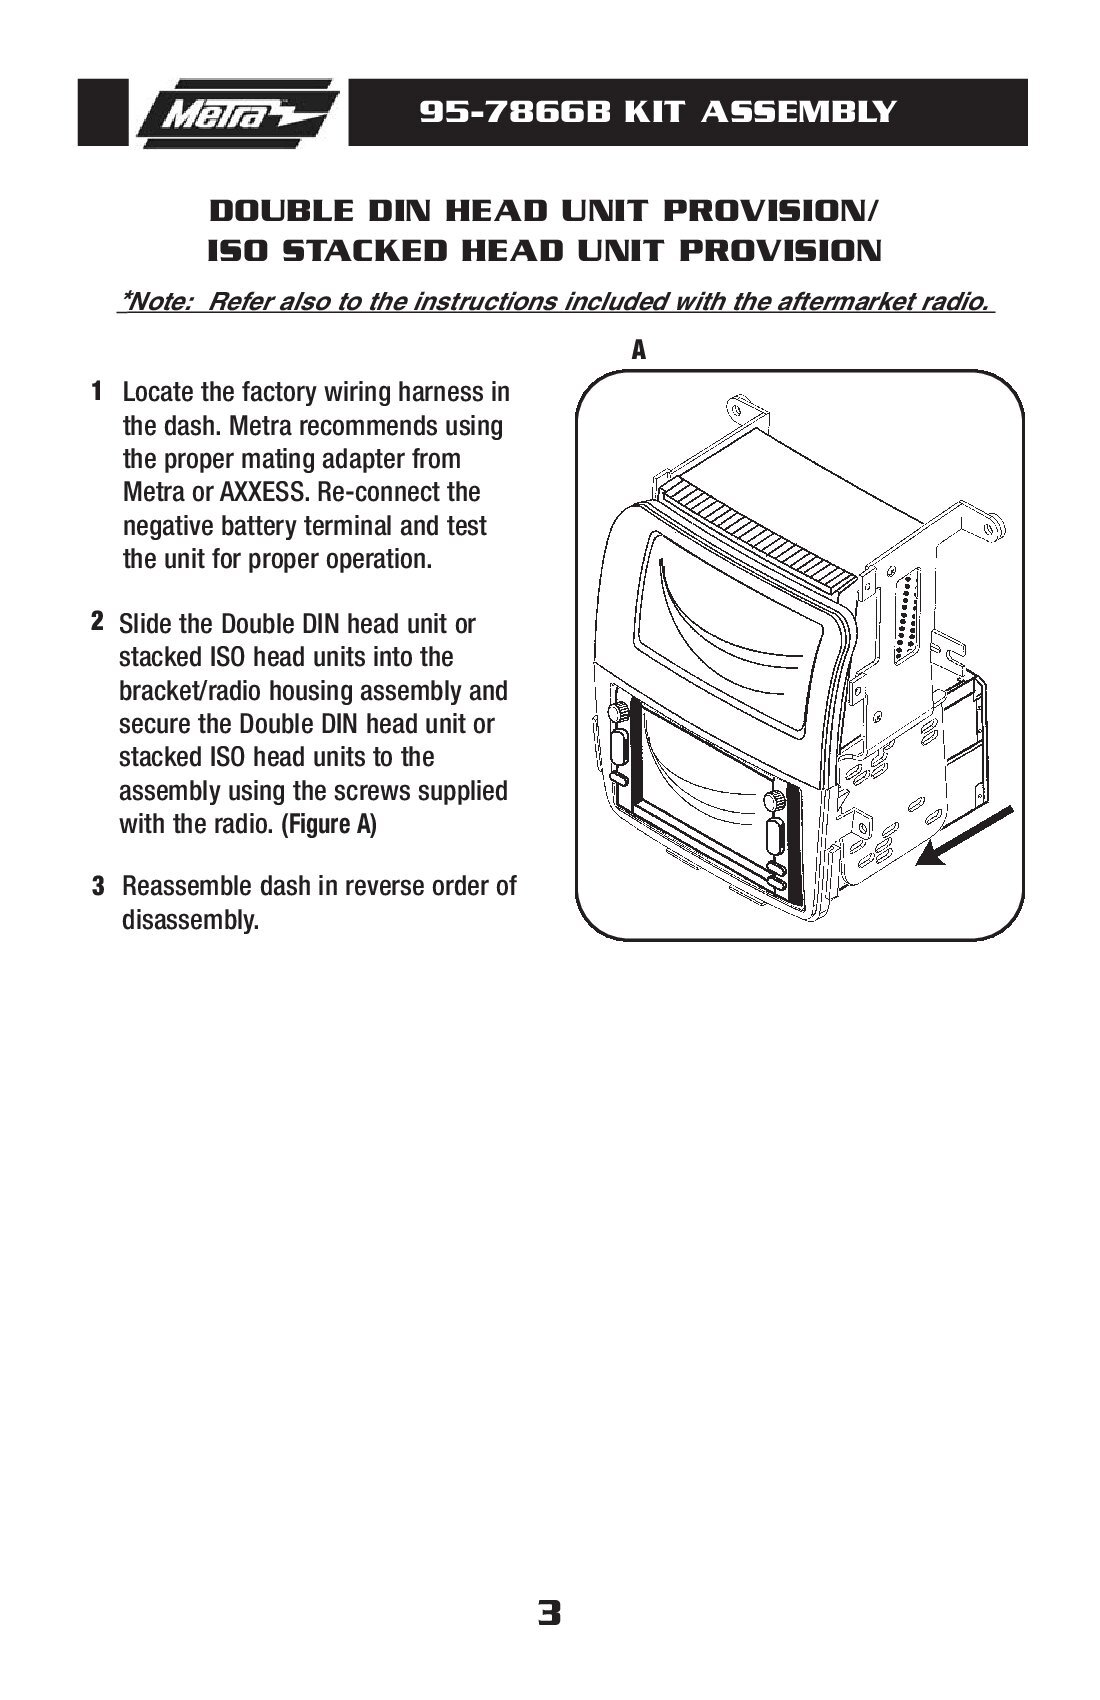
2001 2002 2003 2004 2005 2006 Acura MDX Factory Radio Removal | Aftermarket Radio Installation Procedure

Your Acura MDX has a 5 speaker system which are all retrained when installing this aftermarket radio. If you have BOSE or don’t have BOSE you will keep all your speakers including the subwoofer and your factory amplifier. Your factory navigation touchscreen will continue to function but there will be no audio so you will lose route guidance and other prompts. The backup camera will continue to work through the factory screen. If you don’t have a touchscreen the trip screen will work as normal. You will also get to keep your steering wheel control buttons including volume up, volume down, next, previous and mode. Call control buttons are not retained. You will lose the factory Bluetooth functionality and use the Bluetooth from the new aftermarket radio instead. If you upgrade your radio you will lose rear entertainment, external CD changer, external DVD player, factory Sirius XM and OnStar.

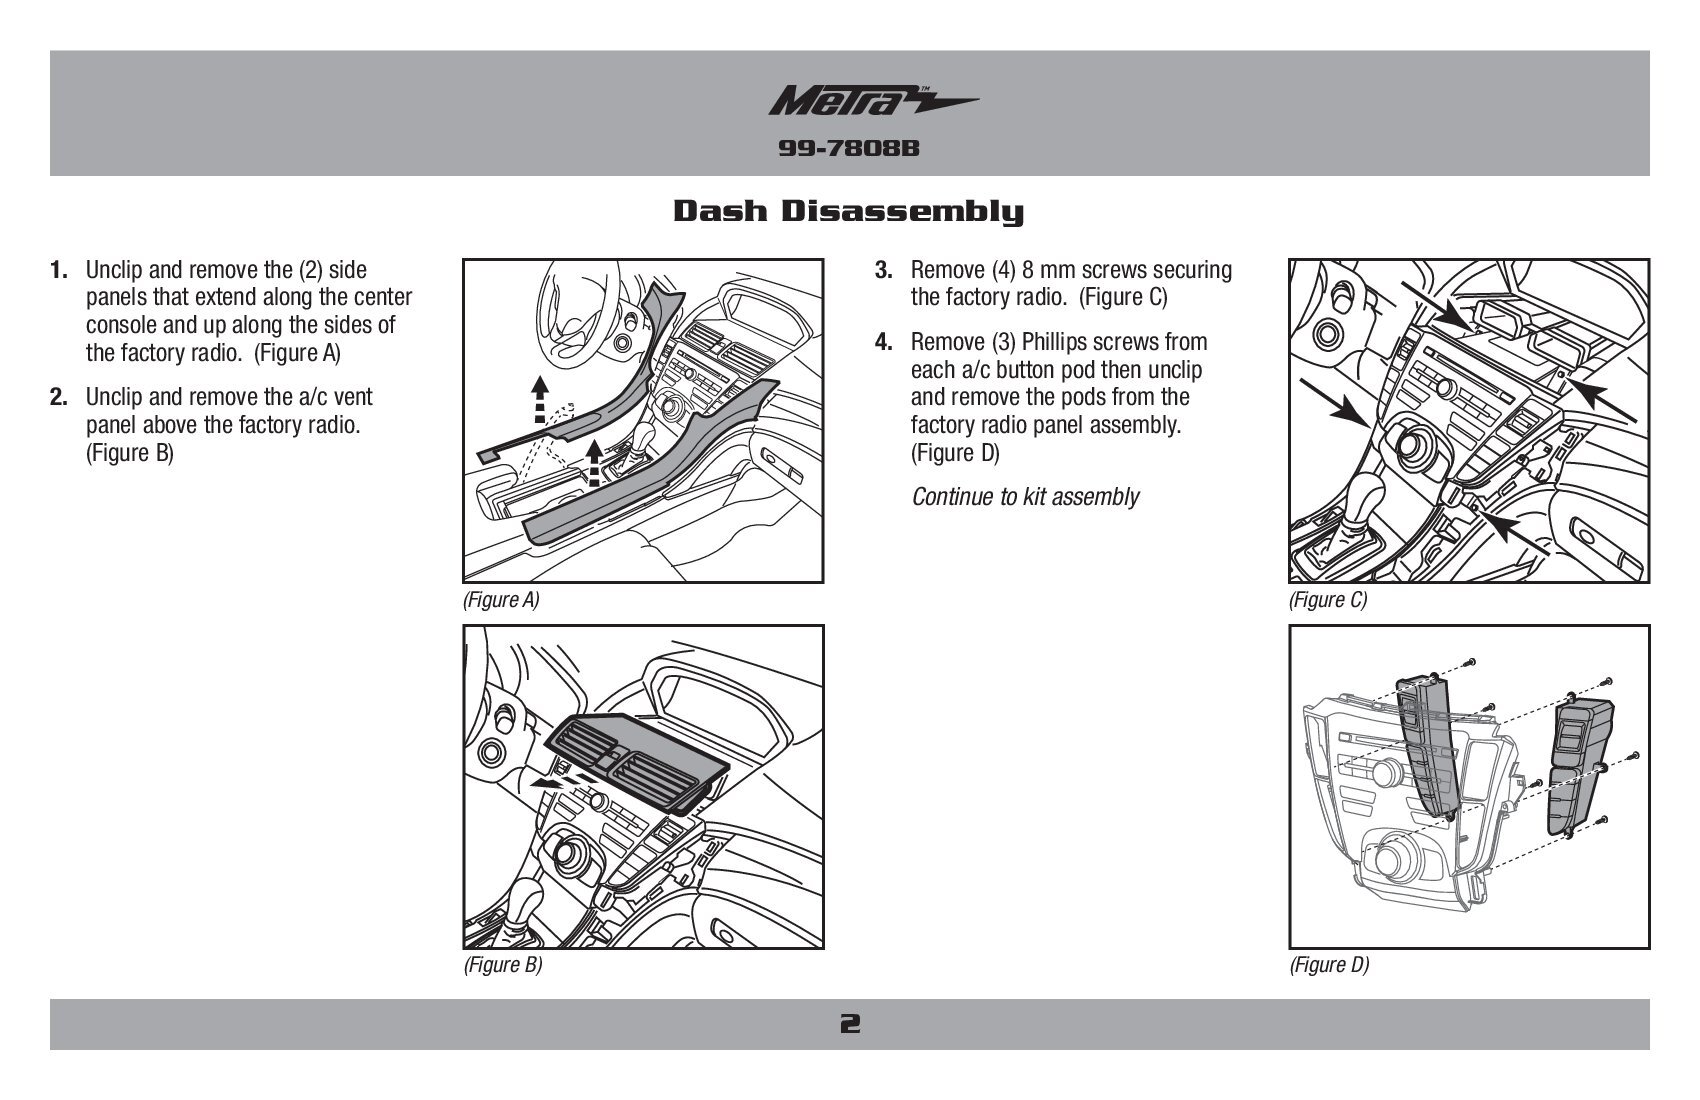
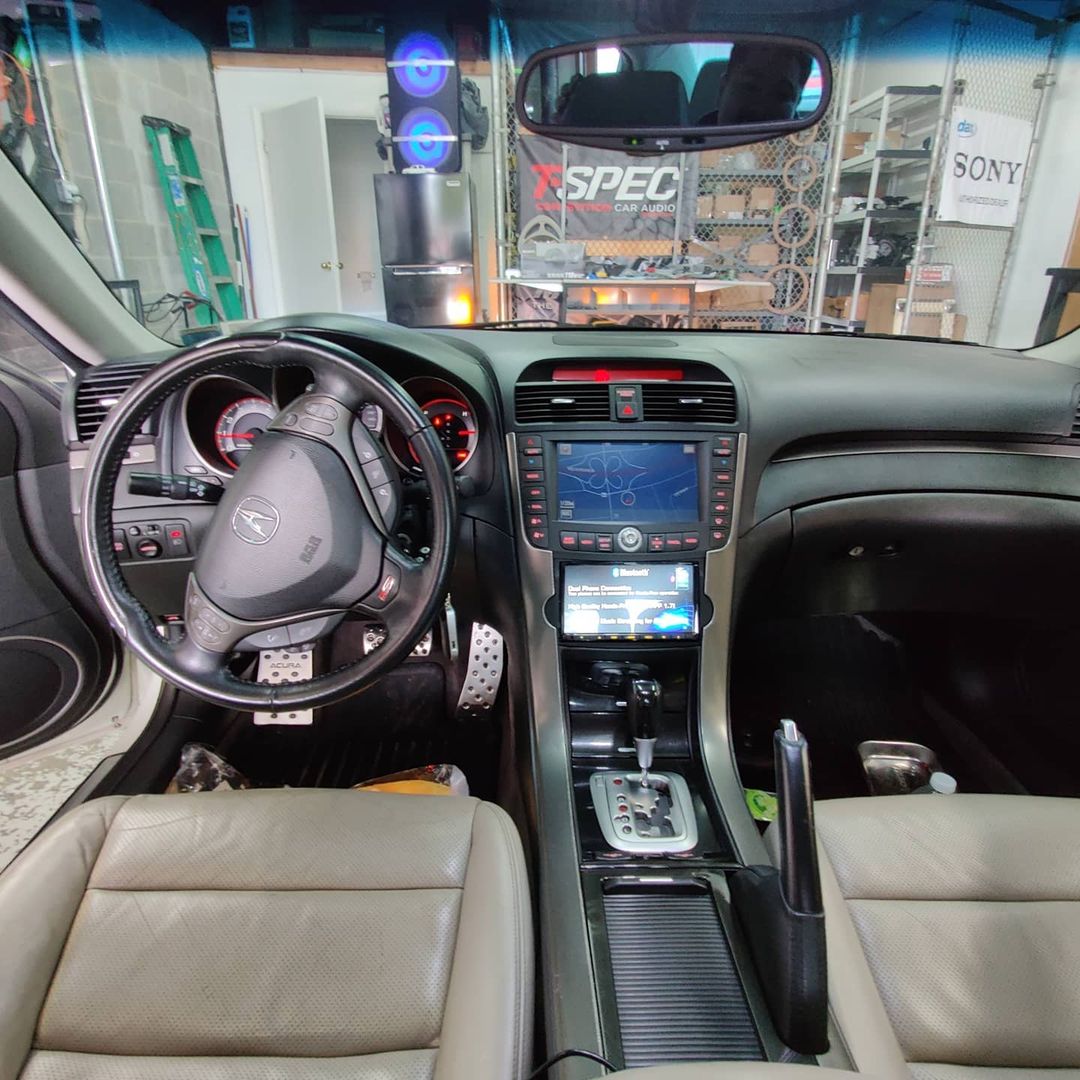
2009 2010 2011 2012 2013 2014 Acura TL Factory Radio Removal | Aftermarket Radio Installation Procedure

Your Acura TL has a total of 6 speakers that are powered by the factory amplifier. When replacing the factory radio using our radio kit you are able to keep all of the speakers except the center channel. The front door speakers, tweeters, rear deck speakers and the factory subwoofer will all continue to work; the center dash speaker will not work. Our harness integrates with the factory amplifier to keep all your speakers working. You will also get to keep your steering wheel controls including volume up, volume down, next, prev and mode. The call control buttons will not work. The climate control display will continue to work and show the climate information but won’t show any audio information. The factory XM, HFL and AUX features will no longer work. If you want to retain XM or AUX you will need your new aftermarket radio to have these features.

Your Acura TL with navigation has a total of 10 speakers that are powered by the factory amplifier. When replacing the factory radio using our radio kit you are able to keep all of the speakers. The ELS Amplifier Interface allows you to install the aftermarket radio and keep the factory amplifier. The front door speakers, tweeters, rear door speakers, rear pillar speakers and the factory subwoofer will all continue to work. Our harness integrates with the factory amplifier to keep all your speakers working. You will lose Sirius XM, USB, AUX, OEM Navigation(screen will be black), and the factory backup camera. The factory backup camera can be rerouted to show up on the aftermarket radio(requires additional purchase). The steering wheel controls including volume up, volume down, next, previous and mode will work. The call control buttons are not retained. The factory hands free Bluetooth is disabled and you will need to use the aftermarket radios Bluetooth features. The call control buttons are not retained. The navigation control buttons are not retained.

FAQ.

  1. In my premium audio system, will the display above the radio continue to show climate control information.
    – Yes your climate control will continue to function as normal.
  2. In my tech package, will I lose the climate control information?
    – Yes the climate information will be lost unless you convert your navigation screen to the audio HVAC display with our harness.
  3. In my tech package, will I lose the factory backup camera?
    – Yes the factory backup camera is lost. You can use our camera retention harness to keep it on your aftermarket radio.
  4. Can I use this complete kit on a TL with navigation?
    – Yes. But you will need additional parts to convert the climate control display and to keep the factory backup camera.
  5. Can I add an amplifier and subwoofers with your harness?
    – Yes you can. You will just need run your RCAs to the back of the radio and wire tap the blue or blue/white wire of the harness.
  6. Can I add a backup camera with your harness?
    – Yes just follow the instructions provided in the radios owners manual or the cameras manual to complete the installation.
  7. Can I use a random radio I found on Amazon or eBay that has an unknown brand?
    – Most likely not. If the radio you purchased on Amazon is less than $100 it most likely won’t have all the features and ports needed for you to complete the installation.
  8. Do I get to keep all my speakers?
    – Yes all speakers are retained on the navigation equipped Acuras, on the base you lose the center dash speaker.
  9. Do I get to keep my steering wheel controls?
    – Yes but an additional part is required. The AXSWC in included in this kit. You will get to keep volume up, volume down, next, prev and mode. The call control buttons will not be retained. The navigation control buttons are not retained.

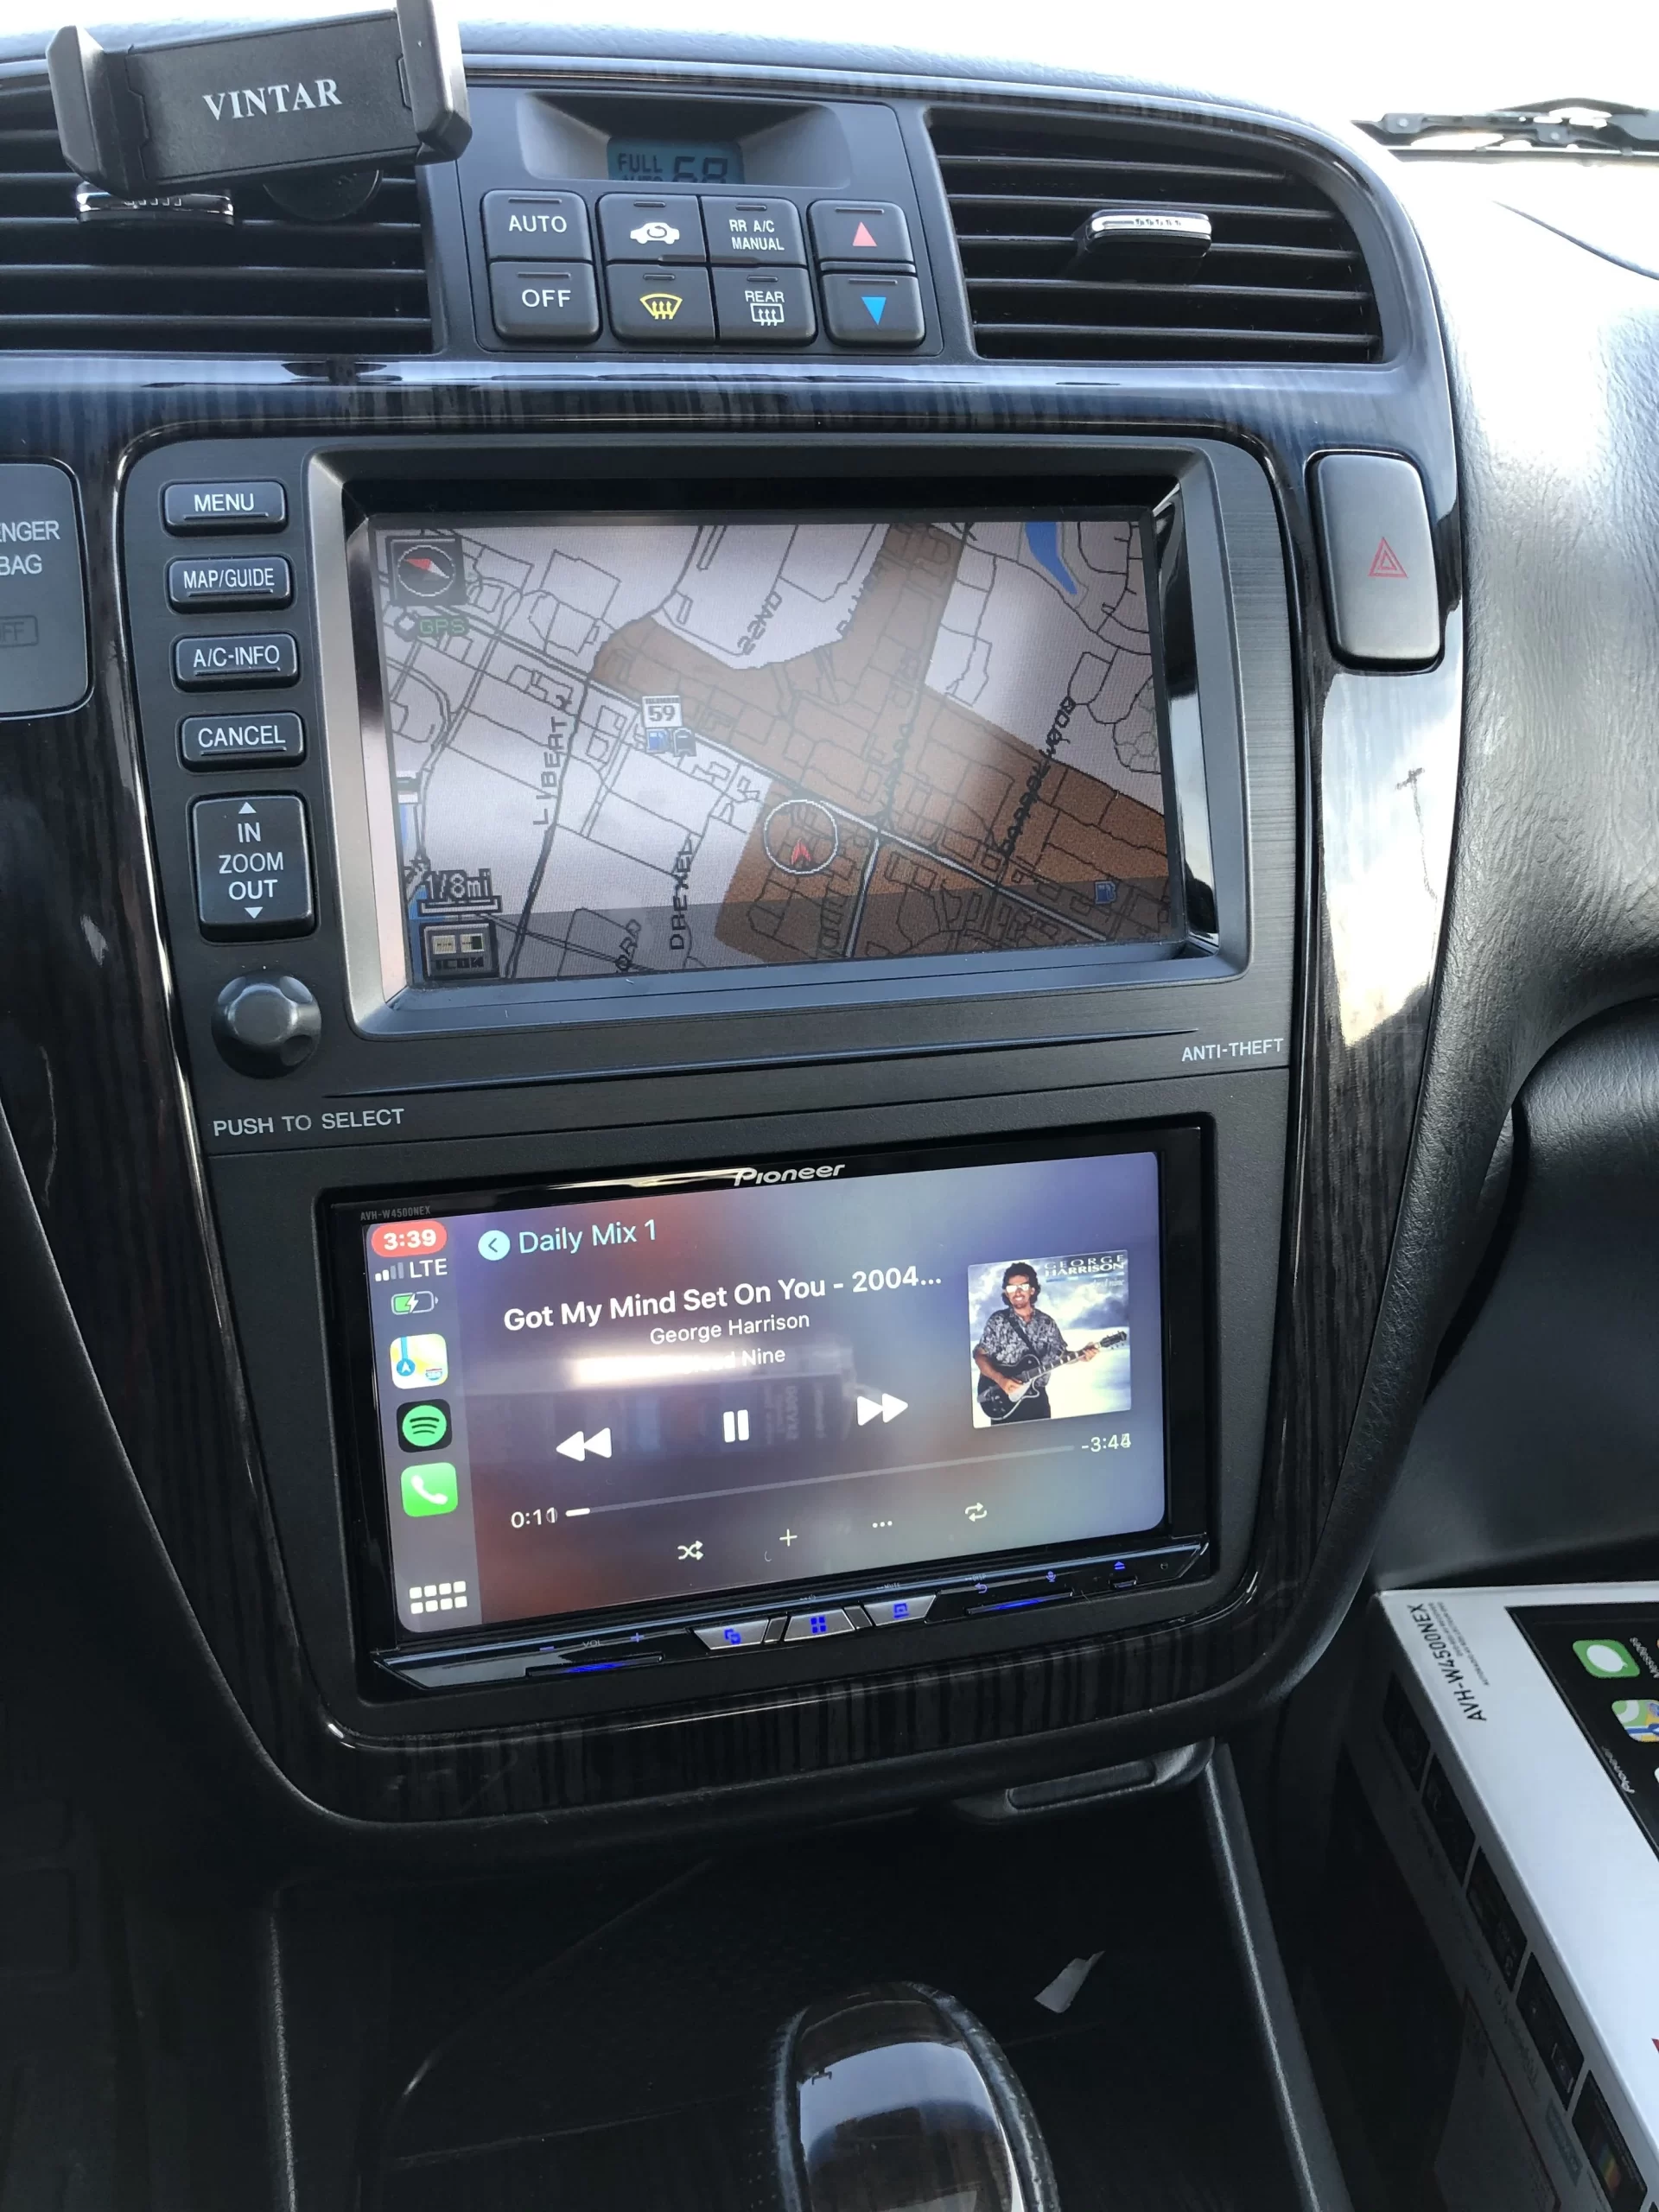
2004 2005 2006 2007 2008 Acura TL Factory Radio Removal | Aftermarket Radio Installation Procedure

Your Acura TL has a total of 6 speakers that are powered by the factory amplifier. When replacing the factory radio using our radio kit you are able to keep all of the speakers except the center channel. The front door speakers, tweeters, rear deck speakers and the factory subwoofer will all continue to work; the center dash speaker will not work. Our harness integrates with the factory amplifier to keep all your speakers working. Your navigation touchscreen and factory backup camera will continue to function but there will be no audio prompts from the factory navigation. You will lose Sirius XM and the factory AUX input. The steering wheel controls including volume up, volume down, next, previous and mode will work. The call control buttons are not retained. The factory hands free Bluetooth is disabled and you will need to use the aftermarket radios Bluetooth features.
1999 2000 2001 2002 2003 Acura TL Factory Radio Removal | Aftermarket Radio Installation Procedure

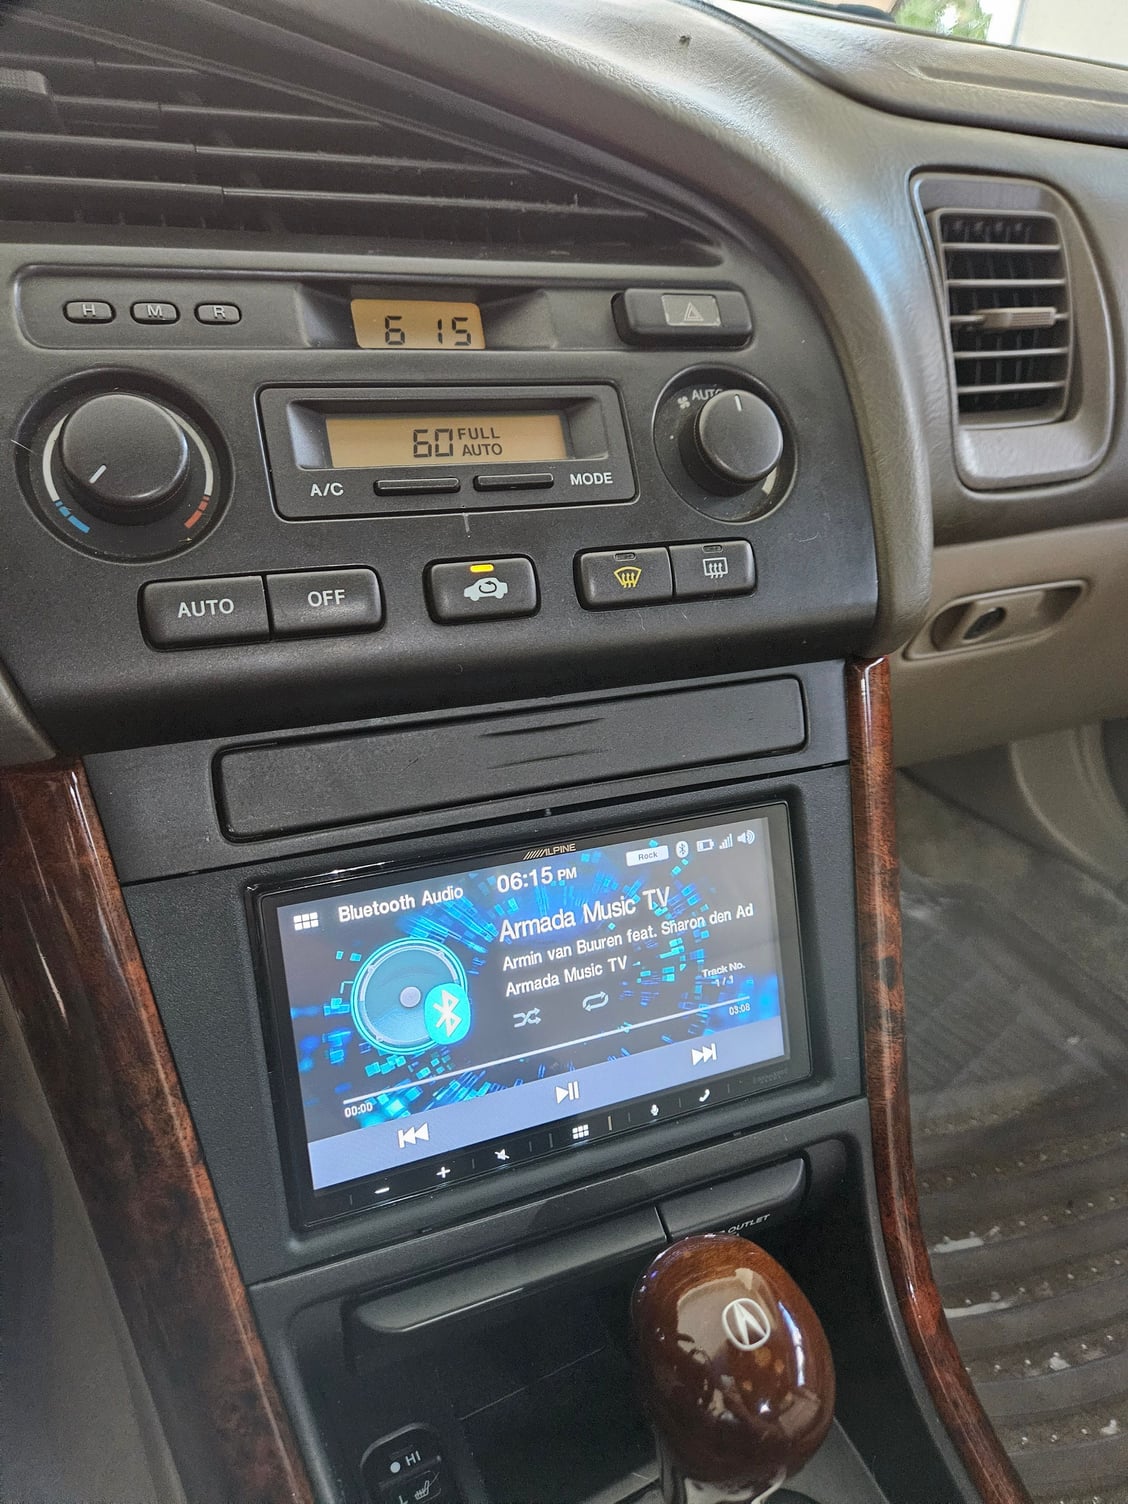
Your Acura TL has a 5 channel speaker system. The door speakers are powered by the factory radio and amplifier powers the factory subwoofer. All speakers are retained when installing an aftermarket radio. Our harness powers all of your speakers using the aftermarket radios internal amplifier while also integrating with the vehicles factory amplifier to power your factory subwoofer. When replacing the radio if your vehicle is equipped with navigation the touchscreen will continue to function but there will be no audio prompts from the factory navigation. The steering wheel controls including volume up, volume down, next, previous and mode will work with the aftermarket radio. The factory hands free Bluetooth will no longer work. You will use the new aftermarket radios Bluetooth features.

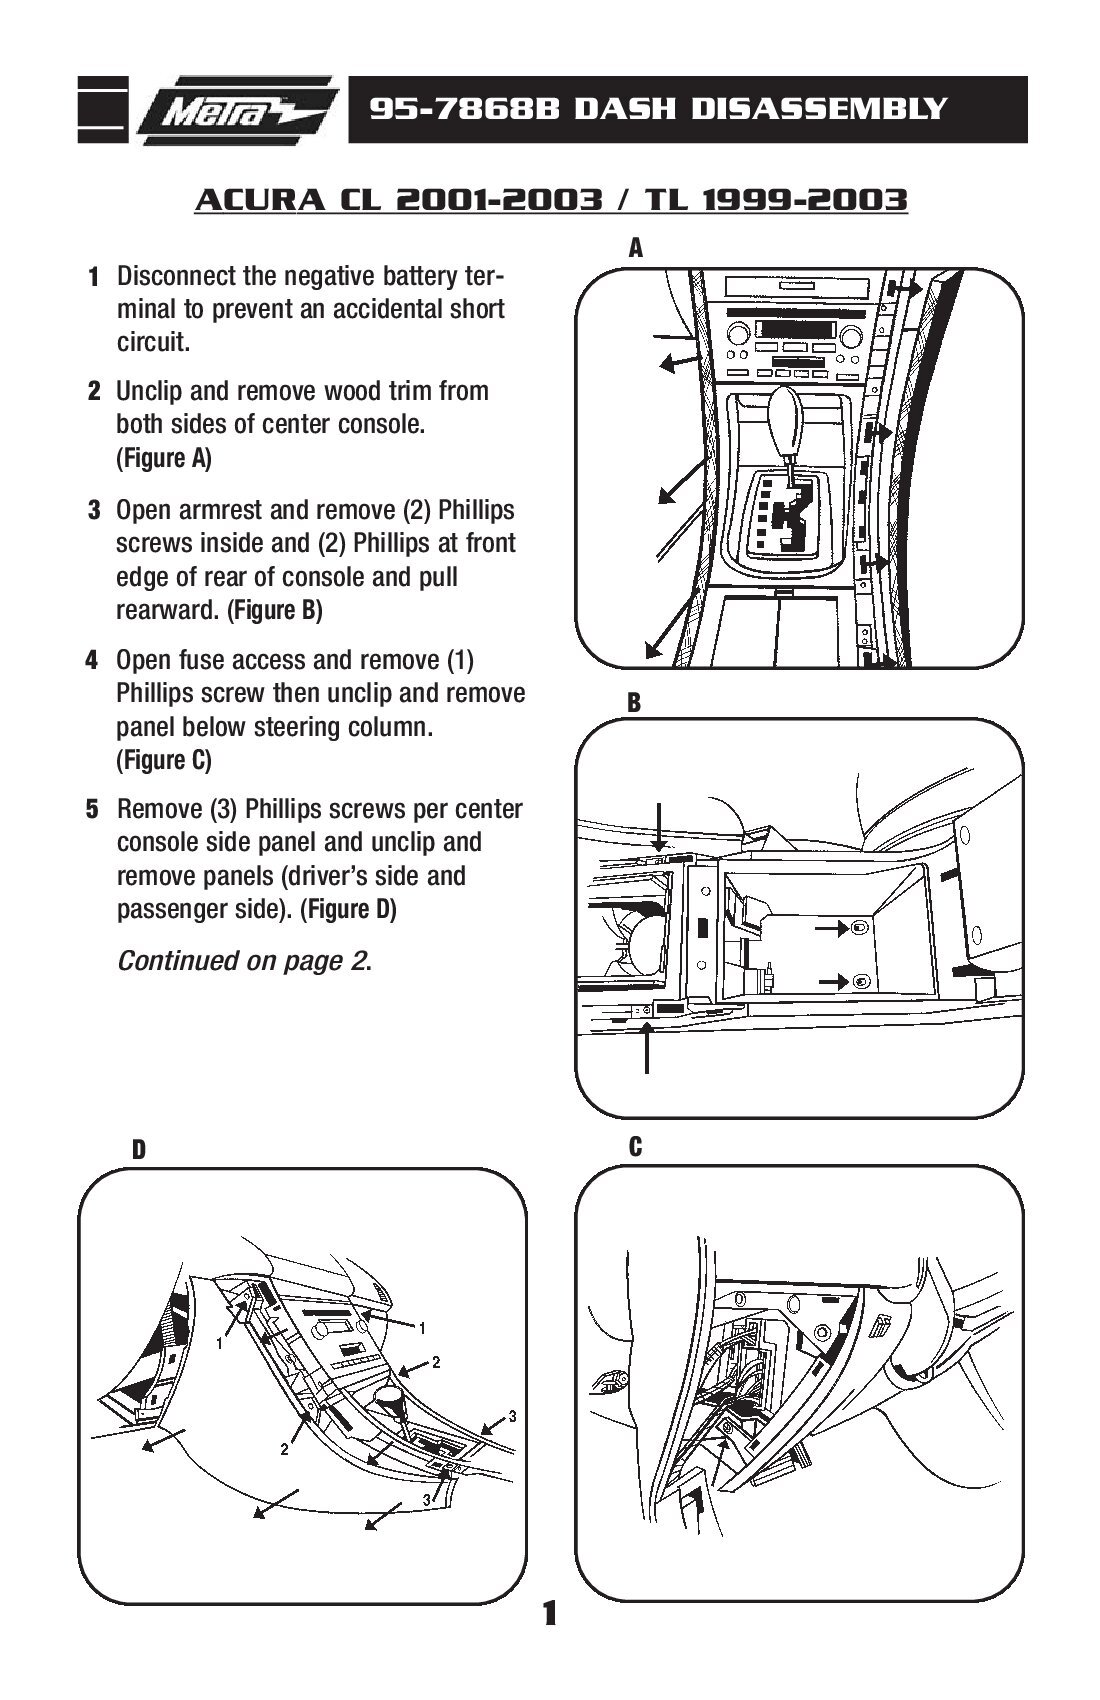
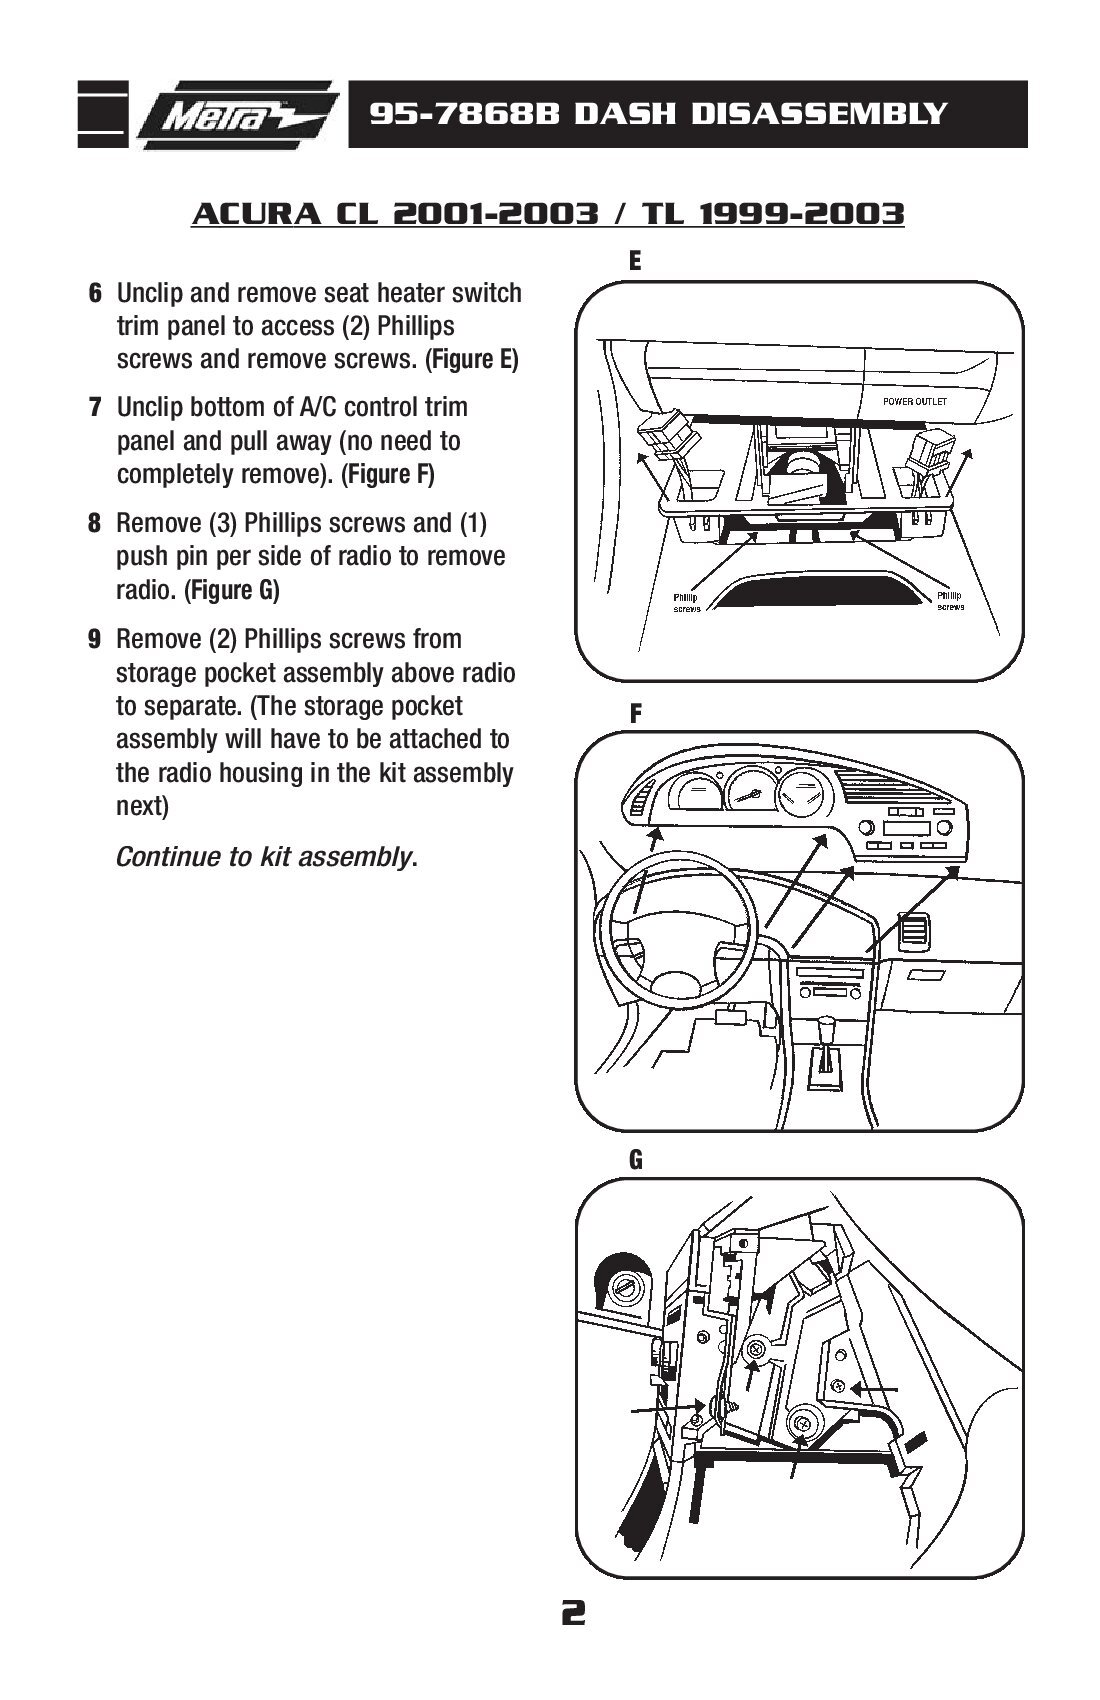
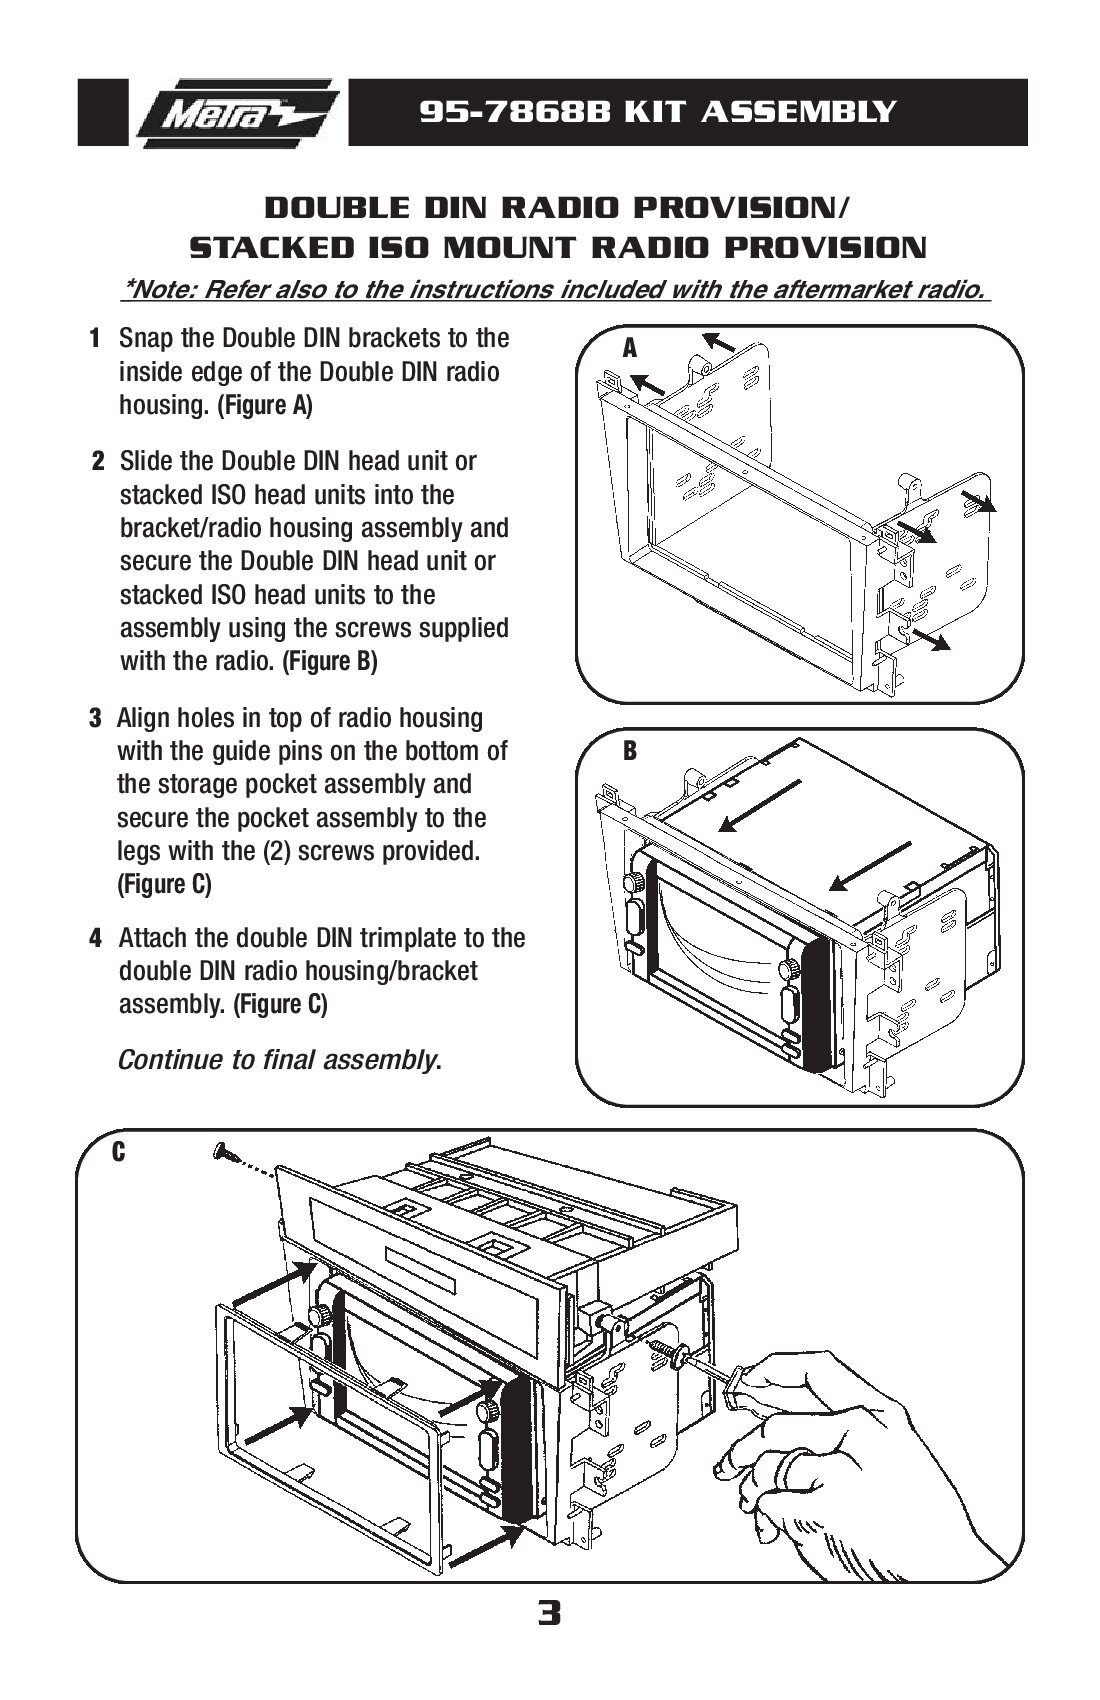
This page contains written instructions and video demonstrations on how to remove the factory radio in your 1999 2000 2001 2002 2003 Acura TL.

  1. Protect your seats and have a towel ready to cover up metal parts. Also make sure to locate your radio and navigation codes.
  2. Disconnect the negative battery terminal and secure it so it does not accidentally touch the battery.
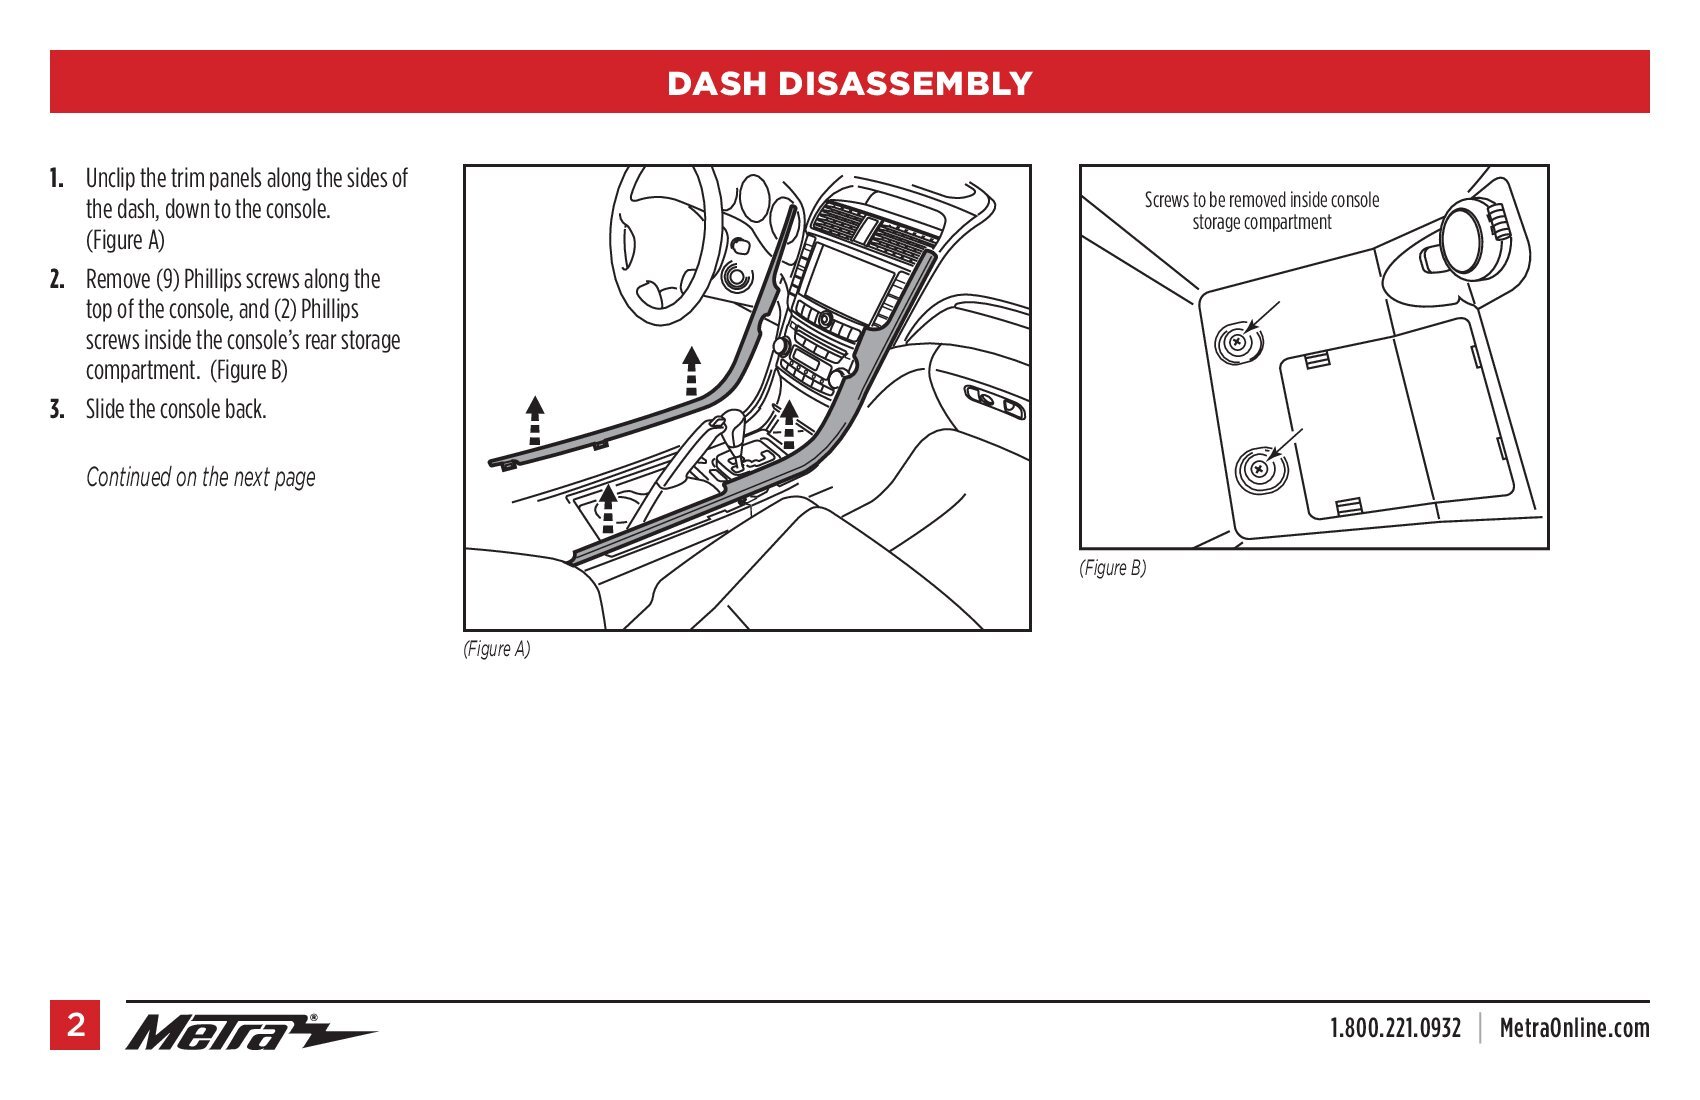
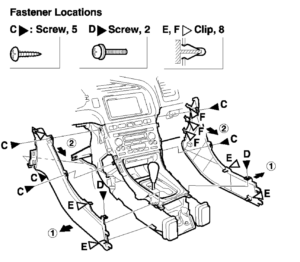
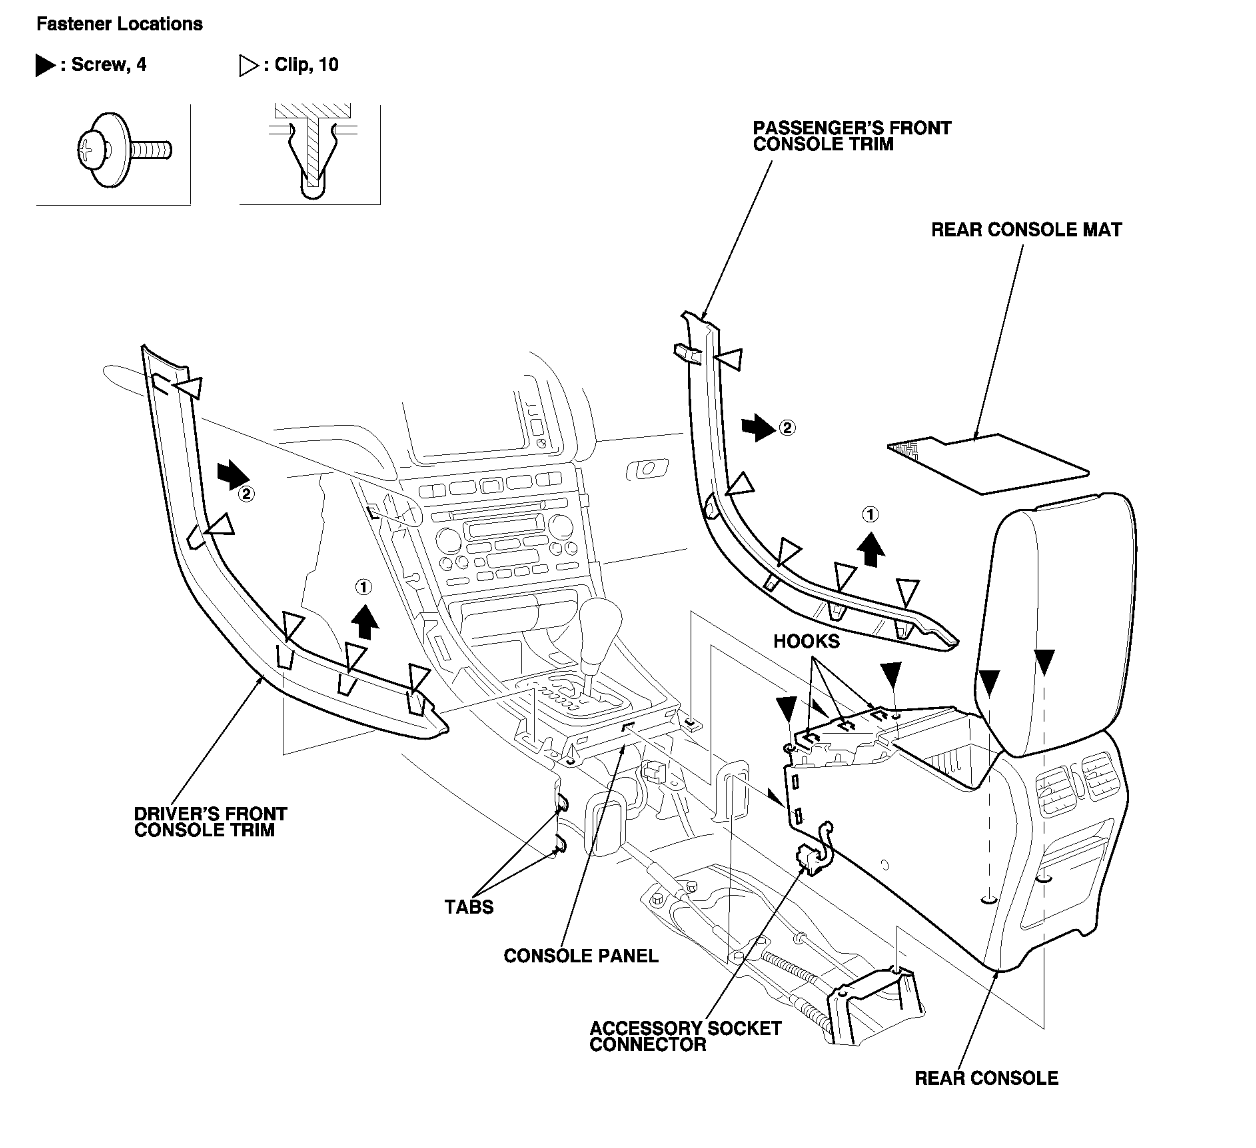
  3. Unclip the side panel trims that run from the vents to the emergency break. They pull free with moderate force.
  4. Remove 4 screws from the center console, two right by the shifter and 2 inside the center armrest pocket.
  5. Slide the center console armrest back so that it is separated from the trim around the shifter.
  6. Remove 6 screws holding the radio and the trim around the shifter together
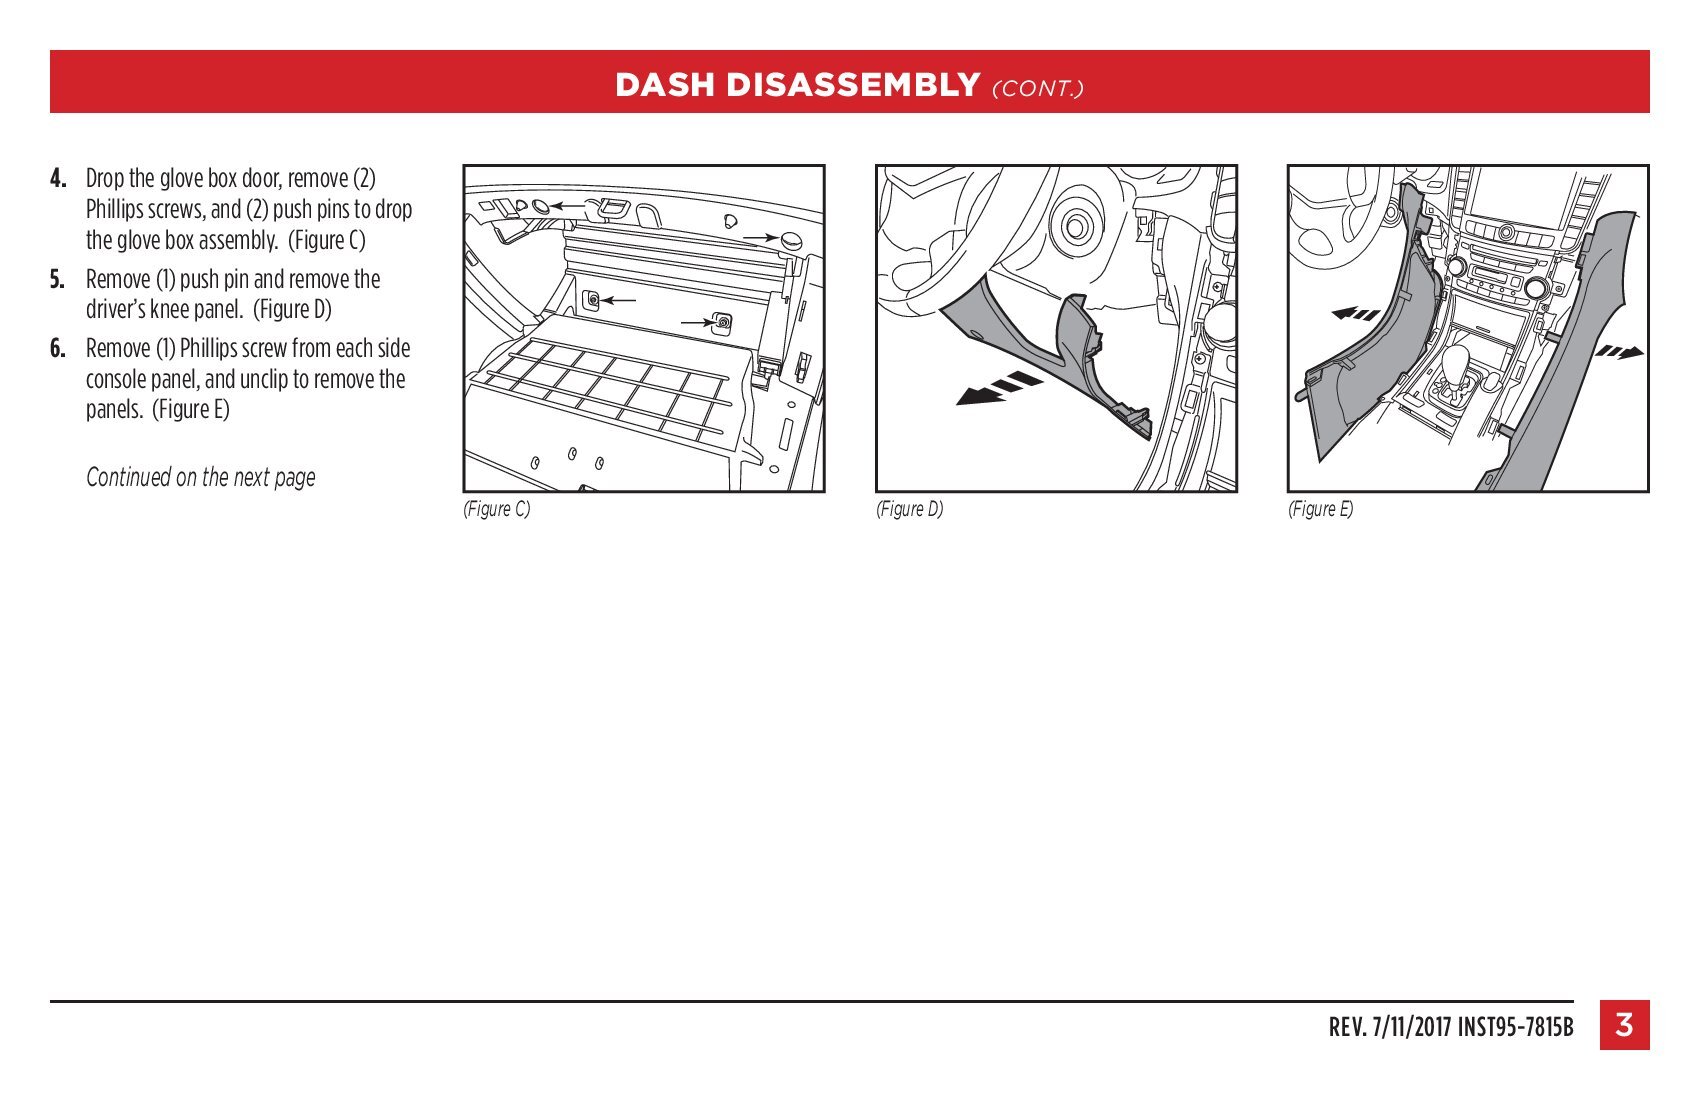
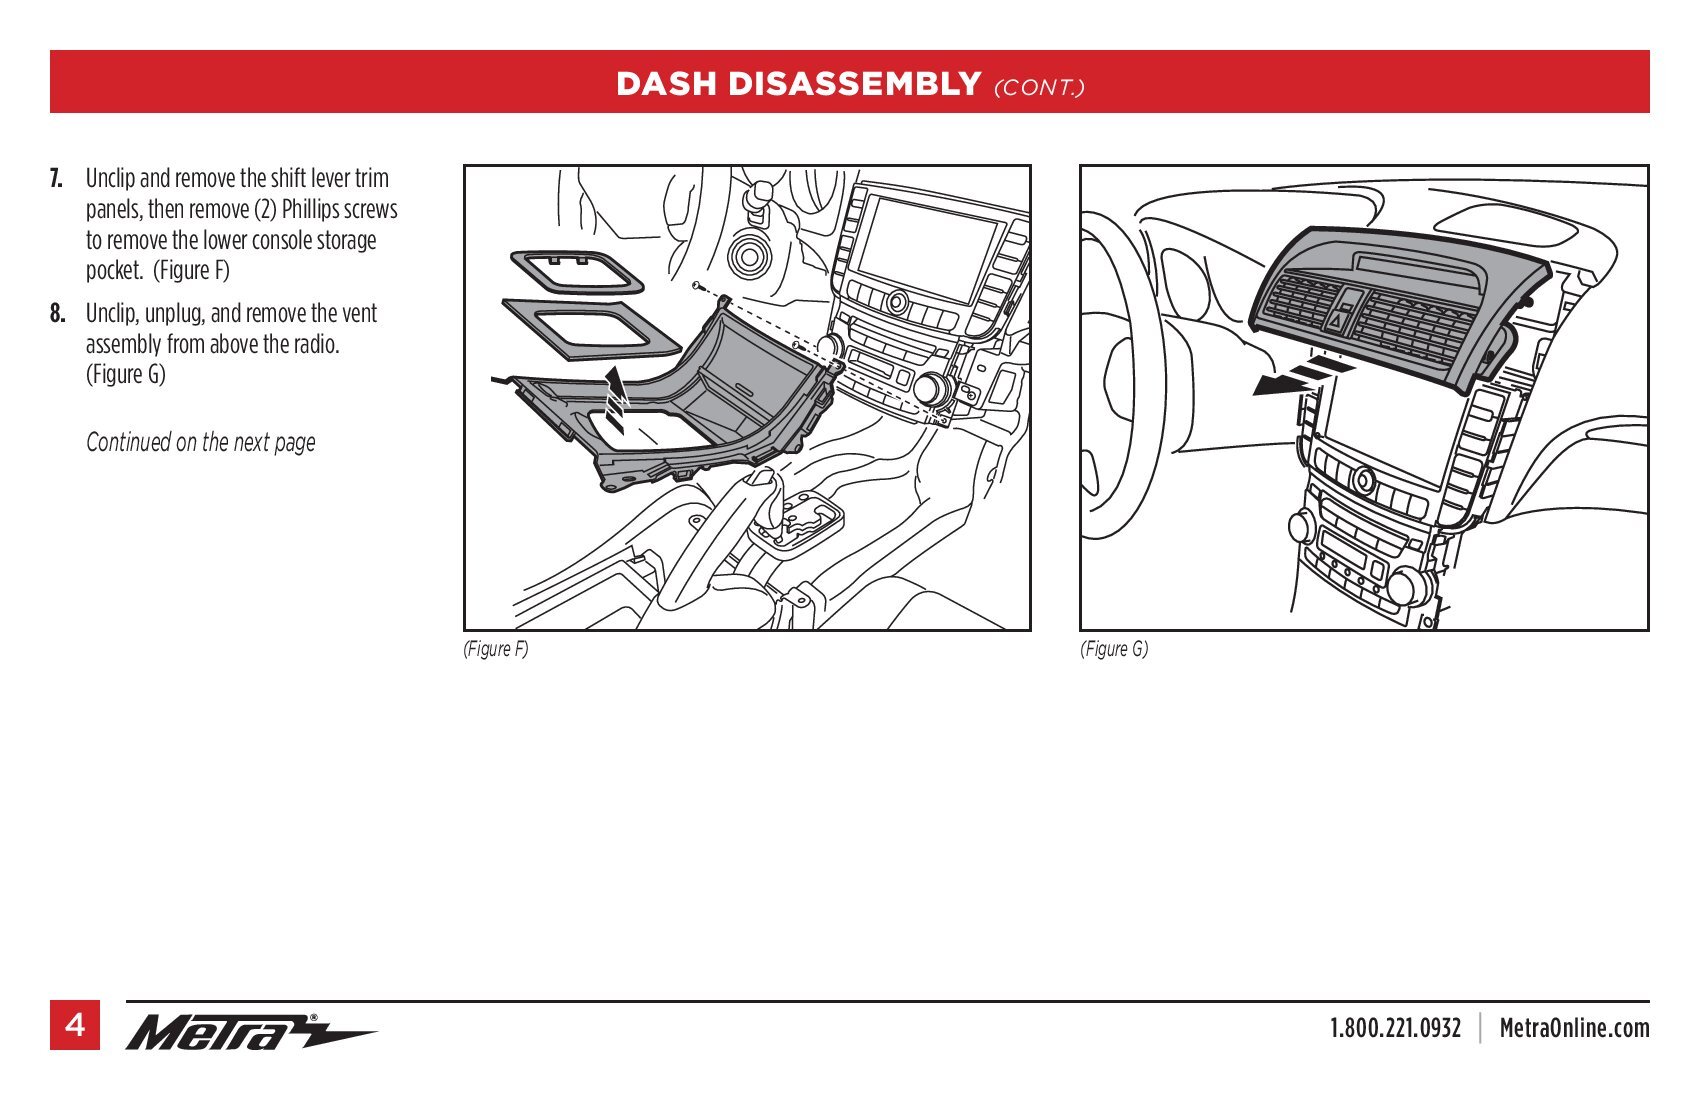
  7. Remove 2 screws on the passenger side center console trim and unclip it from the center console.
  8. Remove 3 screws on the drivers side center console trim and unclip it from the center console.
  9. Unclip and unplug the heated seat switches. Unclip the plastic trim around the heated seat switches.
  10. Unclip the trim surrounding the shifter. Release the shifter by pressing down the shift lock release
  11. Remove 2 screws securing the center console trim to the radio trim.
  12. Pull the shifter trim panel towards you and disconnect the cigarette lighter.
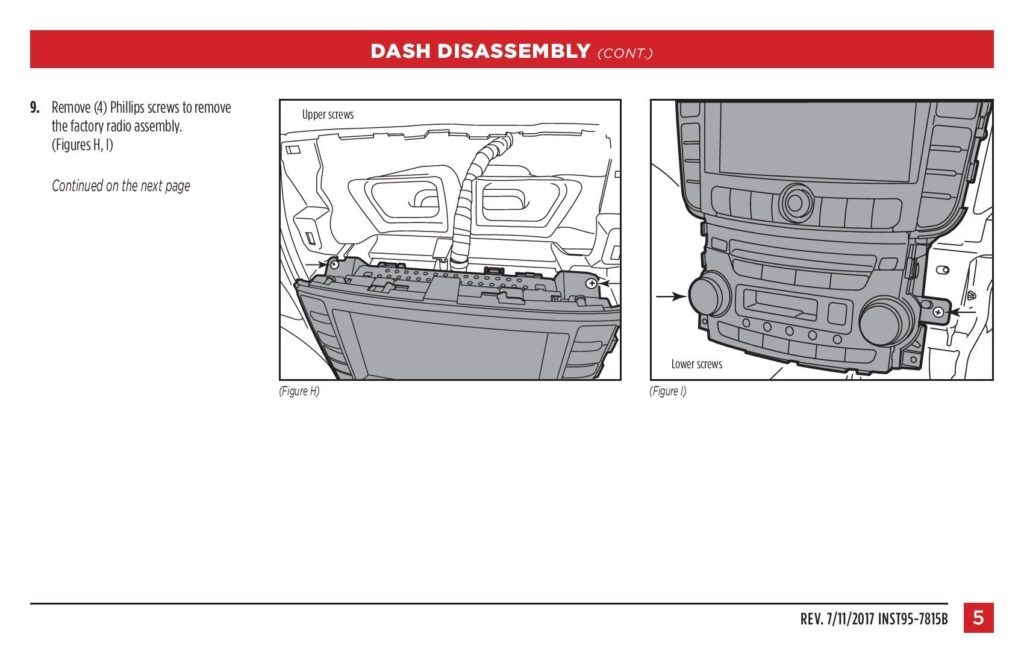
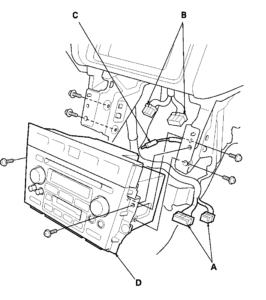
  13. Remove 4 radio screws securing the radio on the sides.
  14. Unclip the radio from the dash and unplug the three connections.