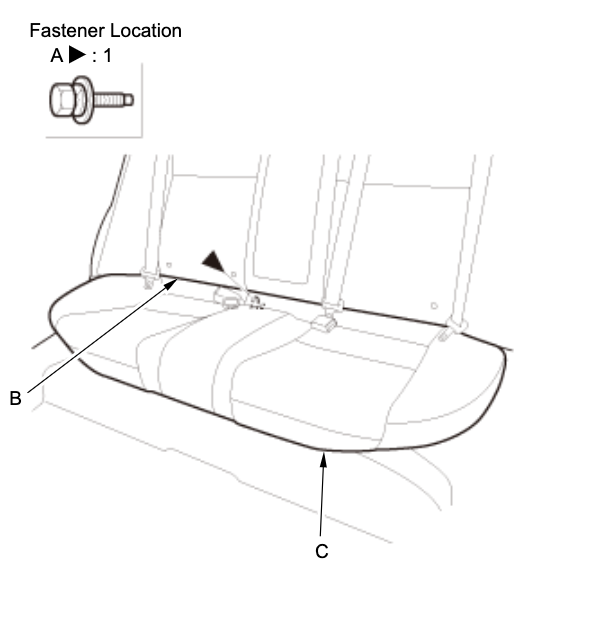
- Remove the bolt (A) between the rear seat-back (B) and the rear seat cushion (C).

- While pushing down on the seat cushion (A), pull the seat hook handles (B) to release the hooks (C).
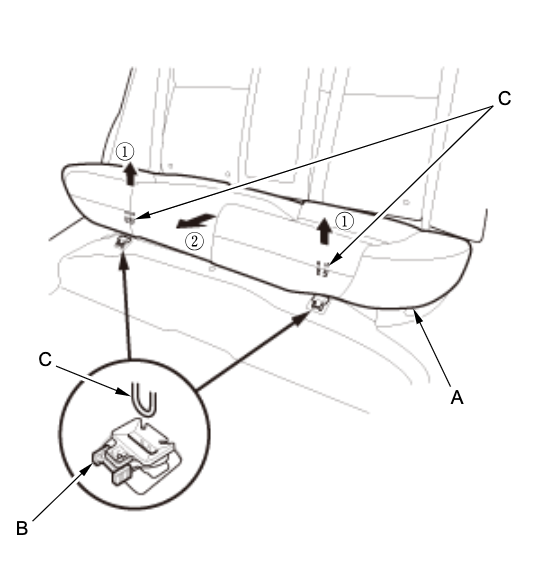
- Remove the bolt (A) securing the seat side bolster (B)
- Lift up the seat side bolster (A) to release the hook (B), then remove the side bolster. Remove both bolsters
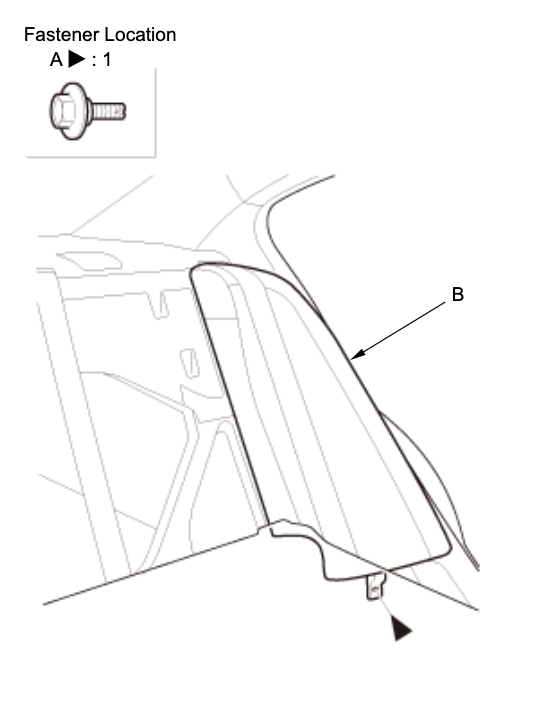
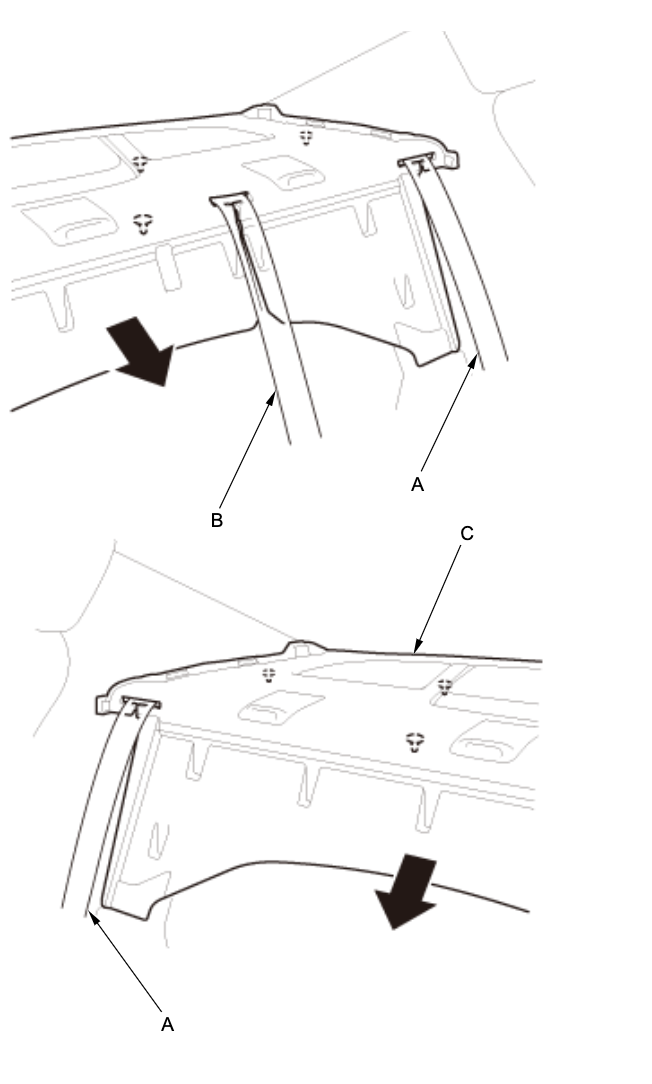
- Remove rear door opening seal (A) as needed.
– Pull out the C-pillar trim (B) to release the clips.
– Remove the C-pillar trim.
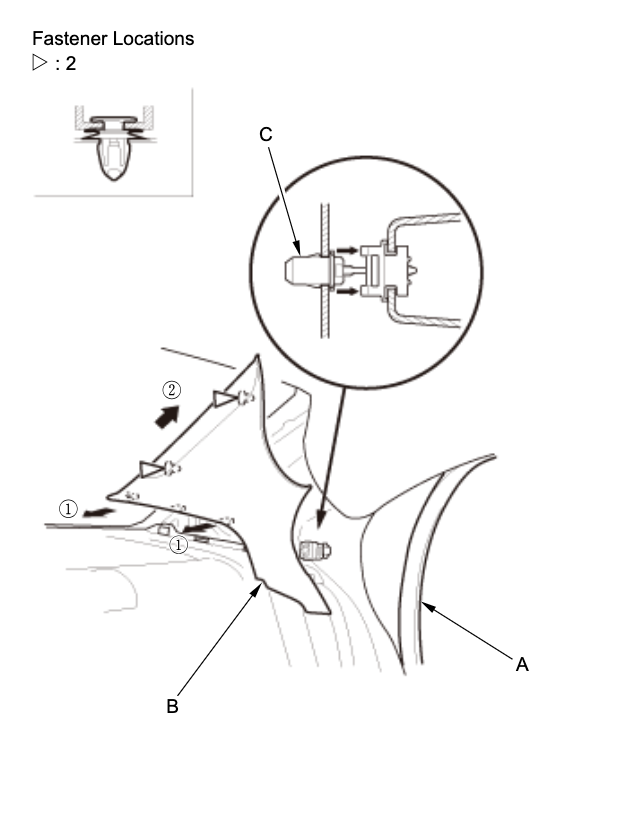
NOTE: The front clip (C) will stay in the body.
- Remove the front clip (A).
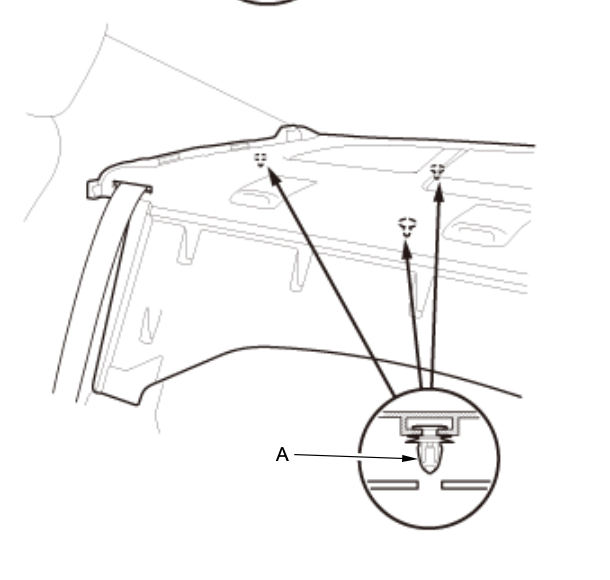
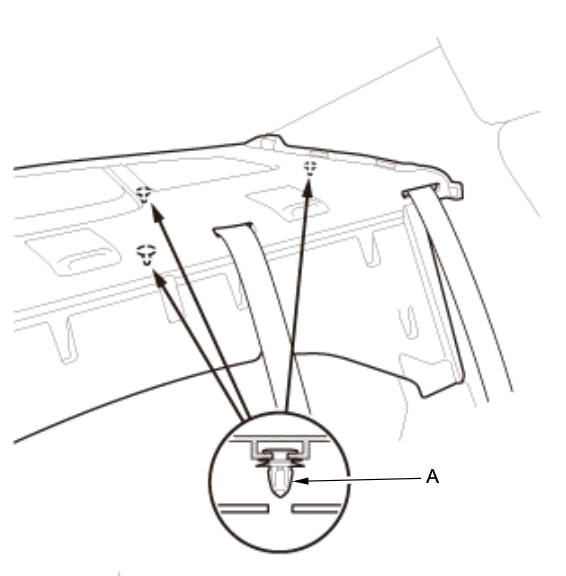
- From the trunk compartment, detach the clips (A)
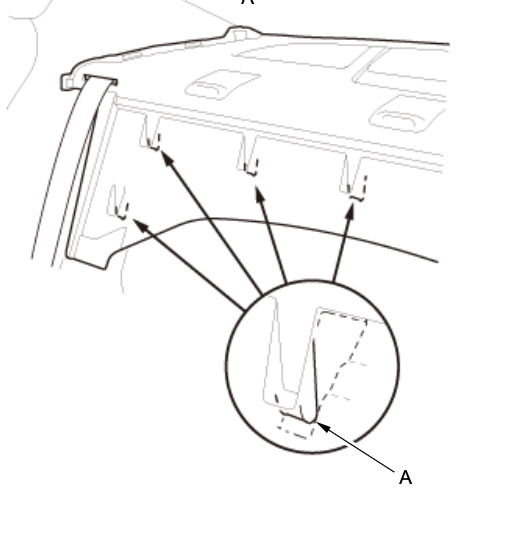
- Release the hooks (A).
- Pull out both rear seat belts (A) and the rear center seat belt (B) through the slits in the rear shelf trim (C), then remove the rear shelf trim.
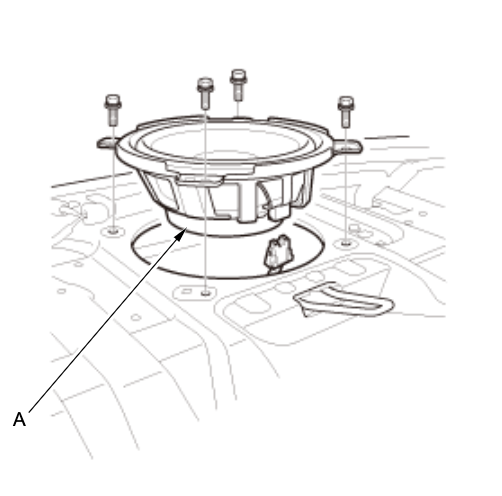
- Remove the four bolts securing the subwoofer.
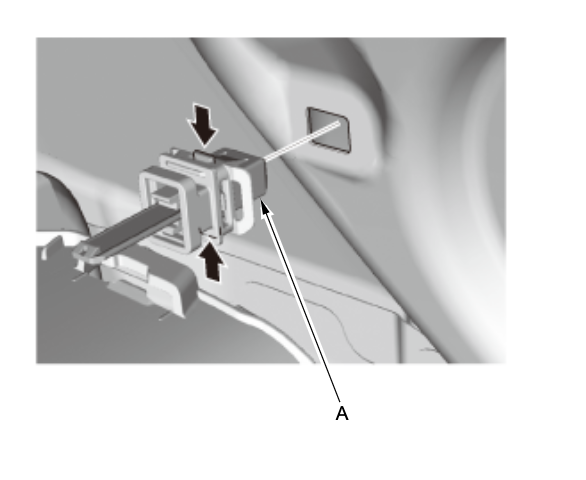
- Disconnect the factory subwoofer by pinching the connector at the sides and pulling down until it releases. You will need to pull with moderate force.
- Secure the new mounting bracket to the rear deck using the factory screws you just removed.
- Connect the new subwoofer to the factory connection using the provided harness.
- Mount the new subwoofer to the mounting bracket with the supplied mounting screws.
NOTE: It is recommended to apply sound treatment material to the rear deck metal and rear deck cover to reduce unwanted rattles and noise - Reinstall the covers you removed in the reverse order.
NOTE: If the rear deck touches your new subwoofer, trim the rear deck panel so the surround of the subwoofer does not touch or buy longer retaining clips to ensure the rear deck does not touch the subwoofer.
You can use the ones found at this link. https://www.amazon.com/Rexka-Panel-Retainer-Chrysler-6503709/dp/B07CJP3X5H/